


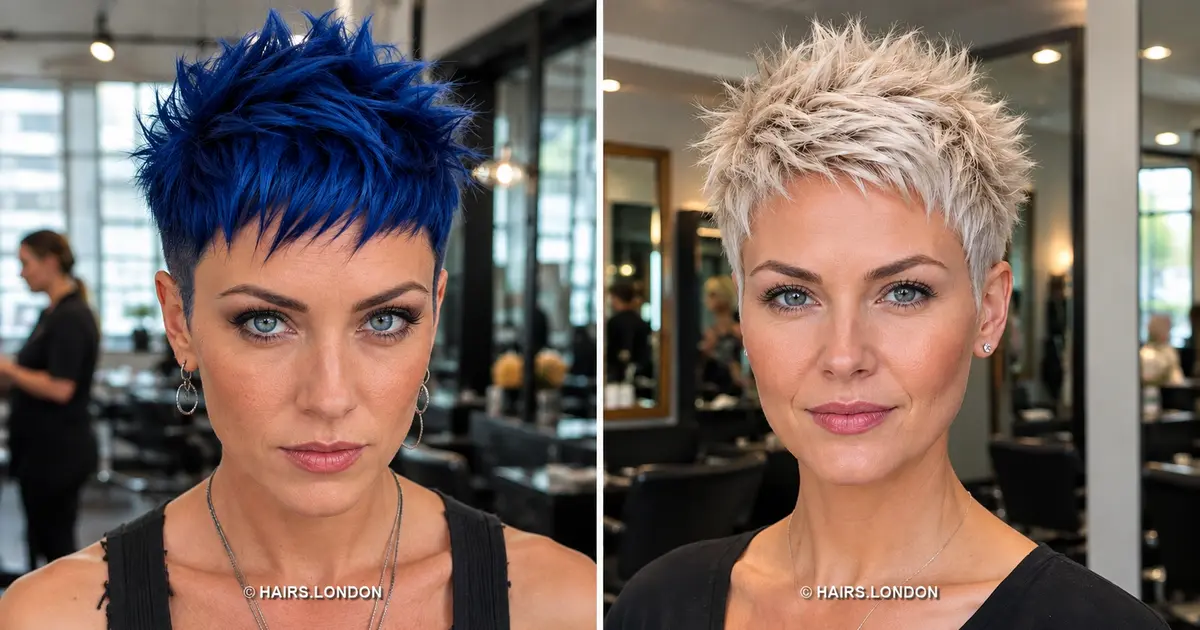
Color can reveal the shape of a pixie haircut. A few bronze highlights pick out lifted layers; pale silver makes fine texture easier to see; a dark base gives a bright copper fringe more contrast. The haircut does the structural work, but the placement of color helps the eye follow it. That relationship is worth noticing before choosing your next short style.
These 20 pixie haircuts bring together swept fringes, close undercuts, softly rounded crowns, and pointed crops. Some use natural looking blonde or brunette dimension, while others make sapphire, lilac, raspberry, or burgundy the defining feature. Each image shows the hairstyle from several angles, so you can compare the face framing with the sides and back.
Use the collection to identify the details you like rather than search for a perfect match. You may prefer the fringe from one photograph and the color placement from another. A useful consultation starts with those preferences, then adjusts the lengths and finish to your own texture, density, growth direction, and styling habits.
Read the haircut before choosing the color
Look at where the longest hair sits. A diagonal fringe brings movement toward the face, a lifted front opens the forehead, and an evenly cropped top creates a more compact outline. Next, compare the sides: a visible undercut makes the difference between lengths stronger, while a soft taper gives a gentler transition. Finally, check how much fullness remains above the nape.
The color names in this article describe what is visible in the images; they are not confirmed salon formulas. Lighting, previous coloring, and your starting shade can change the result. Discuss the tone you want with your colorist before deciding on the process.
1. Taupe Blonde Pixie with a Long Swept Fringe
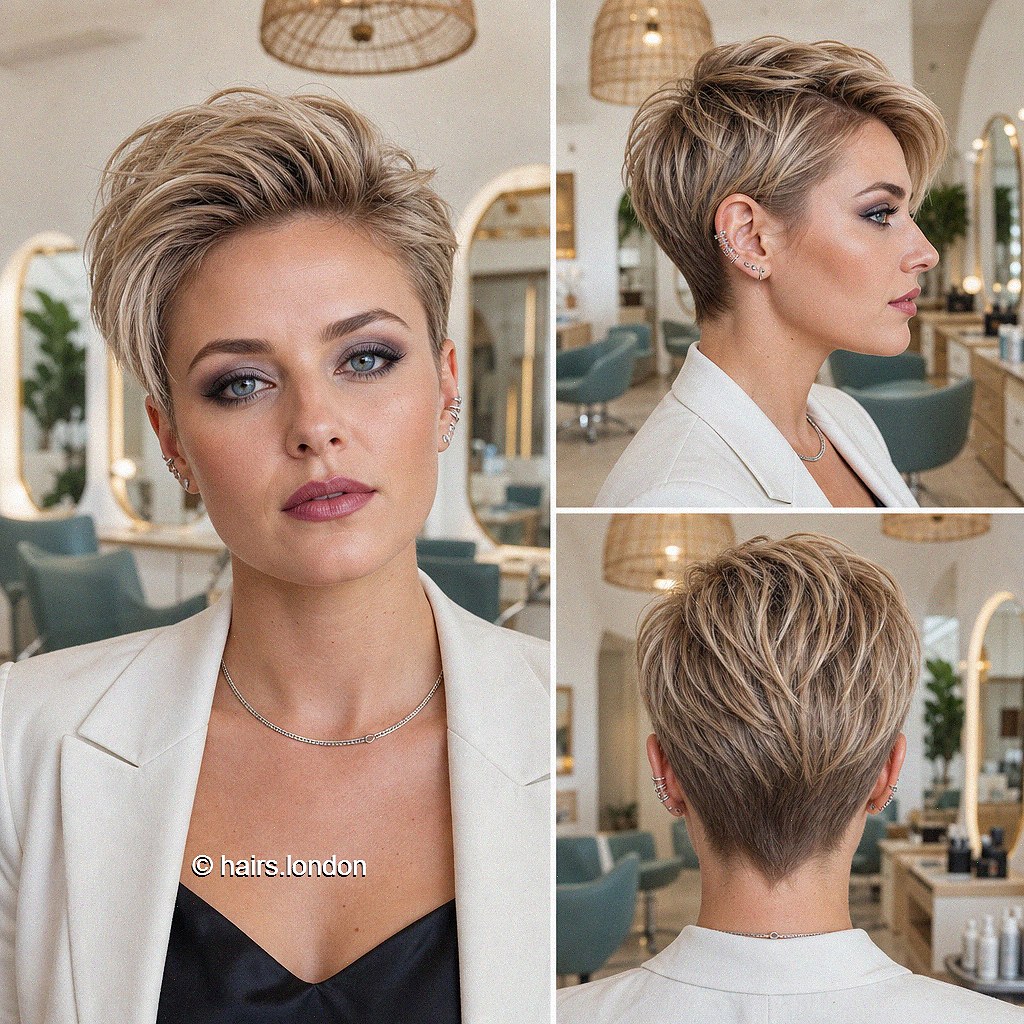
Taupe blonde layers sweep across the forehead, giving this pixie a softer front than the closely cropped styles in the collection. The crown remains rounded above a tidy nape, with enough length through the top to move naturally. Ask your stylist to decide where the fringe should finish when dry, especially if your hair has a slight wave. Guide it sideways during drying, then loosen the ends with your fingers. Fine hair may benefit from retaining more density through the front. Compare the side view to decide how much coverage you want around the ear before settling on the length.
2. Bronze Brown Tousled Pixie with Lifted Layers
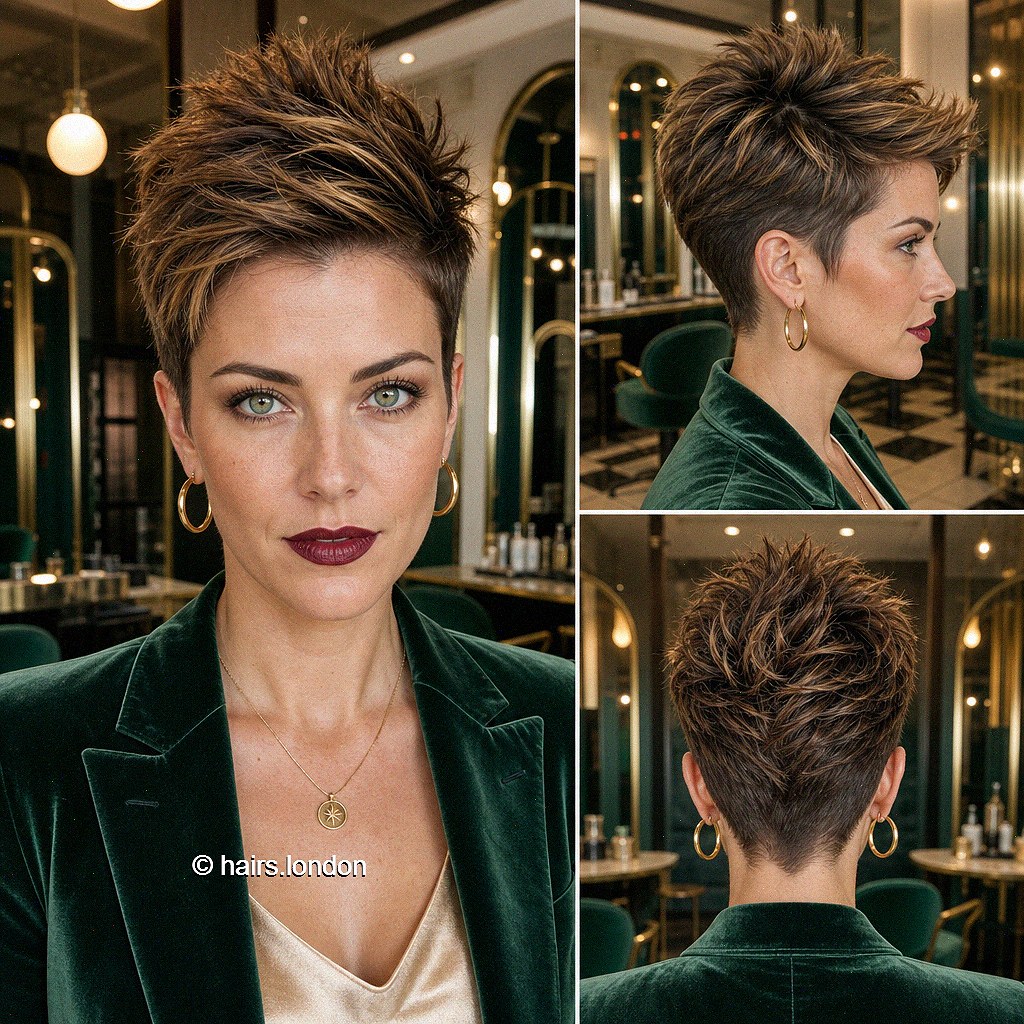
Bronze brown highlights pick out the lifted layers in this tousled pixie, creating movement without a dramatic color change. The sides are shortened, while the crown carries a loosely rounded shape. Ask your stylist for a top that can be styled in several directions rather than fixed into identical spikes. Dry the roots with your fingers, then use a small amount of paste to separate selected ends. If your hair is thick, discuss where weight builds around the temples. Keep enough support through the crown so the shape does not collapse. The back view shows a neat, softly tapered finish.
3. Aubergine Spiky Pixie with a Compact Fringe
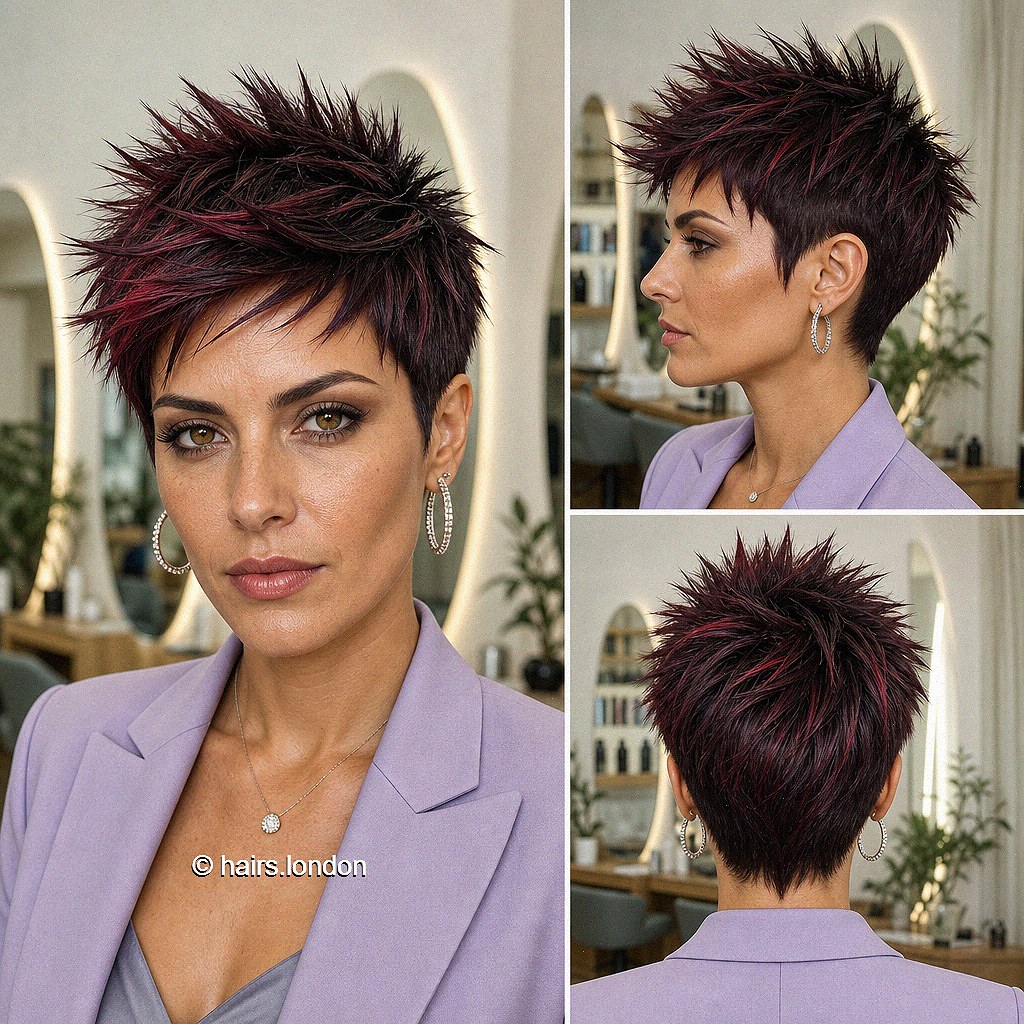
Deep aubergine highlights give this short pixie a burgundy cast, especially across the pointed crown layers. A compact fringe rests above the brows, keeping the face open while softening the front slightly. Ask your stylist to leave enough length for separated texture rather than cutting the top uniformly close. On dry hair, warm a little paste between your palms and lift only the sections you want to emphasize. Avoid applying a heavy coating at the roots. This silhouette can also be arranged more softly across the forehead. Discuss how your crown growth pattern might influence the direction of the spikes.
4. Tangerine Copper Pixie with an Undercut and Side Fringe
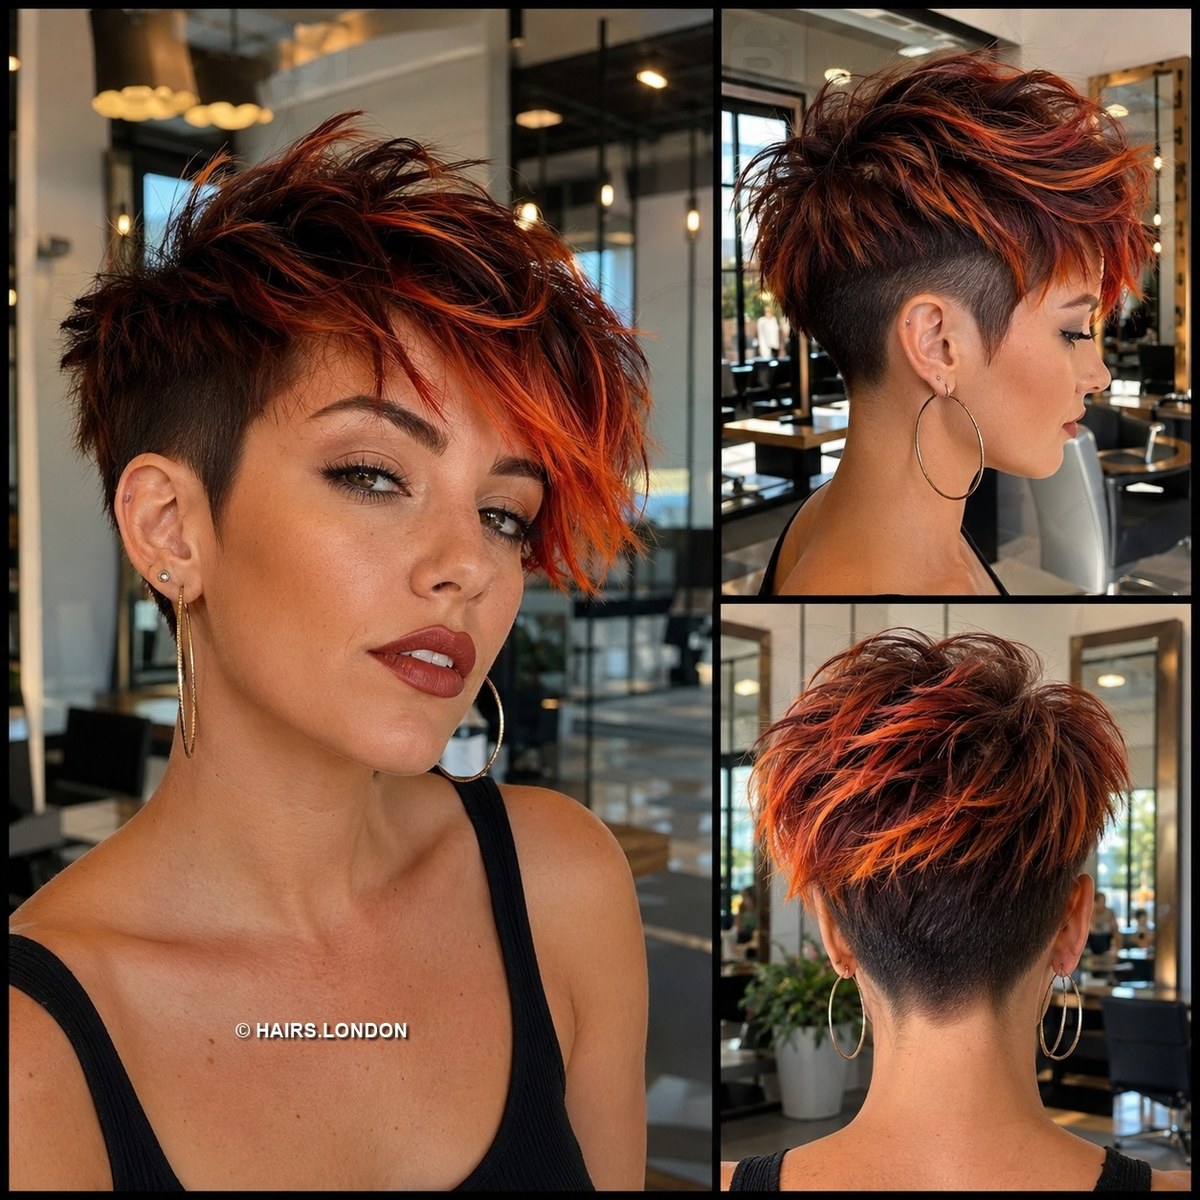
Tangerine copper pieces sweep across a dark base, making the longer side fringe the focal point of this undercut pixie. The close side exposes the ear and gives the upper layers a stronger contrast. Ask your stylist how visible you want that shorter section to remain when the hair falls naturally. Direct the fringe diagonally during drying, lifting lightly at its roots before arranging the ends. A small amount of paste can add separation. Discuss highlight placement with your usual parting in mind. If you prefer a softer perimeter, request a gradual taper while keeping the same warm front emphasis.
5. Onyx Brunette Choppy Pixie with a Diagonal Fringe
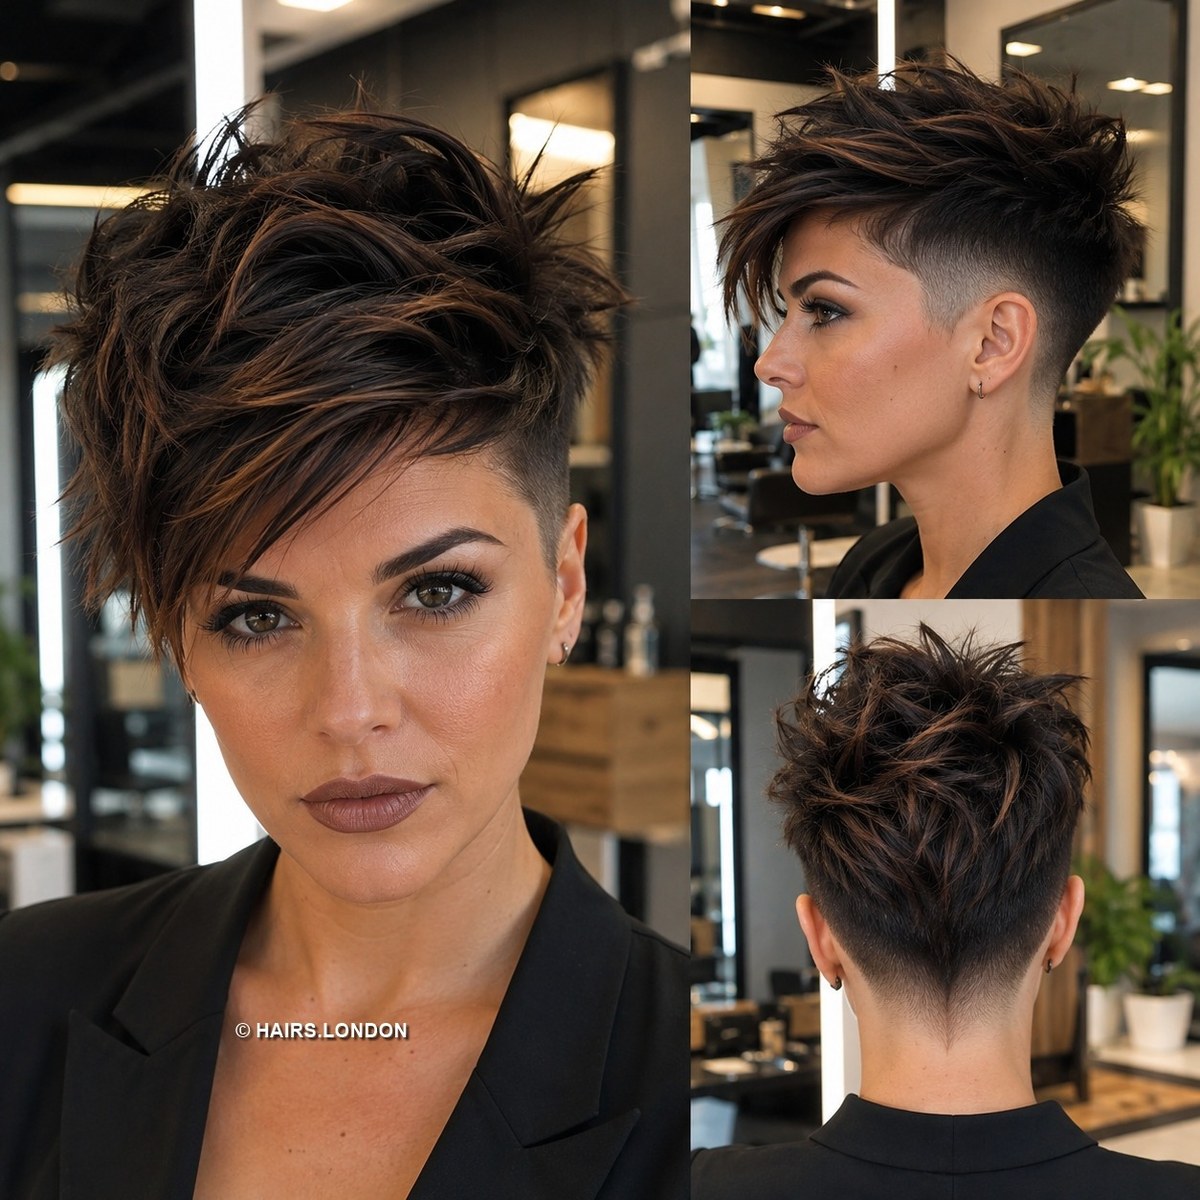
Dark onyx brunette layers create a choppy top above closely shortened sides, with a diagonal fringe adding movement across the forehead. Subtle warm pieces stop the dark surface from looking flat. Ask for a consultation about the balance between crown height and the amount of coverage you want around the temples. Blow dry toward your chosen parting, then separate a few ends with paste. Thick hair may need selected weight removed without making the top sparse. The side profile is useful for explaining how short you want the perimeter. Keep the front long enough to arrange comfortably in your routine.
6. Buttercream Blonde Asymmetrical Pixie with an Undercut
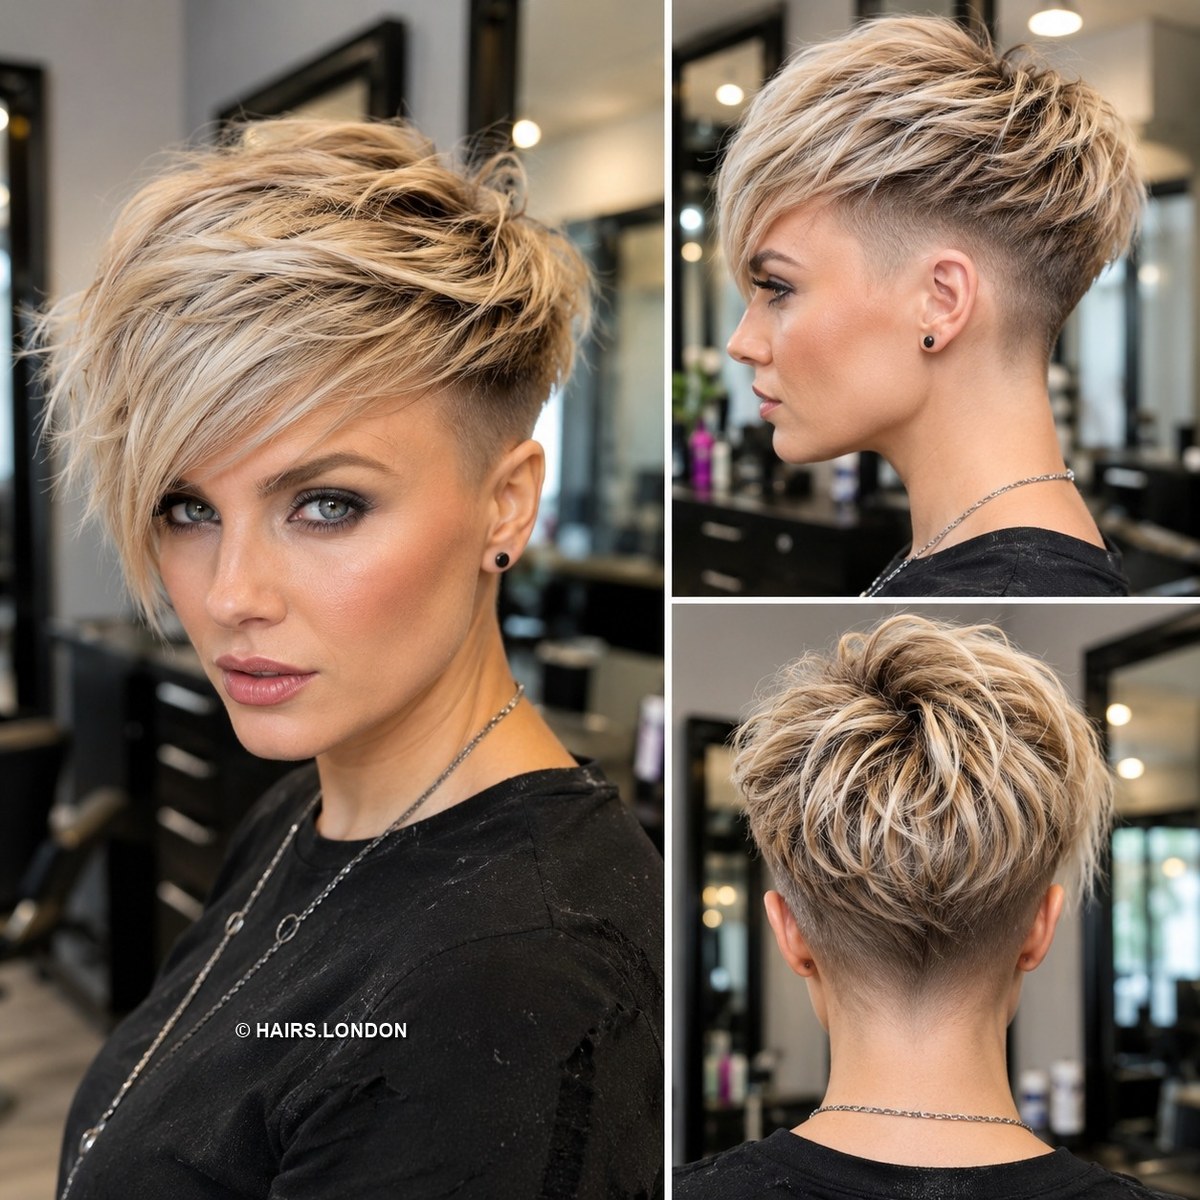
Buttercream blonde layers form a long diagonal fringe above a much shorter side, giving this pixie a distinctly asymmetrical outline. Darker roots add depth through the crown and highlight the contrast between lengths. Ask your stylist to agree on the fringe length and how strongly the undercut should show. A brush can guide the front across during drying, but keep some lift at the roots so it does not lie completely flat. Use finishing product mainly on the ends. If you plan to grow the haircut later, discuss how the shorter side will blend as the longer upper section develops.
7. Honey Blonde Spiked Pixie with a Short Piecey Fringe
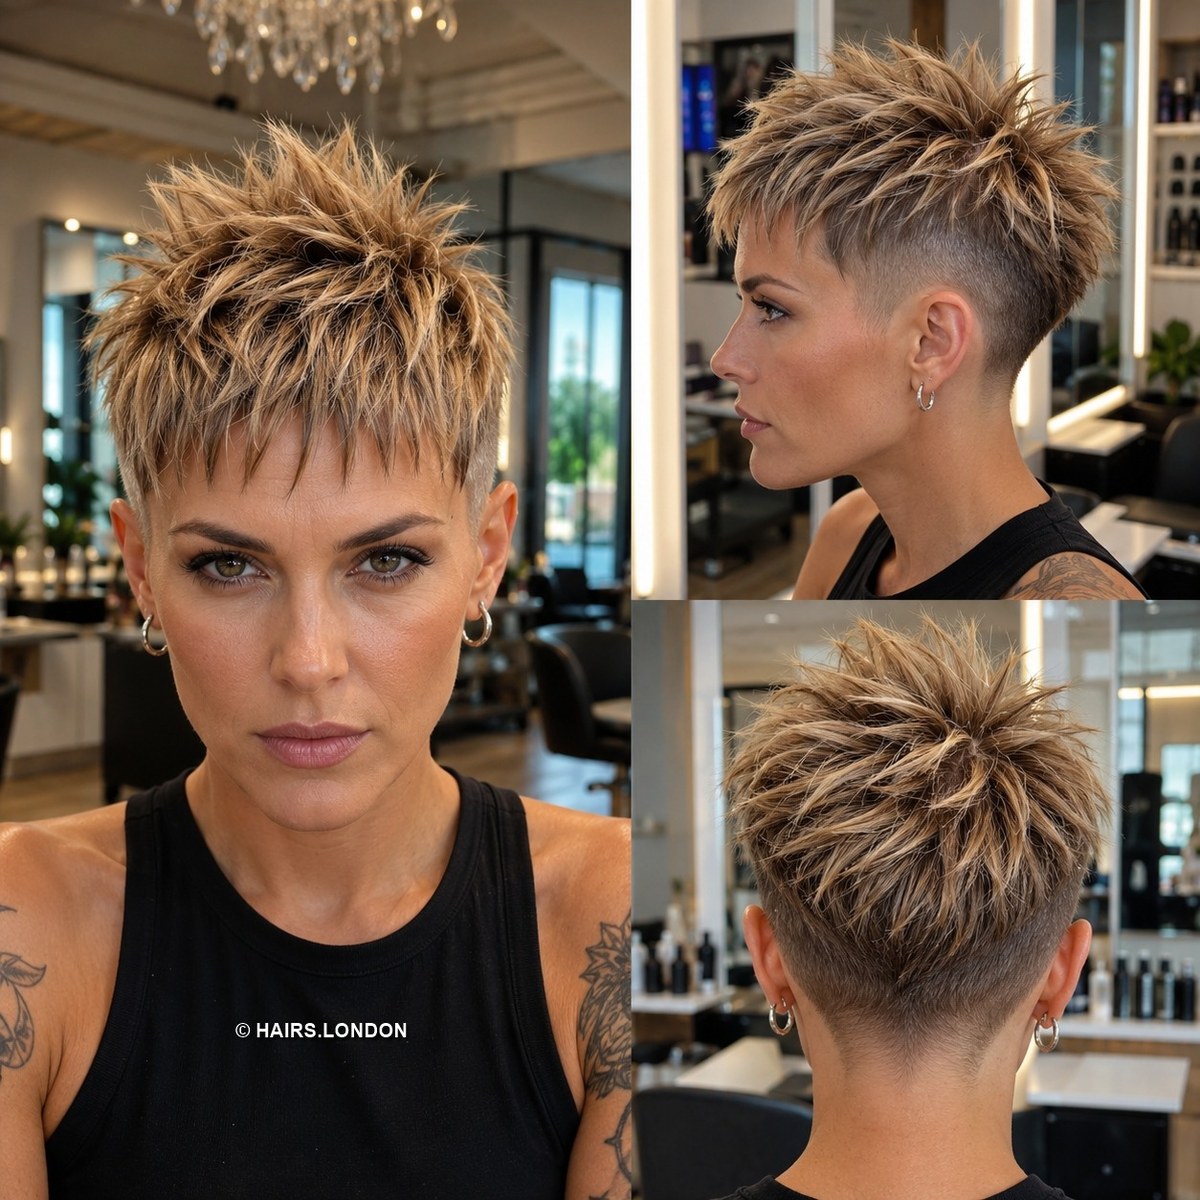
Honey blonde tips stand out above darker roots in this short spiked pixie. The fringe is closely shaped and piecey, while the crown rises into a scattered arrangement rather than one smooth sweep. Ask your stylist to preserve enough density through the top, particularly if your strands are fine. To style, place a little paste on dry ends and lift a few sections at a time. Check the outline before adding more product. The side view shows a compact perimeter with little bulk around the ear. Discuss your natural growth direction so the finished texture feels achievable on ordinary mornings.
8. Sapphire Blue Cropped Pixie with a Textured Crown
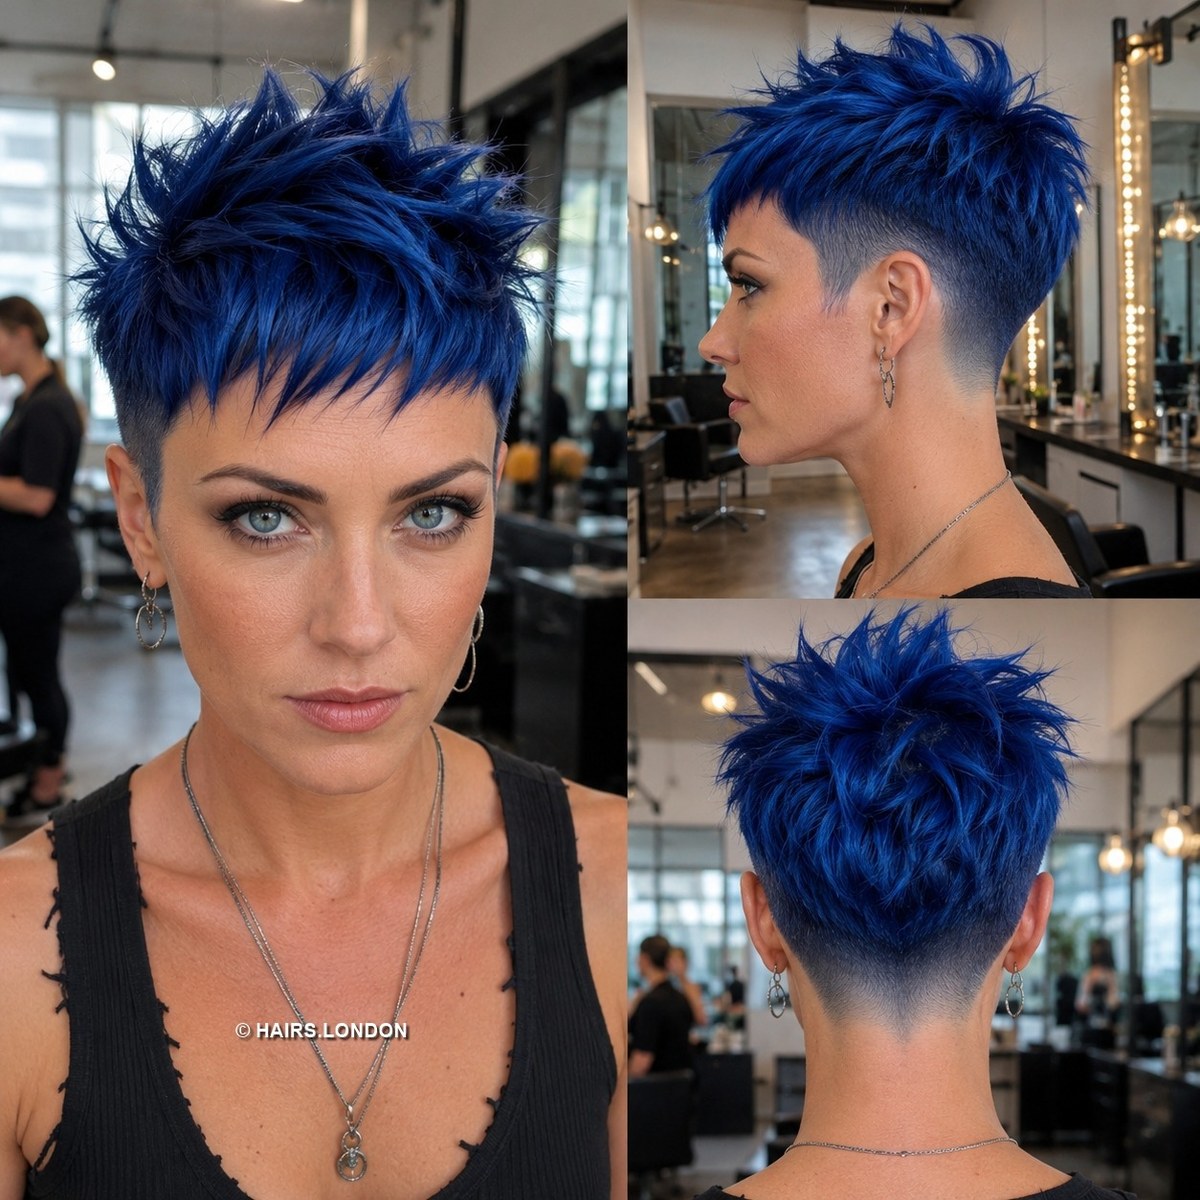
Sapphire blue turns this cropped pixie into a vivid color reference, with pointed crown layers and a short fringe keeping the silhouette compact. The sides are closely shortened, and the back narrows neatly toward the nape. Ask your stylist to consider whether your hair will support this upright texture with minimal styling. Work a small amount of paste through dry ends rather than coating the roots. Before choosing the blue, discuss your starting shade, existing color, and the lightening required for this intensity. The image helps establish the color goal, but a salon consultation should determine the process and upkeep.
9. Ivory Blonde Textured Pixie with Soft Short Bangs
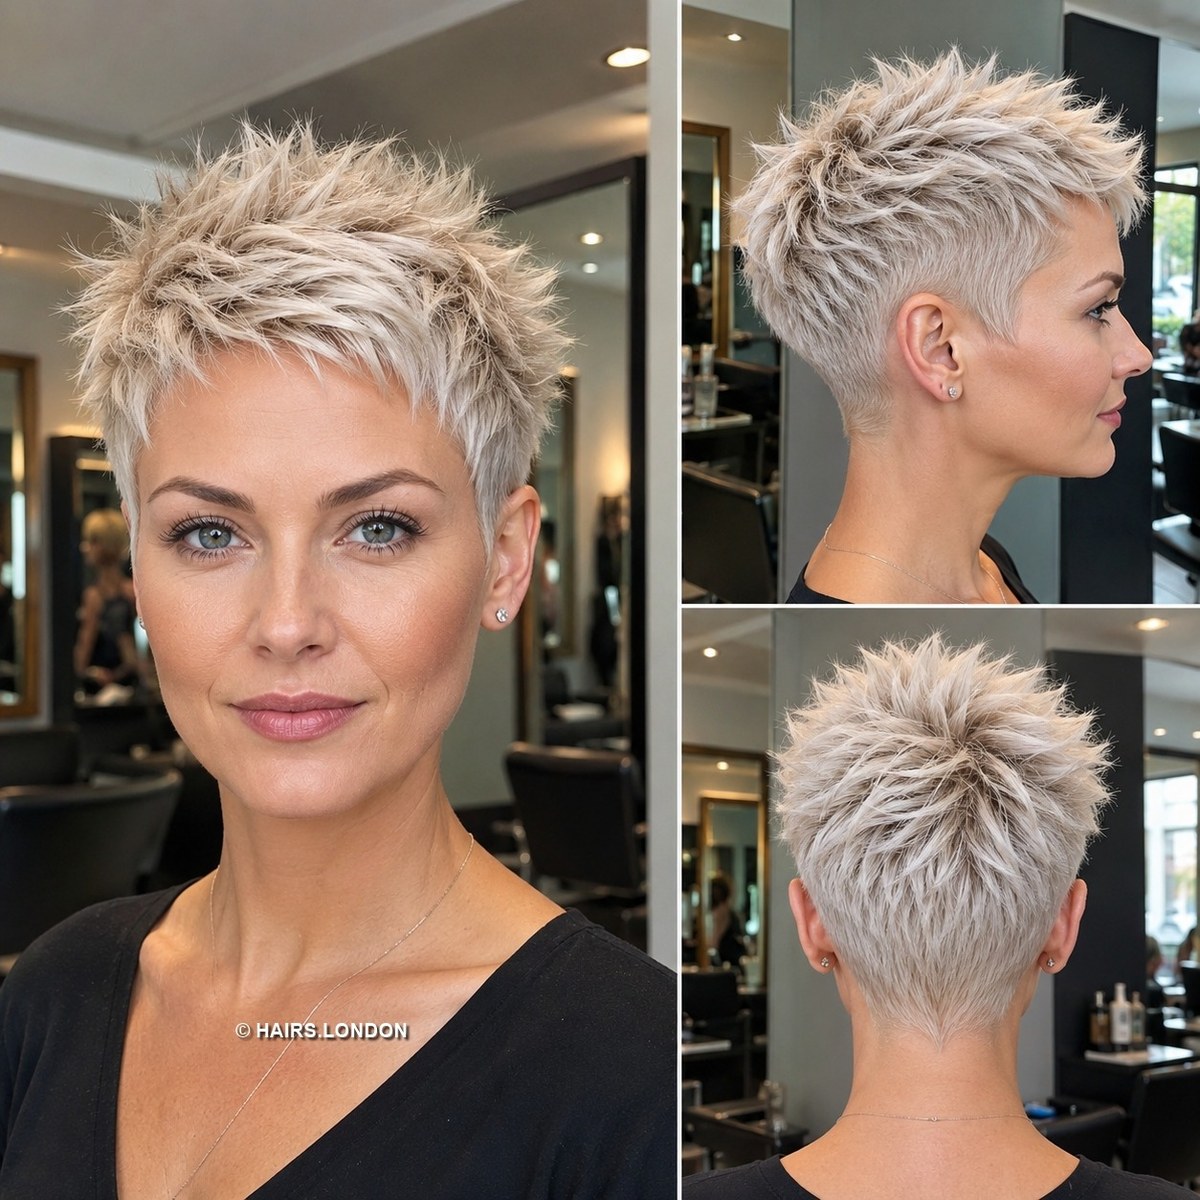
Ivory blonde layers give this short pixie a light, softly pointed surface, with tiny bangs framing the forehead without much coverage. The sides stay close, allowing the textured crown to carry the shape. Ask your stylist to refine the ends carefully while preserving fullness where your hair needs it. Dry loosely with your fingers, then arrange a few pieces using a modest amount of product. Fine hair can become weighed down quickly, so start lightly. Compare the back photograph to explain your preferred nape length. The pale tone is distinct from silver, so use swatches to discuss warmth before coloring.
10. Auburn Copper Pointed Pixie with an Airy Crown
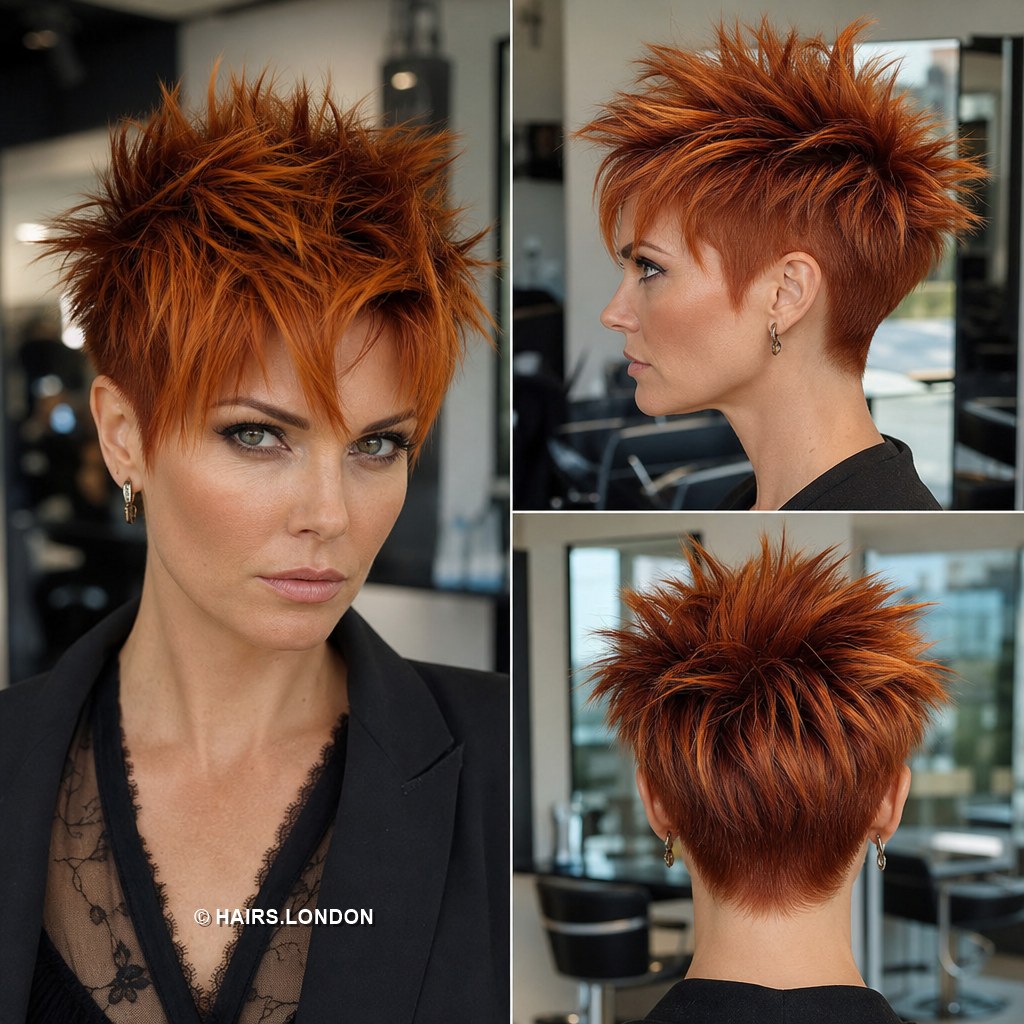
Auburn copper layers create an airy, pointed crown above a short perimeter. The warm color becomes brighter at the tips, making the uneven texture easier to see from the front and back. Ask for enough top length to separate the pieces while keeping the outline controlled around the ears. Blow dry the roots toward the shape you want, then pinch selected ends with a little paste. Avoid arranging every strand upright, which can make the finish look rigid. If you have a front cowlick, discuss how the short fringe will behave. Agree on copper intensity using salon swatches before coloring.