


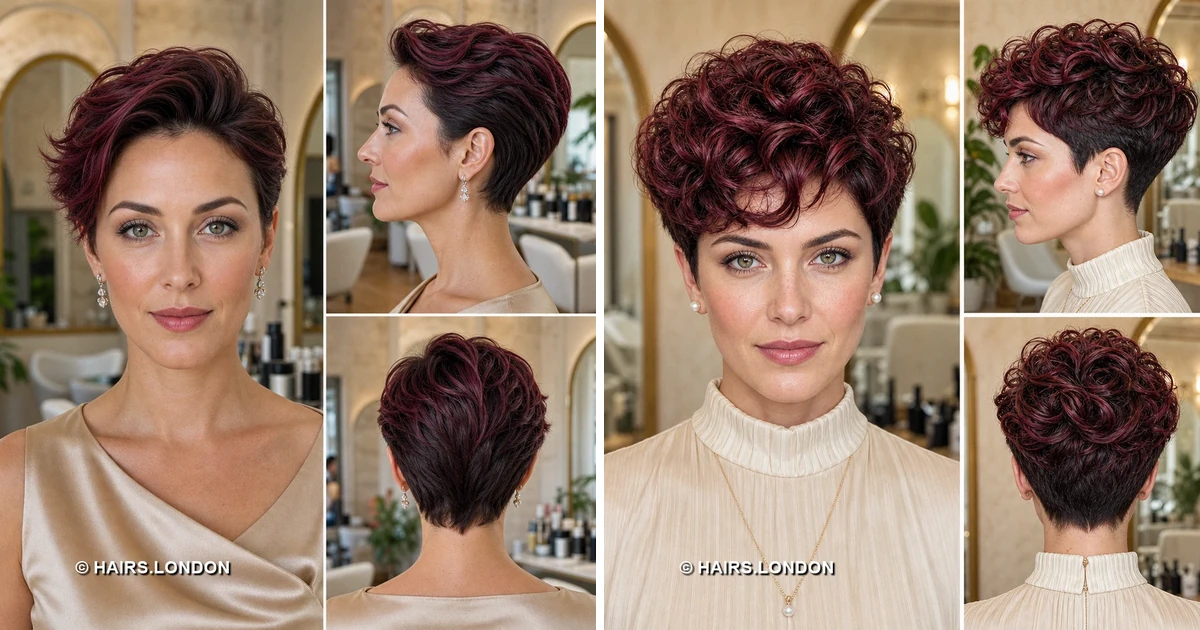
11. Smooth Burgundy Pixie with Sweeping Bangs
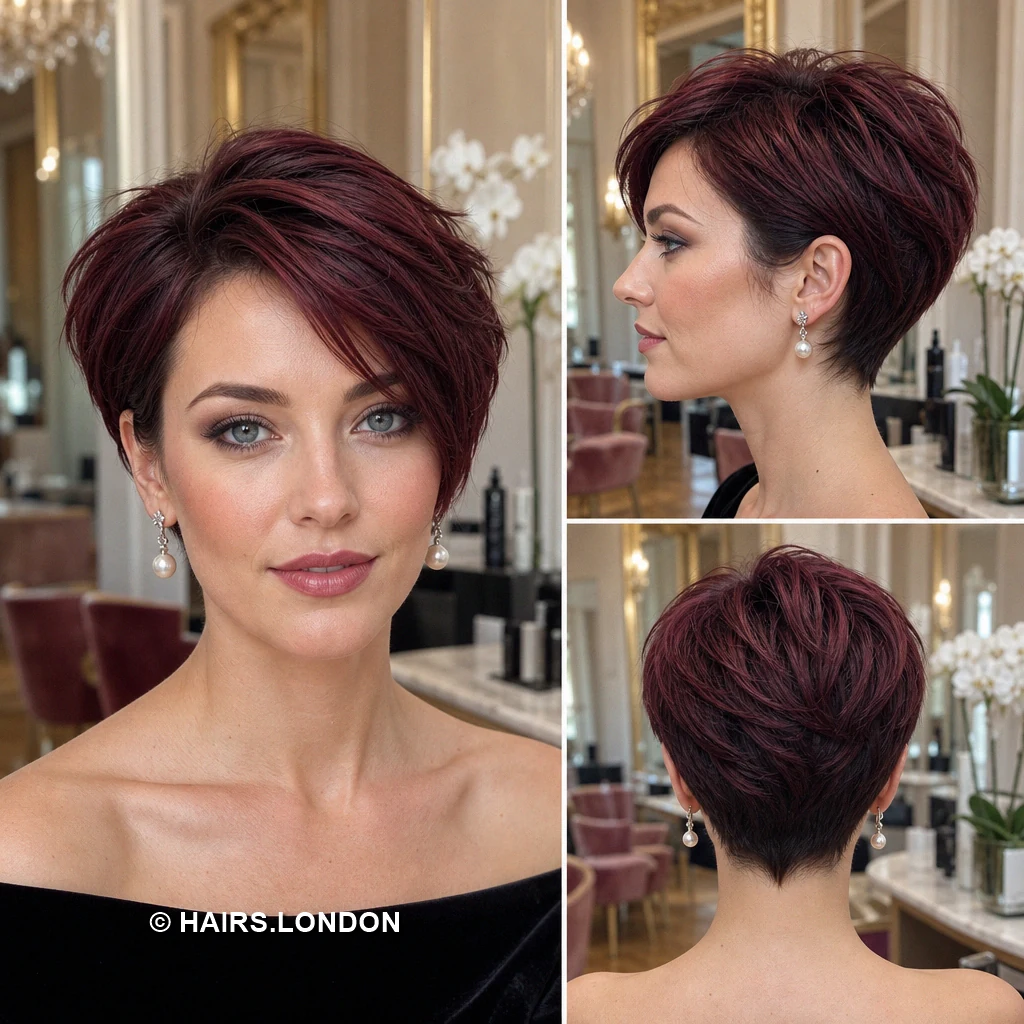
Long diagonal bangs give this burgundy pixie a smooth outline. The fringe crosses one side of the forehead in layers. Above it, the crown has modest lift and soft separation. Close sides reveal the ears, while the back narrows gradually. Deep plum and wine tones blend across the visible top. Request a fringe length that works with your everyday parting for comfort. Dry the top sideways using a small brush and gentle tension. Add lightweight cream only where flyaways interrupt the sweep. Book trims before the fringe becomes difficult to position. Discuss how dark you want the roots to remain.
12. Layered Wine Pixie with Flowing Top
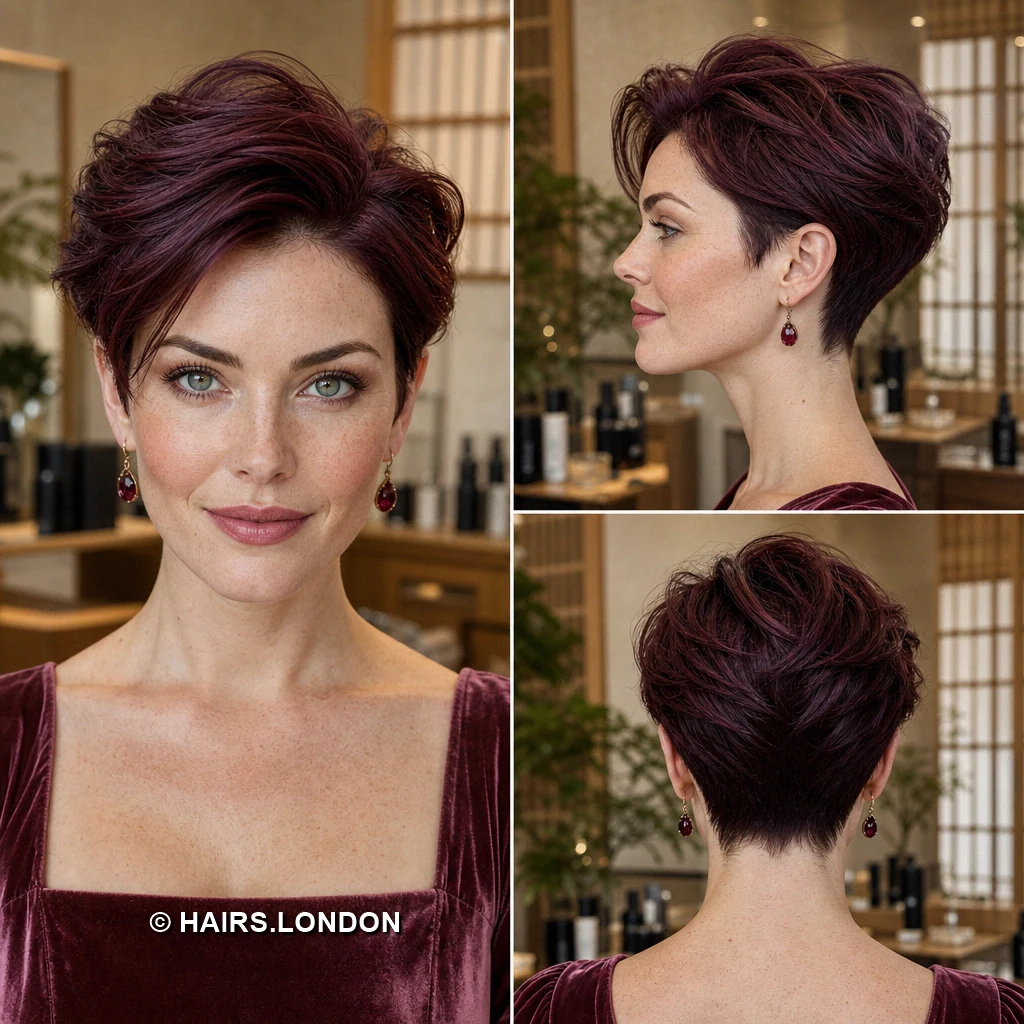
Sweeping layers create broad movement across this wine colored pixie. The top rises near the crown before falling into angled fringe. Shorter hair around the ears balances the generous upper volume. The layered back contracts into a softly pointed neckline. Burgundy ribbons appear through a deeper brownish base. Ask for connected layers that allow the front to move. Lift roots during drying each morning, then guide the longest pieces sideways. A flexible styling cream helps retain their flowing, separated finish. Maintain the nape before grown out layers obscure its point. Request a gloss if the warm wine color looks dull.
13. Compact Burgundy Pixie with Short Side Sweep
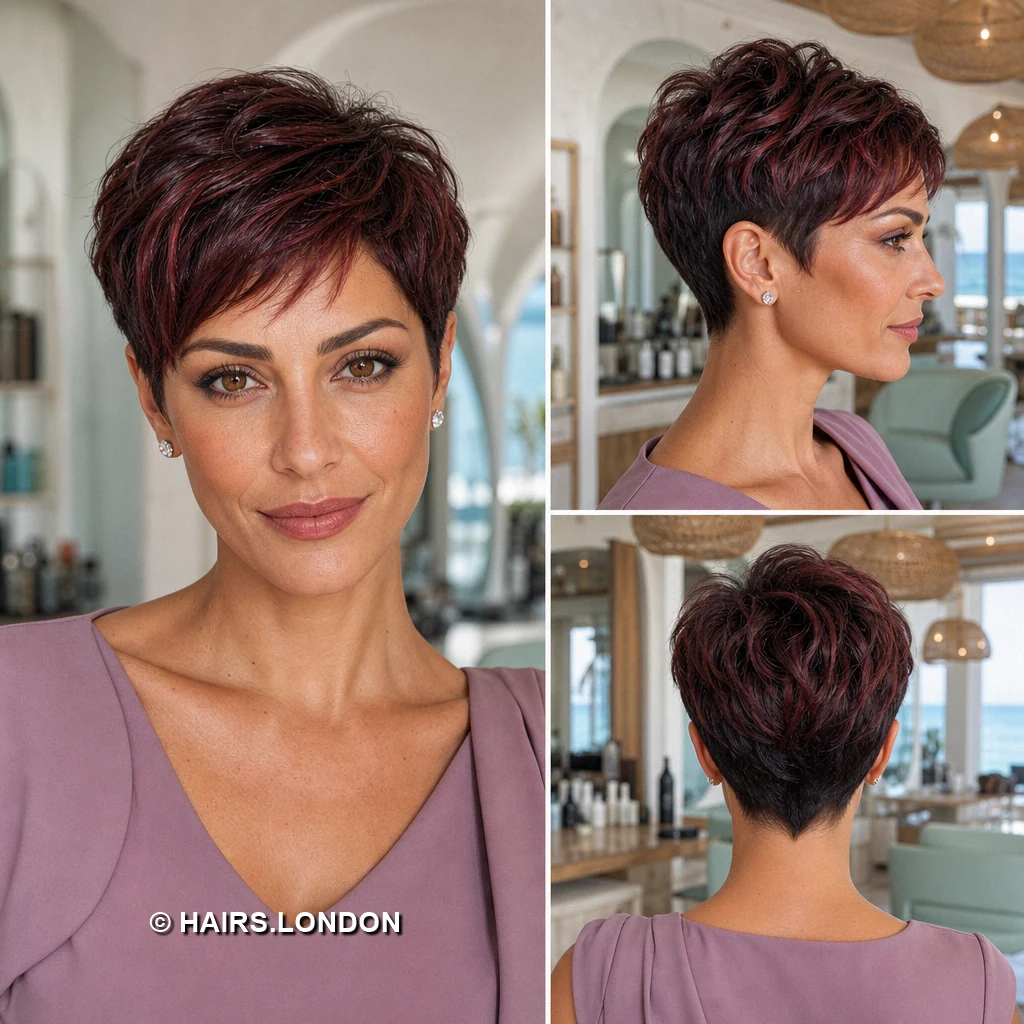
A short side sweep keeps this burgundy pixie compact. Its fringe skims the forehead without covering either eye. The crown carries gentle fullness and softly separated upper layers. Sides stay close around the ears and taper toward the neck. Red-violet strands are visible against the darker lower section. Ask for light texture on top while preserving the rounded silhouette. Dry the fringe sideways and lift the crown with fingertips. Smooth only the outermost pieces with a little styling cream. Frequent neckline checks help prevent the compact shape from spreading. Discuss a subtle color refresh rather than automatically adding brighter streaks.
14. Spiky Wine Pixie with Short Fringe
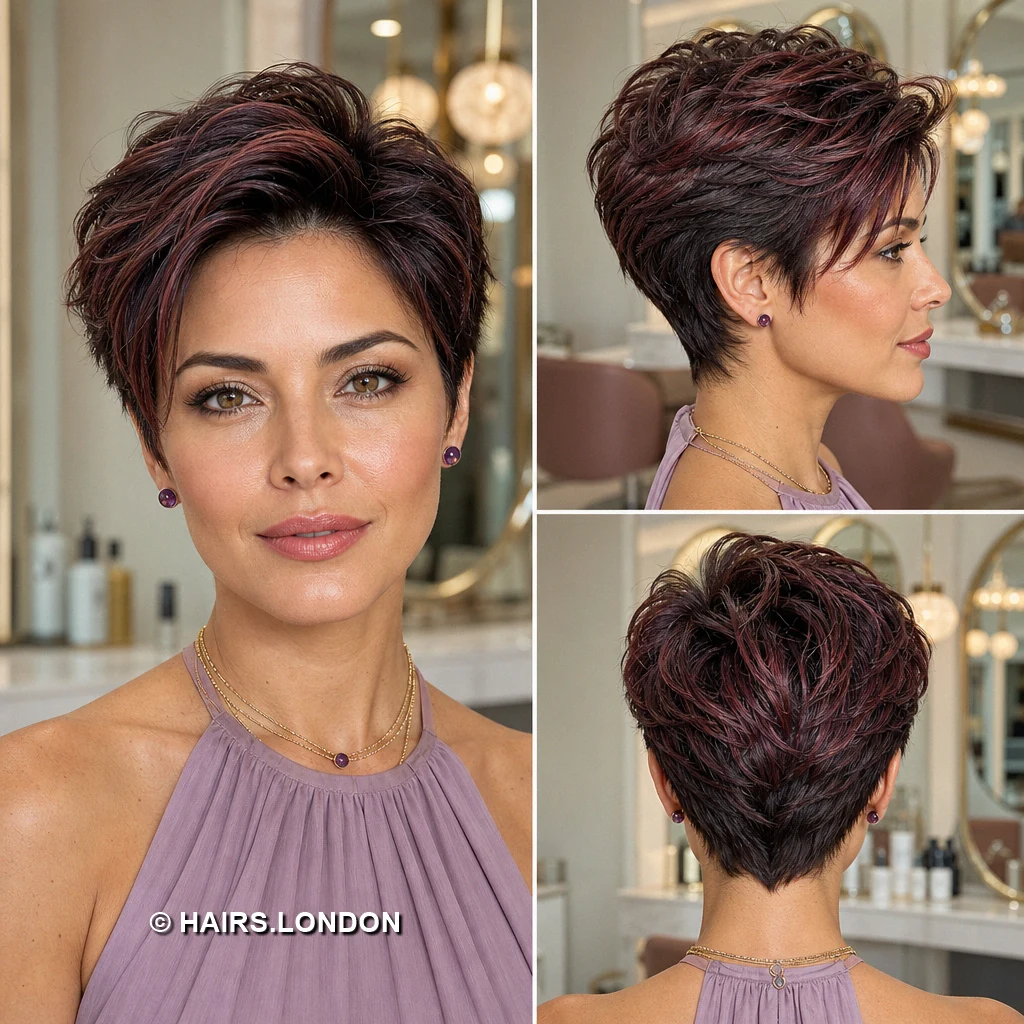
Pointed burgundy pieces bring height to this short pixie. A wispy fringe breaks across the forehead beneath the spiky top. The sides are cropped close, leaving the ears uncovered. Back layers rise into texture before narrowing at the nape. Wine red highlights accent the lifted strands over darker hair. Request shorter, textured top layers if you want defined spikes. Work lightweight paste into dry hair, lifting small sections individually. Keep product away from roots if the finish becomes heavy. Trim the sides before they compete with the elevated crown. Ask for color placement that remains clearly visible when styled upright.
15. Neat Burgundy Pixie with Brushed Fringe
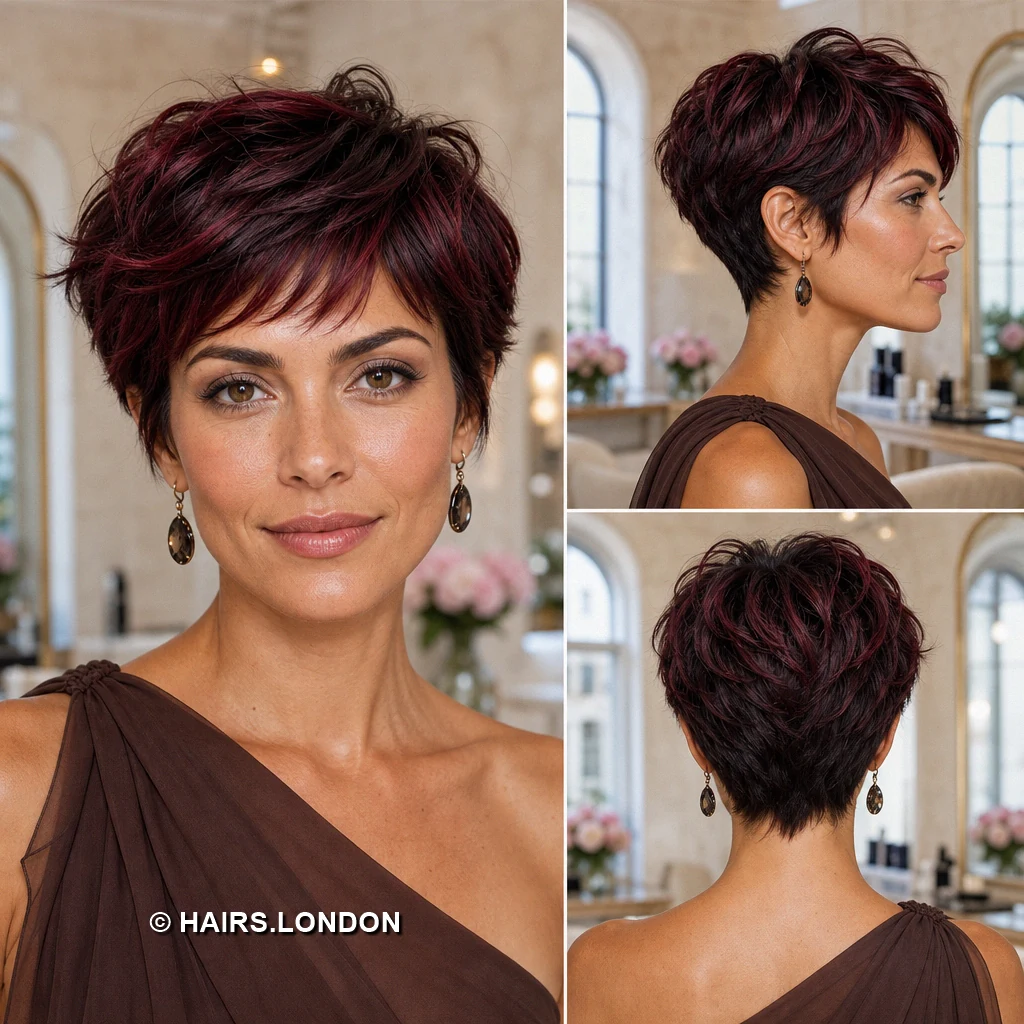
This neatly shaped burgundy pixie combines lift with restraint. A short, brushed fringe angles across the upper forehead. Layered crown hair creates a low, rounded rise behind it. The sides fit close to the ears without looking shaved. Darker hair beneath the burgundy top tapers cleanly downward. Ask for soft texturing that will not disturb the outline. Brush damp hair forward and sideways with a small brush, then loosen the ends. Use minimal paste to hold the light crown separation. Schedule trims when the fringe and nape lose their definition. Discuss whether you prefer subtle red or deeper wine tones.
16. Soft Wine Pixie with Wispy Bangs
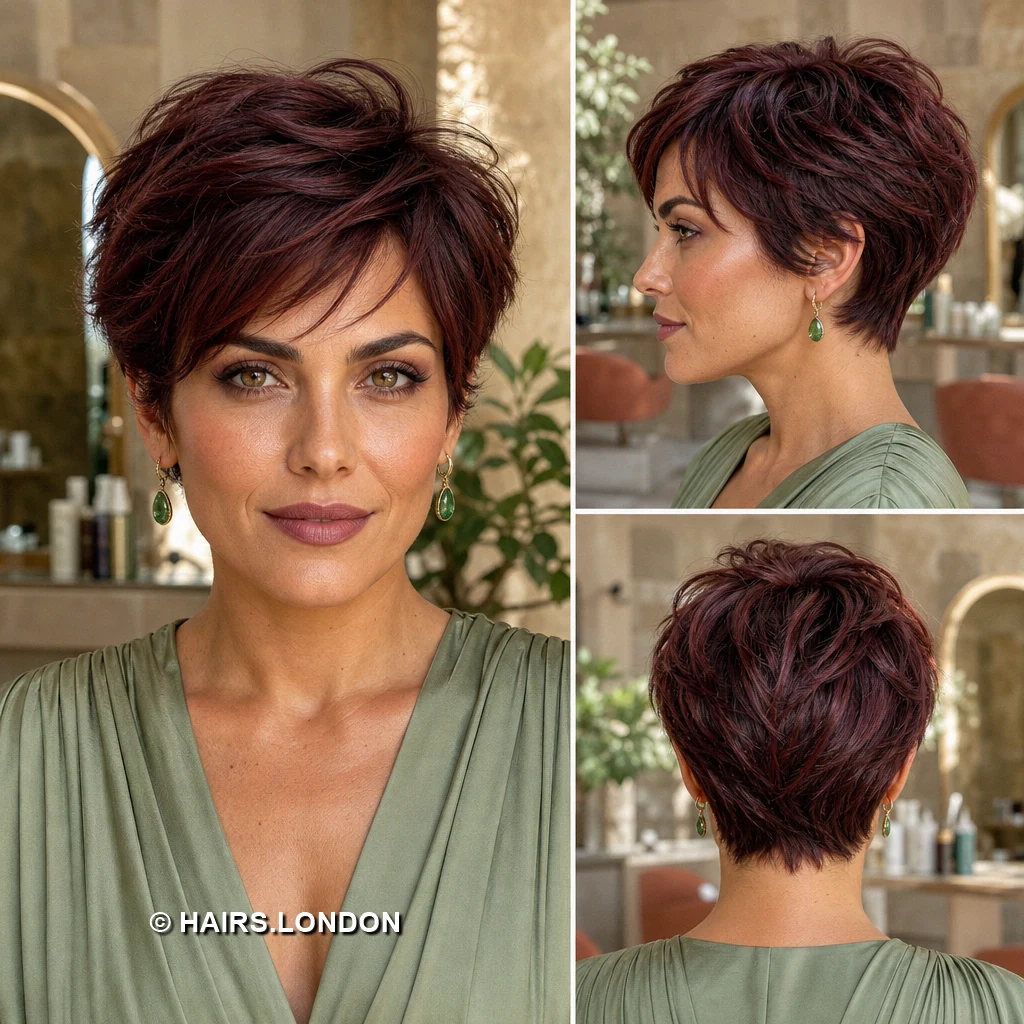
Wispy bangs make this wine colored pixie especially soft. The top retains rounded fullness with gentle movement through its layers. Short sides tuck neatly around the ears and jawline. From behind, the hair narrows into a small tapered point. Muted burgundy color shows lighter ribbons across the crown. Ask for delicate ends around the fringe rather than blunt cutting. Dry the roots for lift, then arrange bangs with fingertips each morning. A trace of cream keeps the wisps defined but flexible. Trim the neckline as soon as its point becomes indistinct. Review color in daylight before choosing your next gloss.
17. Sculpted Burgundy Pixie with Rolled Front
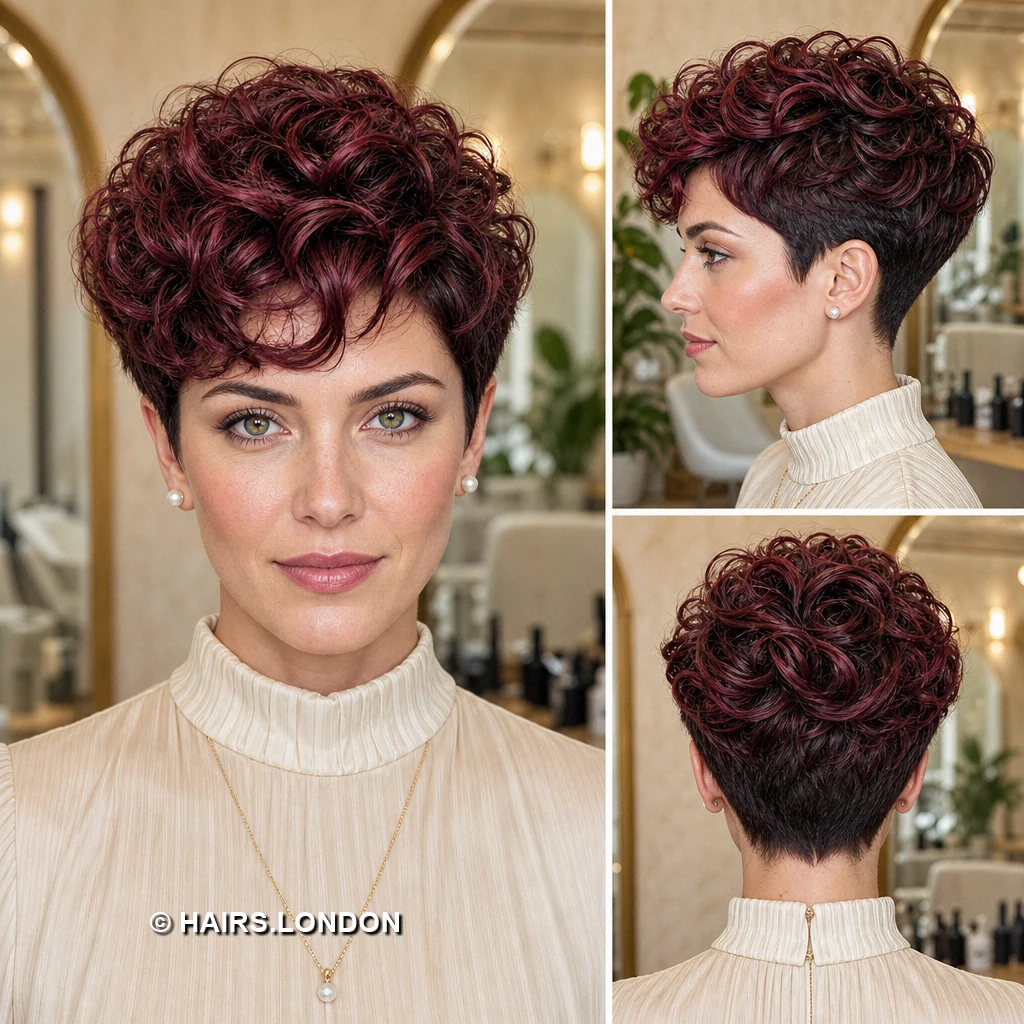
A rolled front adds controlled height to this burgundy pixie. Its top sweeps back and sideways in broad, visible layers. Closely tapered sides keep the ears exposed beneath that volume. The back remains textured above a narrow, dark nape. Burgundy highlights catch along the curve of the front. Request enough length for the roll to form without stiffness. Dry the roots backward, then shape the front with fingers. A small dab of flexible paste can hold separated sections. Maintain the side and neck outlines between fuller top reshaping if needed. Ask your colorist to concentrate brightness where the layers bend.
18. Textured Wine Pixie with Side-Swept Fringe
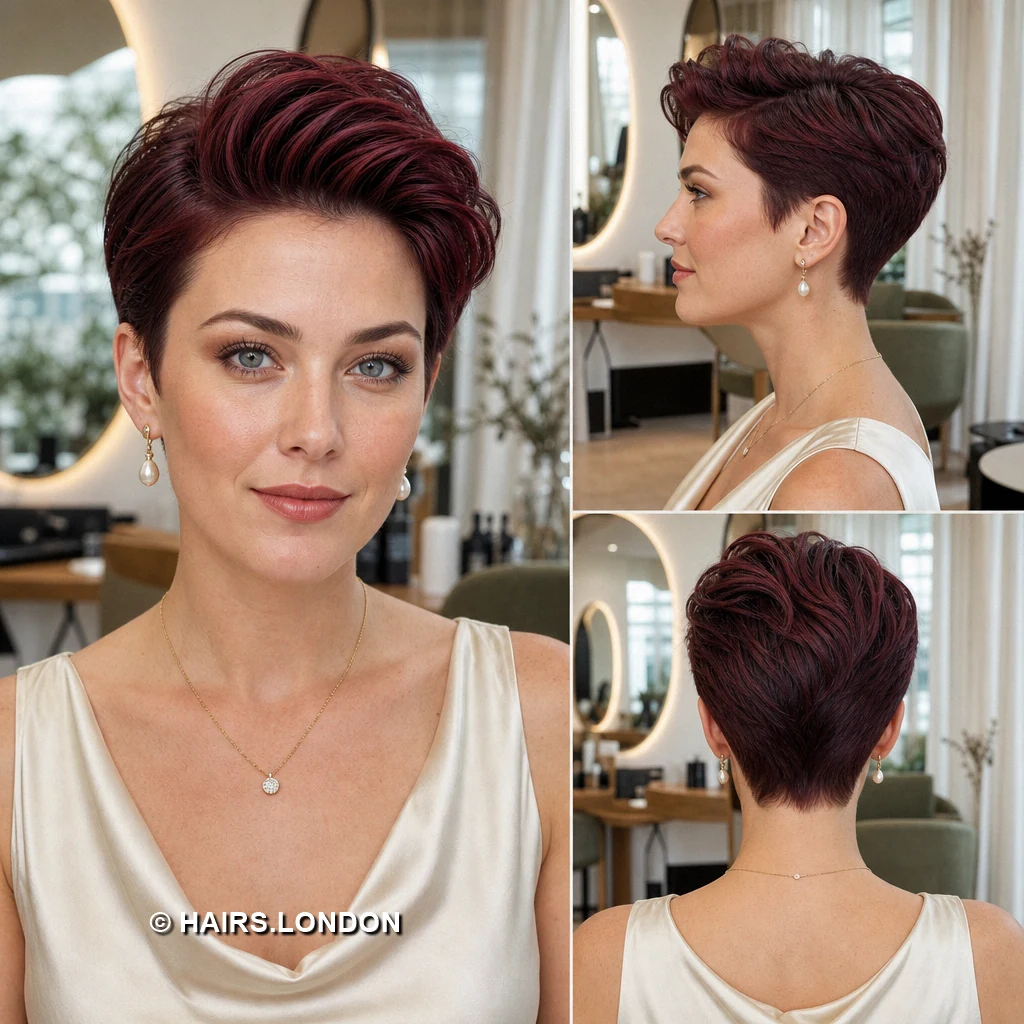
A layered side sweep defines this textured wine pixie. The fringe crosses the forehead in soft, uneven sections. Crown pieces overlap loosely, giving the top rounded volume. Shorter sides hug the ears above a sharply narrowing nape. Burgundy streaks appear among the darker strands at the back. Ask for movement throughout, rather than thinning only the ends. Finger dry the crown upward and settle the fringe sideways. Use a little styling cream to emphasize selected pieces without pulling down the crown. Plan trims before the nape loses its distinct tapered point. Discuss how the highlights will appear from every angle.
19. Curly Wine Pixie with Open Forehead
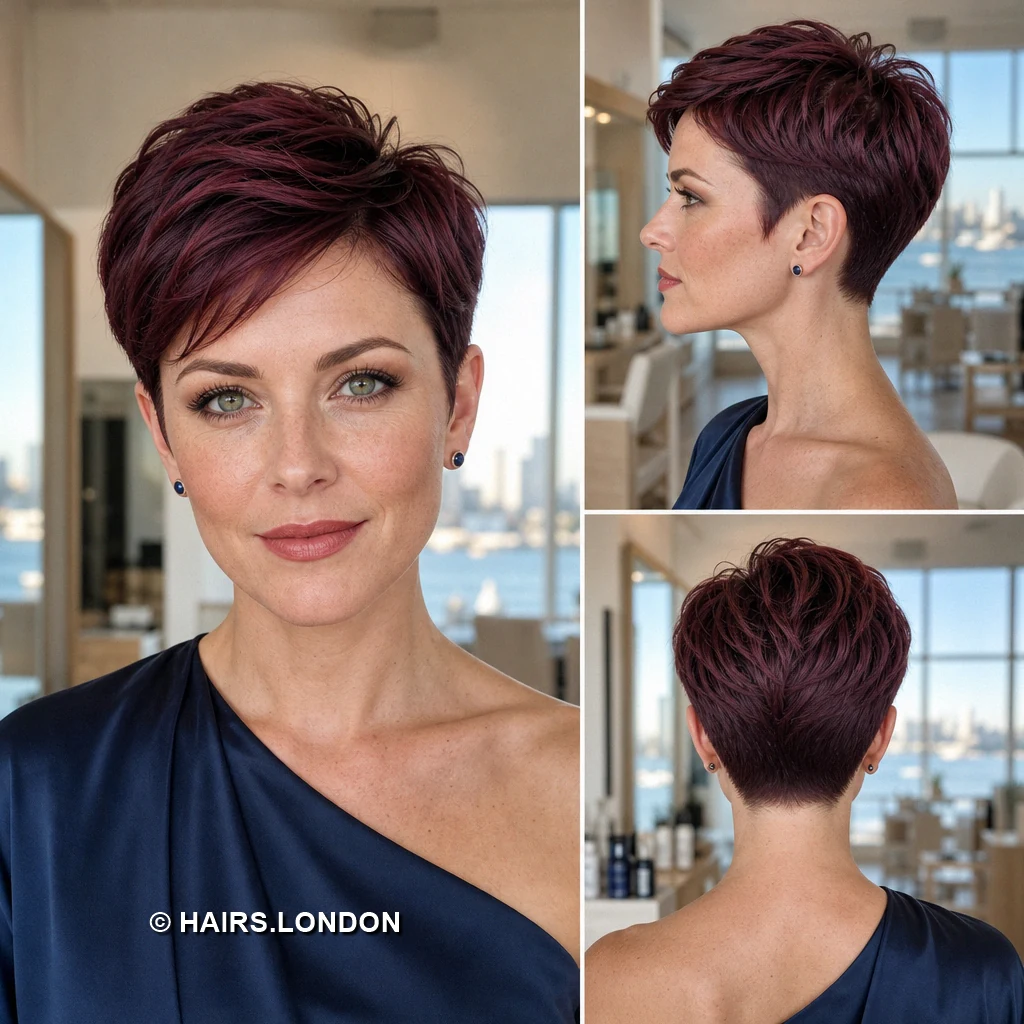
Loose wine colored curls fill the top of this pixie. Their front edge curves sideways, leaving part of the forehead open. The sides sit noticeably closer beneath the rounded curls. Behind, the curly crown ends above a short tapered nape. Burgundy accents follow the bends against a darker base. Ask your stylist to shape curls in their natural pattern. Scrunch curl cream into damp hair, keeping the sides lightly coated. Diffuse gently to preserve definition and avoid unnecessary frizz. Refresh the taper as needed without cutting away the curl forming length. Choose color placement that remains visible when curls settle.
How to Choose Your Burgundy Pixie Haircut
Start with the front: a raised sweep opens the forehead, a diagonal fringe adds coverage, and short wisps require less positioning. Then compare the side and back views. A close taper needs more frequent cleanup, while a softer outline allows a little more growth. Consider whether your natural texture can create the pictured height or curls, and how much styling time you want to spend each morning.
Styling Straight, Wavy, and Curly Textures
For straight hair, lift damp roots with a dryer before adding a small amount of lightweight paste to the ends. Wavy hair can be finger dried with mousse or cream to keep its bends visible. For curls, apply curl cream while damp, scrunch, and diffuse gently or air dry. Use less product on the close sides than on the longer top so the shape retains its contrast.
Keeping Burgundy Color Fresh
These looks pair wine and red-violet accents with darker underlying hair, so ask your colorist which shade and placement best match your reference. Wash with a color-safe cleanser, avoid unnecessarily hot water, and protect the hair when heat styling. Red tones can lose their initial vibrancy; a salon gloss or targeted refresh may restore it without changing the entire color placement.
Maintaining the Pixie Shape
Watch the outline around the ears and nape: those areas often show growth before the longer top does. Arrange trims according to how closely you want that taper maintained, and tell your stylist if you are growing the fringe. At each visit, check whether crown layers still lift easily; removing too much weight can change a rounded sweep or disrupt curl definition.
What to Discuss with Your Stylist
Bring the front, profile, and back view of your favorite image. Point out your preferred fringe length, crown height, ear coverage, and nape shape rather than requesting only a pixie. Discuss your hair’s density, growth patterns, natural texture, and daily styling routine. For color, identify whether you want subtle wine ribbons, brighter red-violet pieces, or a more uniform burgundy finish.
Frequently Asked Questions
What is the main difference between these burgundy pixie haircuts?
The biggest differences are top length, fringe direction, texture, and how closely the sides and nape taper.
Which cut offers the most forehead coverage?
Choose one of the longer diagonal or side-swept fringes, such as the soft diagonal pixie or smooth sweeping-bangs version.
Which option keeps the forehead most open?
The raised-front and rolled-front pixies direct their longer front sections upward and back.
Can a burgundy pixie work with naturally curly hair?
Yes. The curly examples retain length on top for curl formation while keeping the sides and nape shorter.
How can I make a straight-haired pixie look more textured?
Lift the roots while blow drying, then separate a few dry ends with a small amount of lightweight paste.
Will I need to style a lifted front every day?
It generally needs some root direction after washing. Ask your stylist whether your growth pattern will support the lift with minimal effort.
How do I keep a curly pixie from looking stiff?
Apply curl product sparingly to damp hair, scrunch gently, and avoid disturbing the curls as they dry.
Do the highlighted looks require an entirely burgundy base?
No. Several images show red or wine accents over visibly darker underlying hair.
How often should I trim a tapered nape?
Book a cleanup when its outline stops looking defined; the timing depends on your hair growth and preferred sharpness.
What should I ask for if I dislike a heavy fringe?
Ask for shorter, textured or point-cut fringe pieces that can separate across the forehead.
How can I help the burgundy shade retain its appearance?
Use color-safe washing products, moderate heat, and discuss a gloss or targeted refresh with your colorist when the tone fades.
What reference views should I bring to a consultation?
Bring the front, side, and back views so your stylist can see the fringe, crown volume, ear area, and nape you want.
Conclusion
A burgundy pixie can be softly rounded, sharply tapered, curled, or swept high off the forehead. Choose the silhouette that suits your texture and styling routine, then use the multi-angle views to agree on its details with your stylist. Keeping the neckline shaped and refreshing the color when needed will help your chosen cut stay recognizable as it grows.