


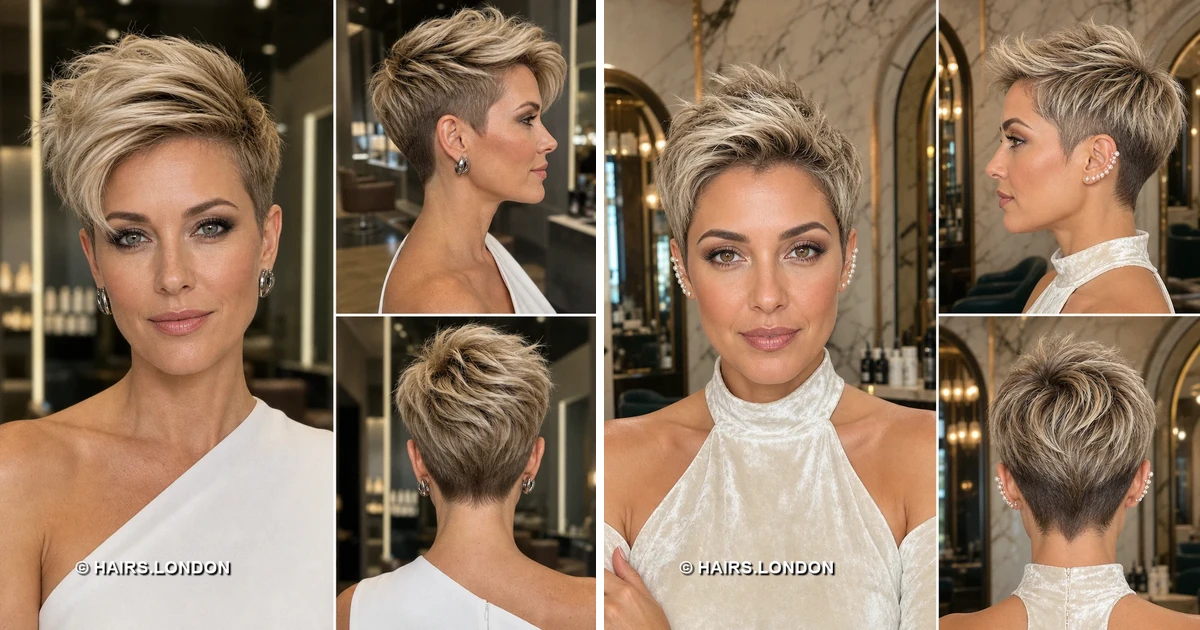
11. Chestnut Pixie with a Short Feathered Fringe
This chestnut pixie keeps its shape compact and softly textured. Fine warm highlights run through the layered top and crown. A short, feathered fringe rests well above the brows. Close sides frame the ears without a harsh separation. The back narrows neatly, following the natural neckline below. Request subtle point cutting to soften the short front. Work a little styling cream through towel-dried hair first. Finger-comb the crown forward, then lift selected pieces gently. Keep appointments frequent enough to prevent the sides becoming bulky. Refresh the perimeter regularly to keep the nape looking deliberate. Leave enough length for gentle movement.
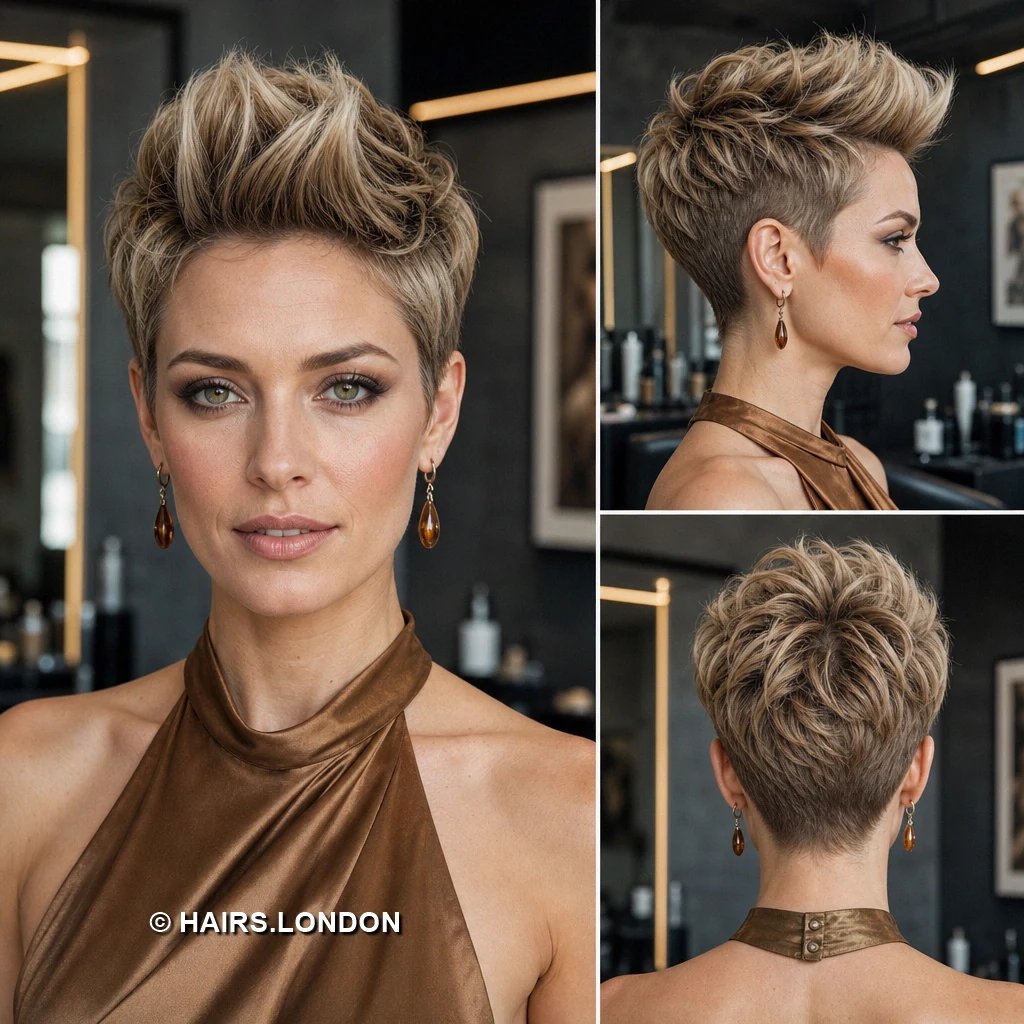
12. Brown Pixie with Directional Crown Spikes
Longer crown pieces shoot upward across this dark brown pixie. Warm lighter tips give the spiky texture extra definition. The short fringe breaks into fine, forward-facing points. Smooth, close sides keep the height concentrated on top. The back tapers sharply into a small nape point. Ask for staggered layers that support distinct, movable spikes. Apply mousse at damp roots, lifting sections while blow-drying. Dry with fingers, then pinch selected ends into loose points. Avoid heavy wax, which can collapse these narrow sections. Return for trims before the tapered back loses shape. Show the desired spike height during your stylist consultation.
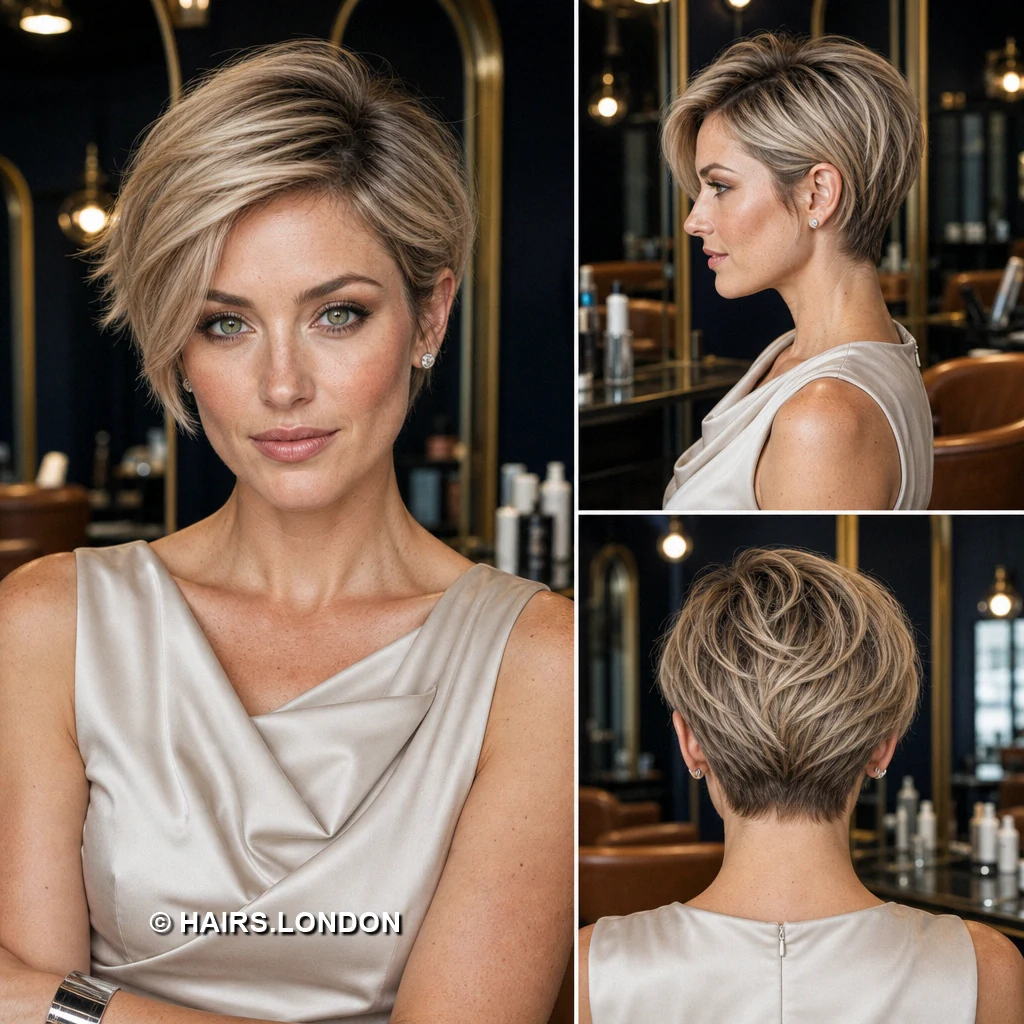
13. Warm Brunette Pixie with Soft Crown Texture
Warm brunette layers create a rounded, softly textured pixie. Fine caramel strands weave through the crown and upper back. The short fringe falls forward in light, uneven pieces. Neatly cropped sides leave a little softness around the ears. The nape tapers smoothly without extending far down the neck. Ask for gentle layering rather than dramatic, disconnected top sections. Rub a small amount of mousse into the crown. Blow-dry with your fingers for lift that remains relaxed. Schedule trims around every four to six weeks for definition. Discuss highlight placement if you want similarly subtle dimension. Use light products for flexibility.
14. Sandy Brown Pixie with Tousled Spikes
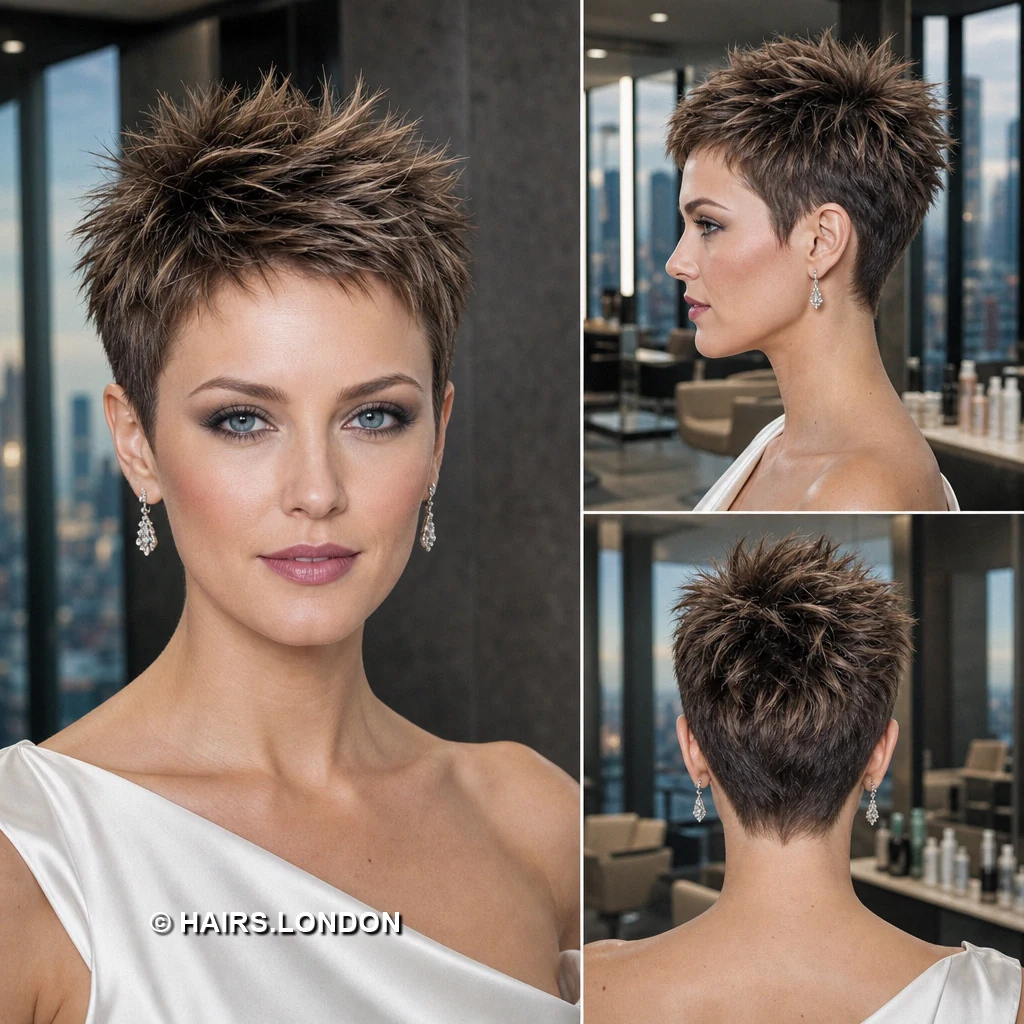
Sandy brown highlights brighten the pointed layers of this pixie. Darker hair beneath gives its crown texture visible contrast. Short fringe pieces angle forward without covering the brows. Close-cut sides keep the tousled top from spreading outward. The back narrows into a clearly tapered, pointed nape. Request textured tips while retaining enough hair for separation. Lift damp roots with your fingers as they dry. Work matte paste through dry ends for controlled, airy separation. Keep the temples tidy to maintain this narrow silhouette. Ask how your crown growth will affect the spikes. Avoid flattening the crown while shaping the fringe.
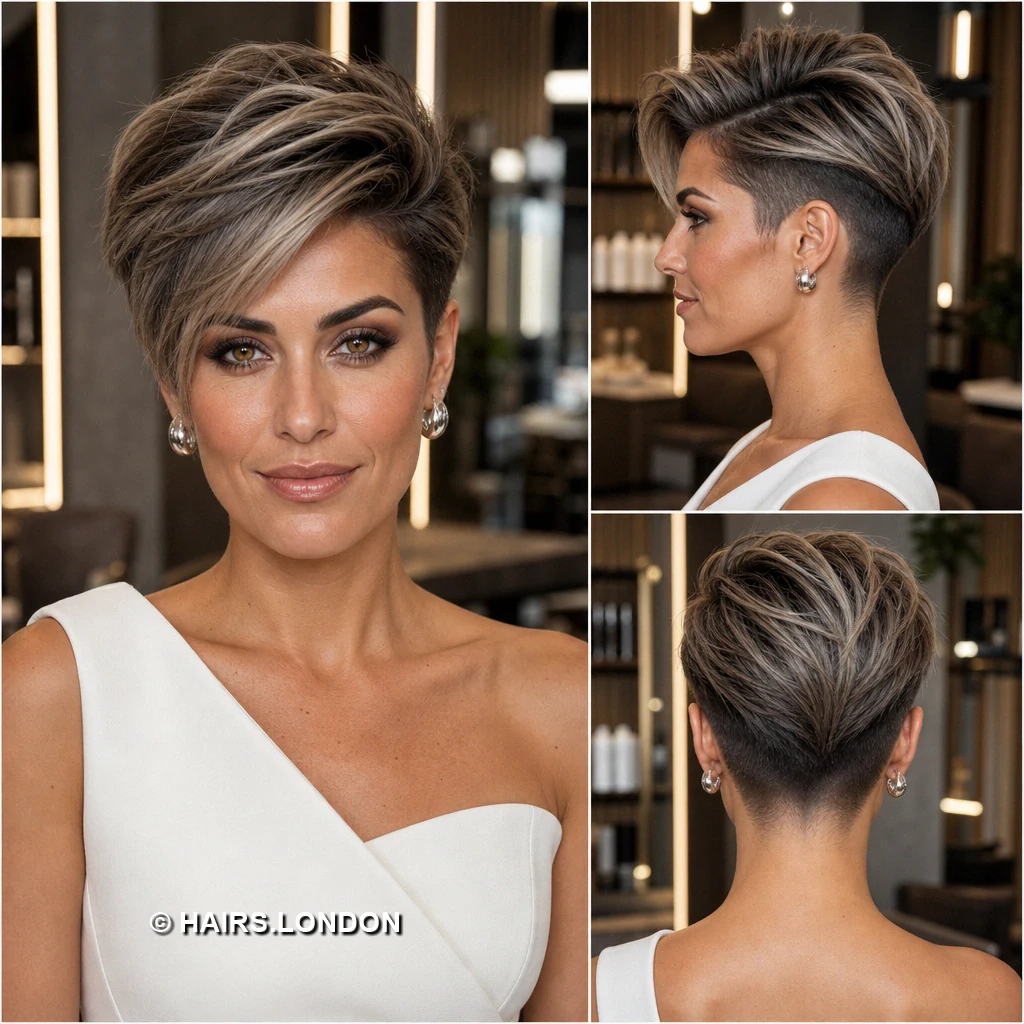
15. Charcoal Silver Pixie with a Rolled Front
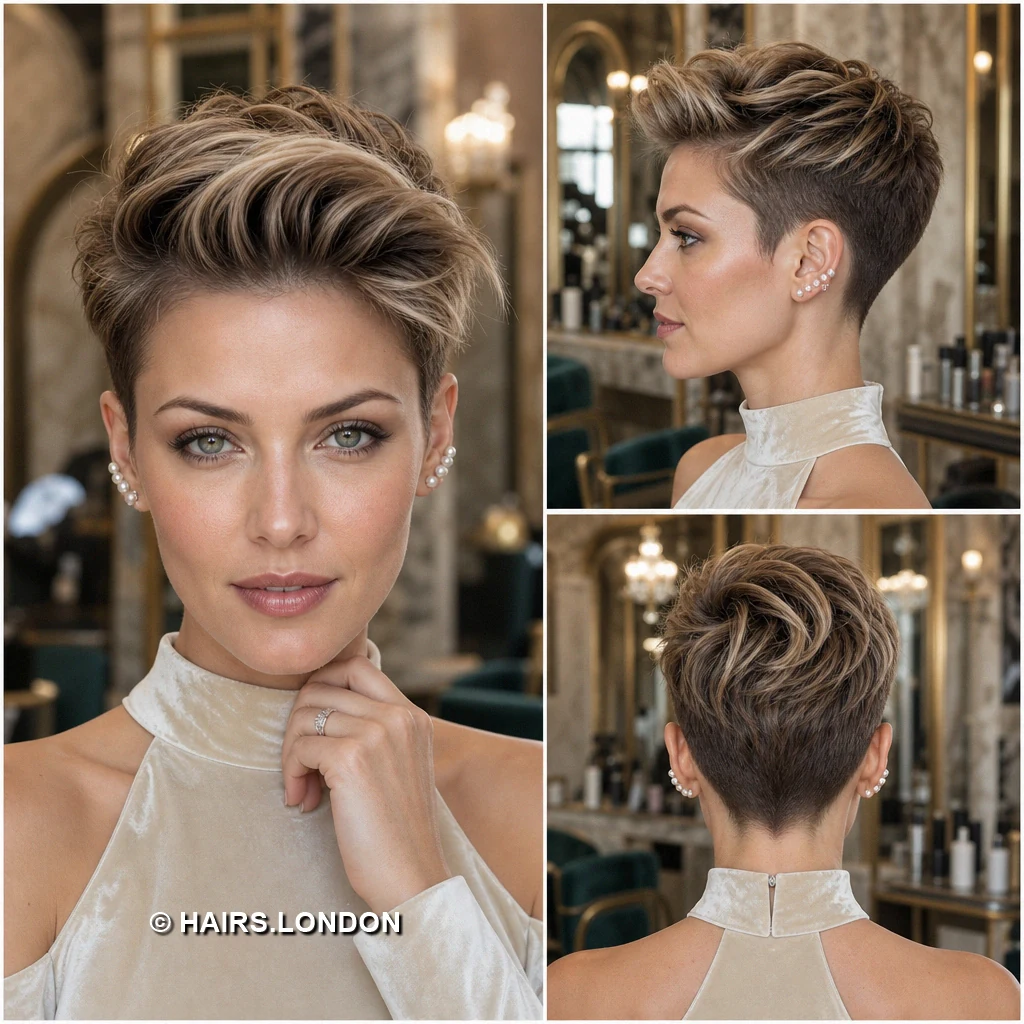
Silver streaks sweep backward through this charcoal-rooted, voluminous pixie. The rolled front adds height while keeping the forehead clear. Longer layers curve across the crown and upper back. Shorter sides lie close beneath the lifted silver surface. A neatly tapered nape balances the generous volume overhead. Ask for enough front length to create this curve. Blow-dry backward with a brush, concentrating lift near roots. Finish with flexible spray rather than stiff, heavy wax. Protect lightened strands with gentle washing and regular conditioning treatments. Keep the sides trimmed so the rolled front stands out. Check the front shape from both sides.
16. Warm Brown Pixie with a Broken Fringe
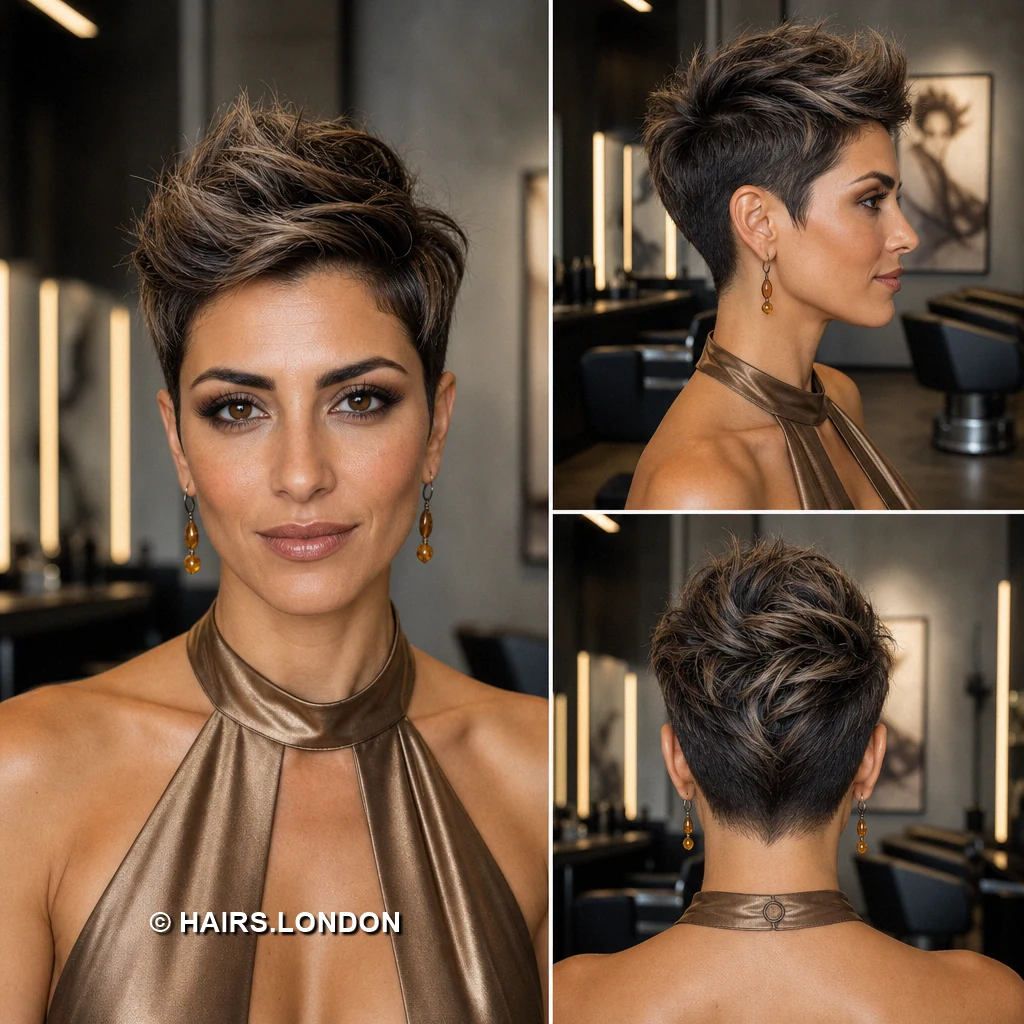
Warm brown highlights move through this short, tousled pixie. Its broken fringe points forward across the upper forehead. Textured crown layers sit slightly higher toward the back. Short sides trace the ears without an obvious undercut. The back tapers into a narrow, natural-looking nape. Ask for piecey ends while retaining a manageable crown length. Scrunch lightweight mousse through damp hair for soft separation. Finger styling preserves movement better than brushing everything perfectly smooth. Define a few fringe pieces with minimal matte paste. Arrange regular trims to keep the cropped outline balanced. Have your stylist adjust the fringe to your hairline.
17. Silver Pixie with a Dramatic Lifted Crown
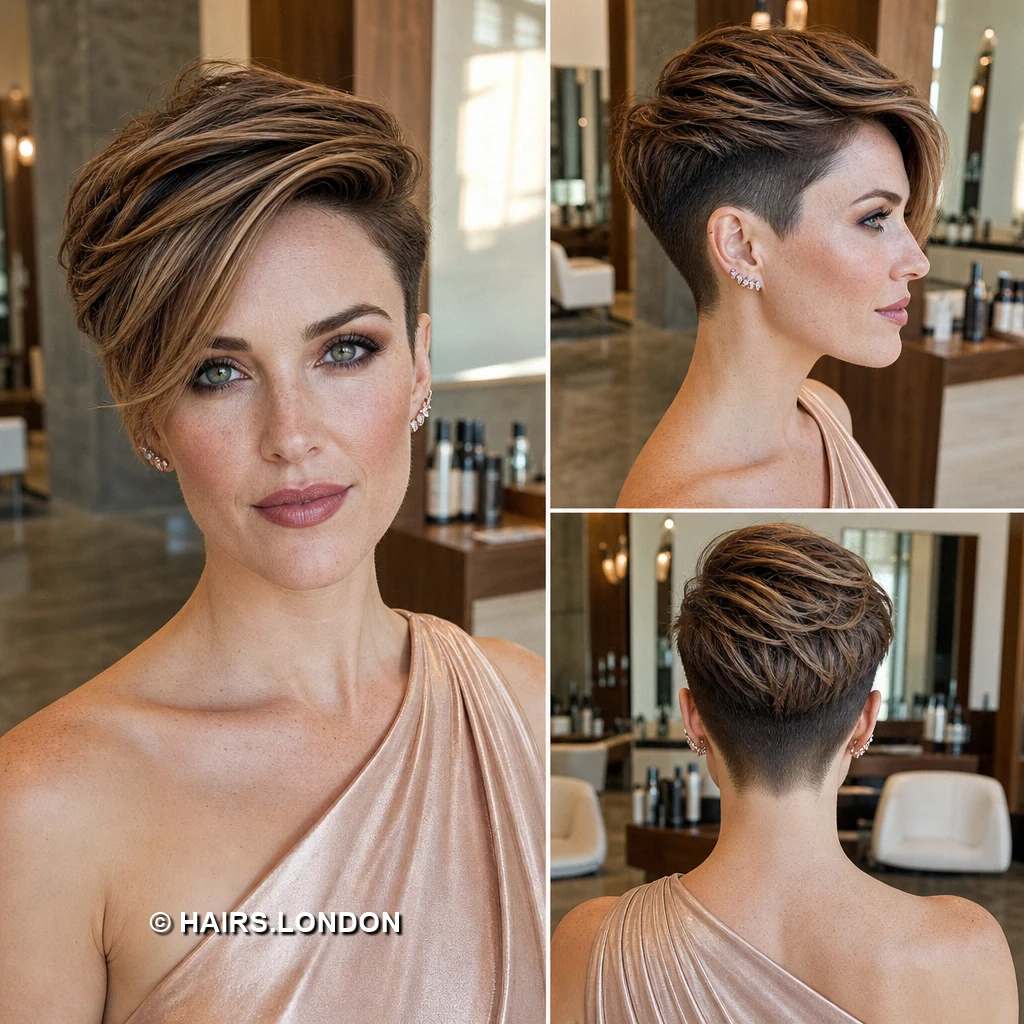
Silver and charcoal strands sweep upward into a dramatic crown. The lifted front exposes the forehead and creates height. Small decorative pins sit along one side of the style. Shorter sides balance the long, separated sections above them. The back shows feathered layers tapering into a slim nape. Ask for enough top length to recreate the upward sweep. Apply heat protectant before directing airflow upward through the roots. Secure accessories gently, avoiding tension on individual hair strands. Use flexible spray to support height without hiding texture. Maintain the nape while allowing the crown its length. Check accessory placement for comfort.
18. Blush Silver Pixie with Swept Texture
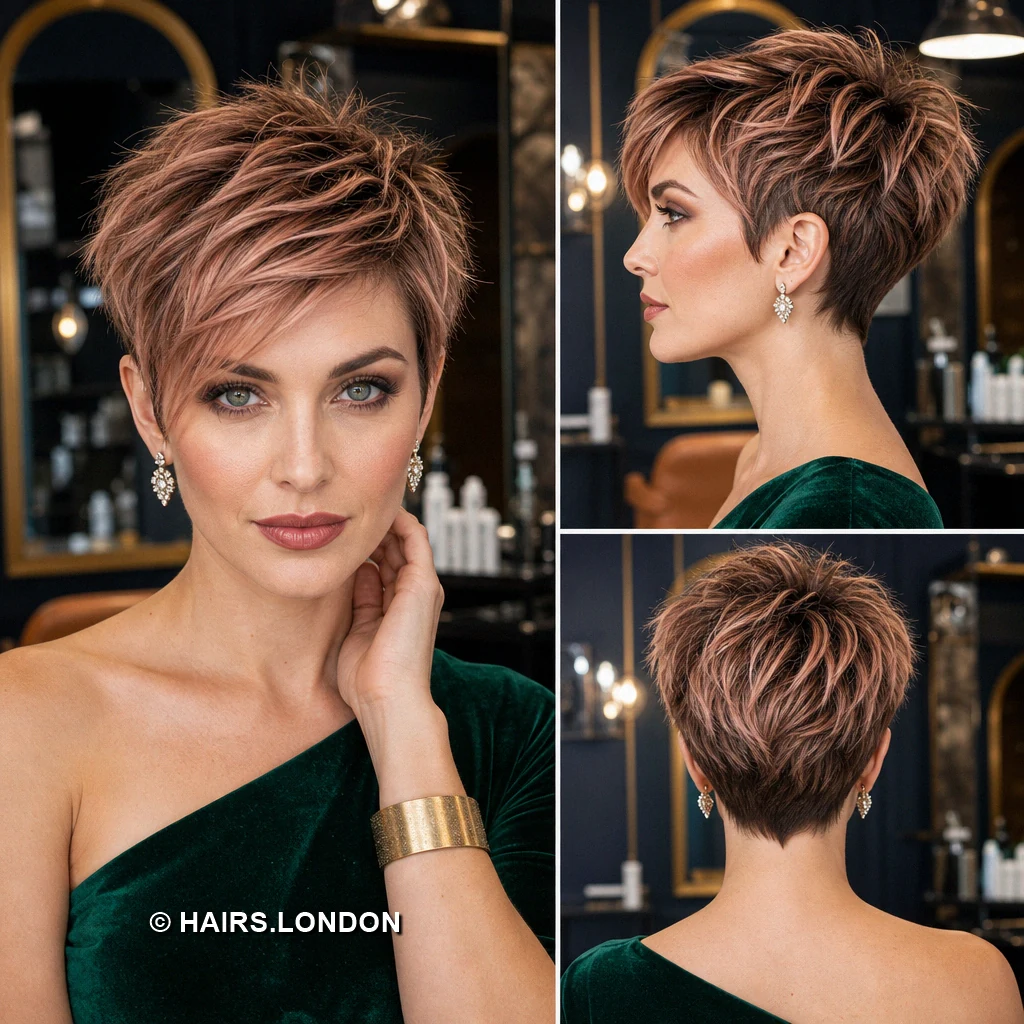
Blush pink ribbons soften the silver base of this pixie. The layered crown rises loosely, then sweeps toward the front. A short, angled fringe rests lightly across the forehead. Closely shaped sides reveal cooler silver hair underneath. Feathered back layers descend into a tidy, pointed nape. Ask for soft layers that preserve movement through the top. Dry with fingers, then pinch selected ends into loose points. Choose gentle washing to help preserve the delicate pink tone. Keep heavier products away from the fine, separated strands. Refresh the nape without cutting away the sweeping crown. Discuss when pink color needs refreshing.
How to Choose a Textured Pixie Cut
Start with the front section: a long diagonal fringe offers more styling options, while a short, broken fringe keeps hair off the eyes. Then consider how much height you want at the crown and how closely you want the sides cut. Compare the profile and back views as carefully as the front. A pronounced contrast between top and sides needs more frequent shaping than a softly blended cut.
Styling Textured Pixie Cuts on Different Hair Textures
For fine hair, apply a small amount of mousse at damp roots and dry upward before adding a little paste to the ends. For dense hair, ask for internal layering that removes bulk without leaving the surface thin. Straight hair can be directed with a small brush; wavy hair may need only finger styling and a lightweight cream. Let natural growth patterns guide any spikes, lifted fronts, or diagonal sweeps.
Keeping Highlighted Pixie Color Fresh
The images show everything from subtle brunette highlights to pale silver and blush tones. Discuss the amount of lightening required for your chosen shade, particularly if your hair is currently dark. Wash gently, condition lightened sections regularly, and limit unnecessary heat. Pale and pink tones may need more frequent color refreshes than a rooted brunette blend; ask your colorist for a schedule tailored to your starting color.
Maintaining the Pixie Shape
The close sides and tapered napes are the first parts of these cuts to lose definition as they grow. Many people will want a shape-up roughly every four to six weeks, adjusted to their growth rate and preferred outline. If you want to keep a long fringe or raised crown, say so at each visit: the perimeter can be tidied without taking the top equally short.
What to Discuss with Your Stylist
Bring the front, profile, and back views of the cut you like. Point out the exact fringe length, crown height, side coverage, and nape finish you want. Tell your stylist how much time you can spend blow-drying and whether you prefer a smooth sweep or separated, piecey texture. Discuss your growth patterns, current color, and willingness to maintain close sides or lightened hair.
Frequently Asked Questions
What makes a pixie cut look textured?
Layered or point-cut ends create visible separation and movement instead of one solid shape. Styling product can emphasize those individual pieces.
Which pixie is easiest to style without a blow-dryer?
A softly layered crop that follows your natural growth pattern is usually easier to finger-style than a tall quiff or precisely swept fringe.
Can fine hair support a lifted pixie?
Yes, provided the crown retains enough weight. Root mousse and upward drying can help create lift without loading fine hair with heavy wax.
How can thick hair avoid looking bulky in a pixie?
Ask your stylist to remove weight within the shape while preserving a smooth surface and enough length for the top to move.
Should I choose a long or short pixie fringe?
Choose a long fringe if you want a visible sweep and flexibility. A short fringe keeps the forehead more open and needs less directional styling.
How often does a tapered nape need trimming?
A visit around every four to six weeks suits many close napes, although your growth rate and preferred sharpness determine the best interval.
Can a pixie have short sides and a soft finish?
Yes. A graduated blend and softly textured top can keep the outline gentle even when the temples and nape are closely cut.
What product works for piecey pixie layers?
Start with a small amount of flexible paste or styling cream on dry ends. Add more only where individual pieces need definition.
How do I keep a swept fringe in place?
Dry it in the intended direction from the roots, then use a little flexible product. The cut must also leave enough length to follow the sweep.
Do pale pixie highlights require extra care?
Lightened hair benefits from gentle washing, conditioning, and heat protection. Your colorist can advise how often your particular tone needs refreshing.
Can I trim the sides without shortening the top?
Yes. Ask for a perimeter tidy and specify that you want to preserve the fringe and crown length.
What should I bring to a pixie consultation?
Bring images showing the front, sides, and back, and identify which details you want to copy or change.
Conclusion
The most useful inspiration here is often in the side and back views: they show how a sweeping fringe or lifted crown connects to the shorter hair beneath it. Choose the texture and amount of height you like, then work with your stylist to adapt the fringe, sides, and nape to your hair’s growth pattern and your maintenance routine.