


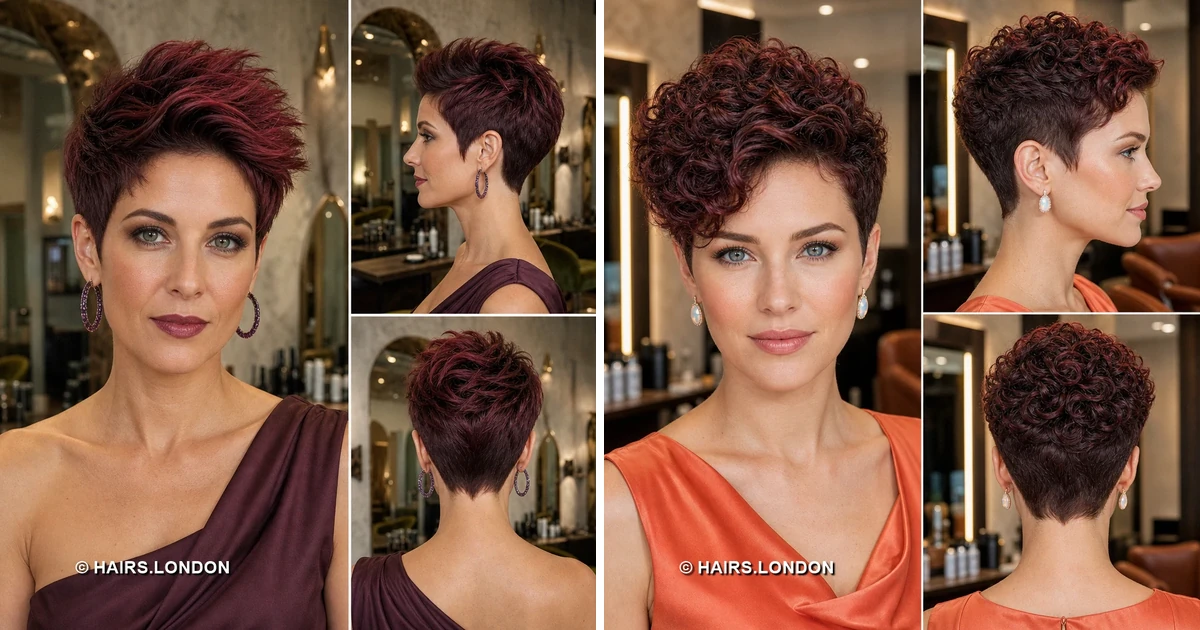
Burgundy pixie cuts can look remarkably different depending on where the length sits. These 15 views show everything from lifted, piecey crowns to springy curls and sweeping fringes, with closely shaped sides and napes providing contrast. Use the front, side, and back views to identify the details you want to keep—and the styling or upkeep each shape will require.
1. Lifted Burgundy Pixie with a Pointed Nape
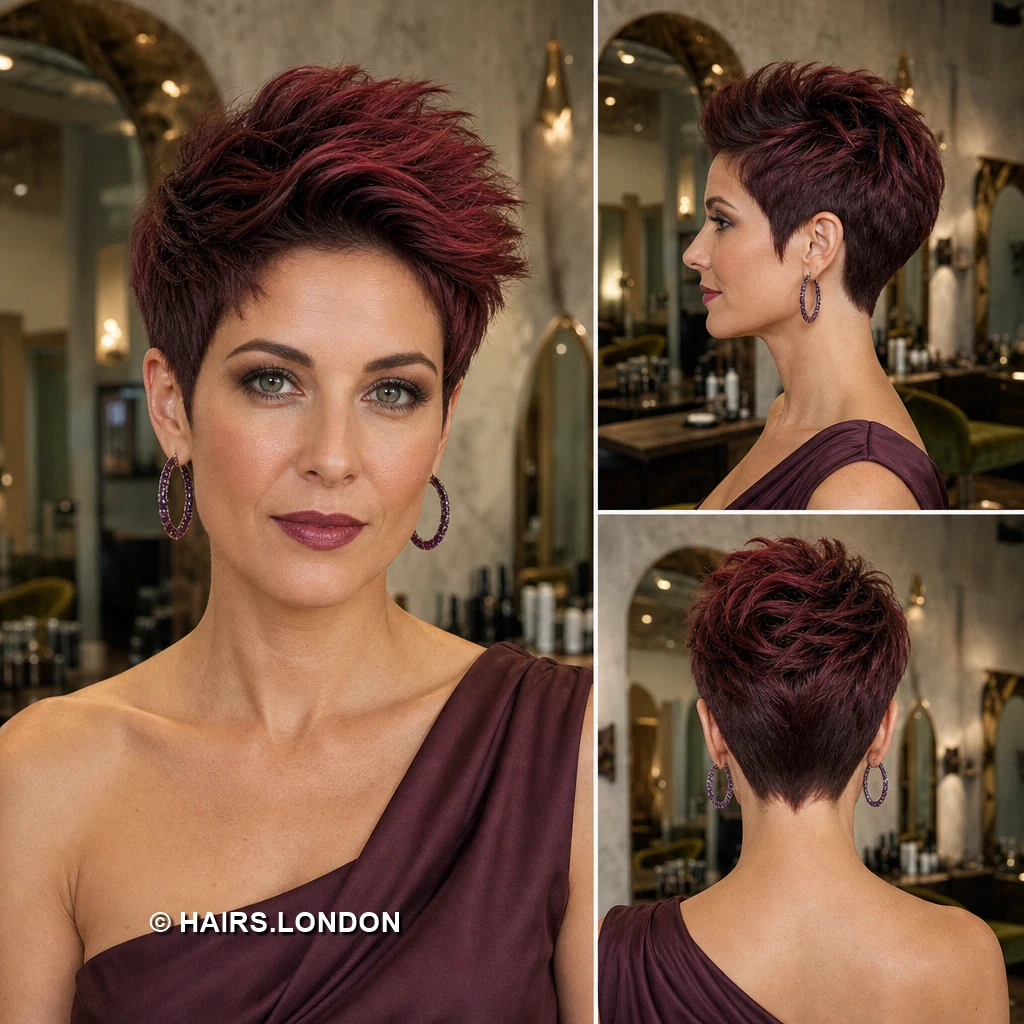
Deep burgundy tones brighten this short, sharply tapered pixie cut. The crown rises into airy, separated pieces with visible movement. Brushed upward fringe opens the forehead without looking overly rigid. Close sides reveal softer plum shadows beneath the red surface. At the back, layered lengths narrow into a pointed nape. Ask for graduated weight above ears and delicate neckline detailing. Light mousse and directional drying help lift the longer top. Pinch individual ends with paste to preserve their uneven definition. Trim the tapered outline regularly before it obscures ear contours. Request a burgundy gloss when highlights start appearing less vivid.
2. Rounded Auburn Burgundy Curly Pixie
Rich auburn ribbons weave through a densely curled pixie crown. Curls sit higher above the forehead, forming a rounded silhouette. Shorter sides hug the temples while leaving natural curl definition. The back tapers neatly beneath a generous cluster of ringlets. Small front curls soften the hairline rather than creating bangs. Have your stylist shape dry curls before removing unnecessary bulk. Apply curl cream throughout damp lengths, concentrating on the top. Diffuse gently or air dry to protect the springy pattern. Refresh flattened coils using water and a little lightweight conditioner. Schedule neckline trims while allowing the upper curls continued growth.
3. Wine Burgundy Pixie with an Angled Fringe
Wine red layers sweep diagonally across this softly textured pixie. The long fringe grazes one brow, with separated, tapered ends. Extra crown length creates height without making the shape stiff. Dark, close sides frame the ear and balance brighter highlights. From behind, short layers converge above a closely tapered nape. Ask for point cutting through the top to encourage separation. Dry forward first, then redirect fringe sideways using your fingers. A dab of flexible paste brings out the angled pieces. Keep temple edges tidy so longer layers retain their contrast. A color gloss can revive burgundy sheen between major appointments.
4. Compact Plum Burgundy Pixie with Fine Fringe
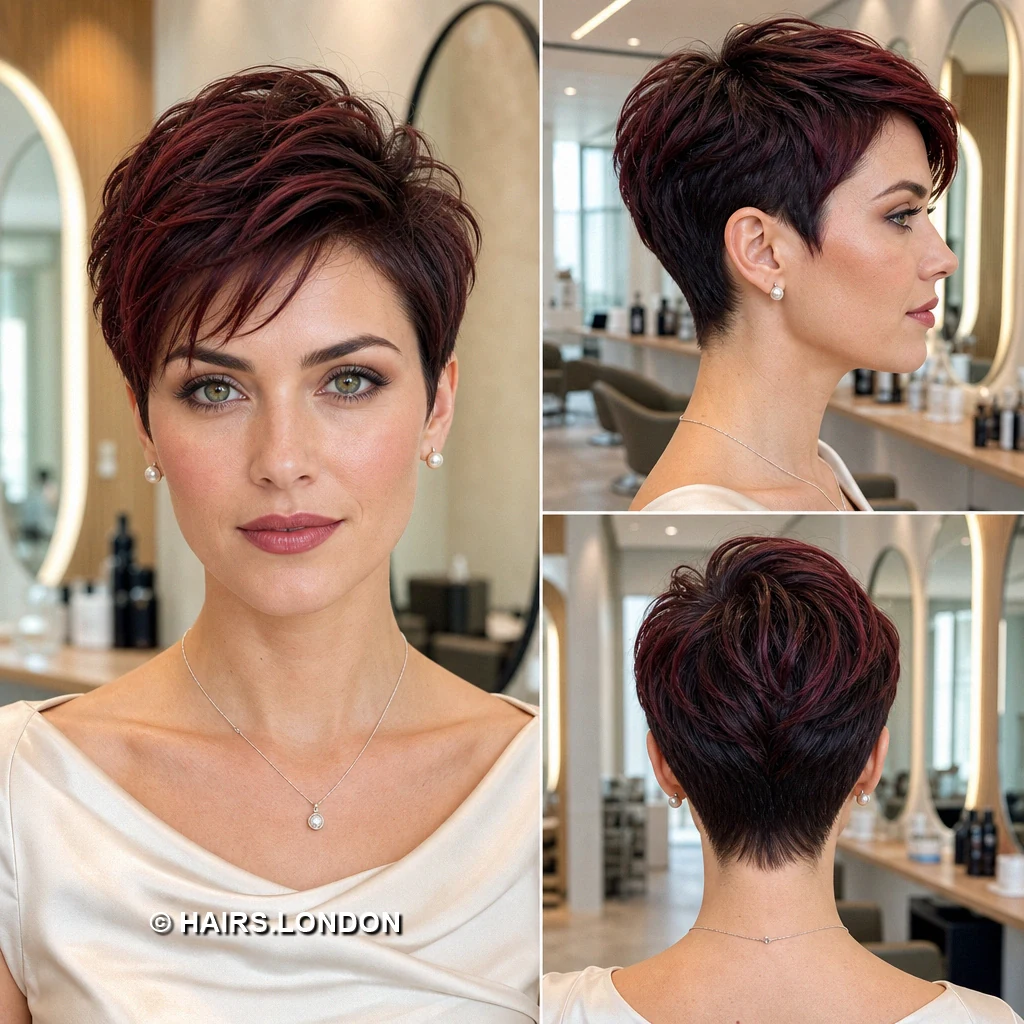
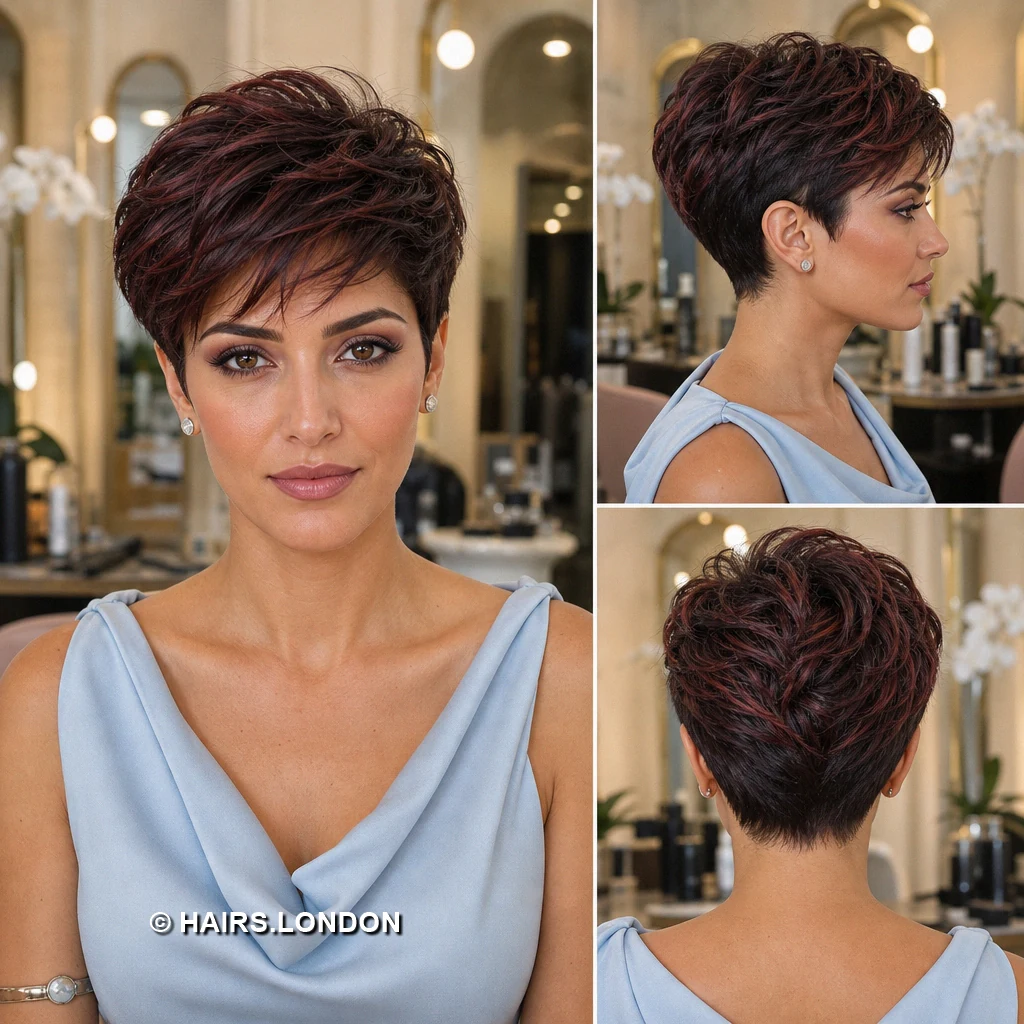
Deep plum burgundy gives this compact pixie a glossy finish. Fine fringe pieces angle across the forehead above defined brows. The gently rounded crown carries texture without excessive vertical lift. Side layers sit close around ears, revealing the cheek area. A slim tapered nape keeps the back clean and lightweight. Request soft internal layering instead of cutting every section bluntly. Blow dry with fingers, directing the front to one side. Work a small amount of cream through slightly damp lengths. Use minimal product near roots to preserve the airy profile. Refresh the neckline before its tidy outline begins feeling heavy.
5. Mahogany Burgundy Pixie with a Long Side Sweep
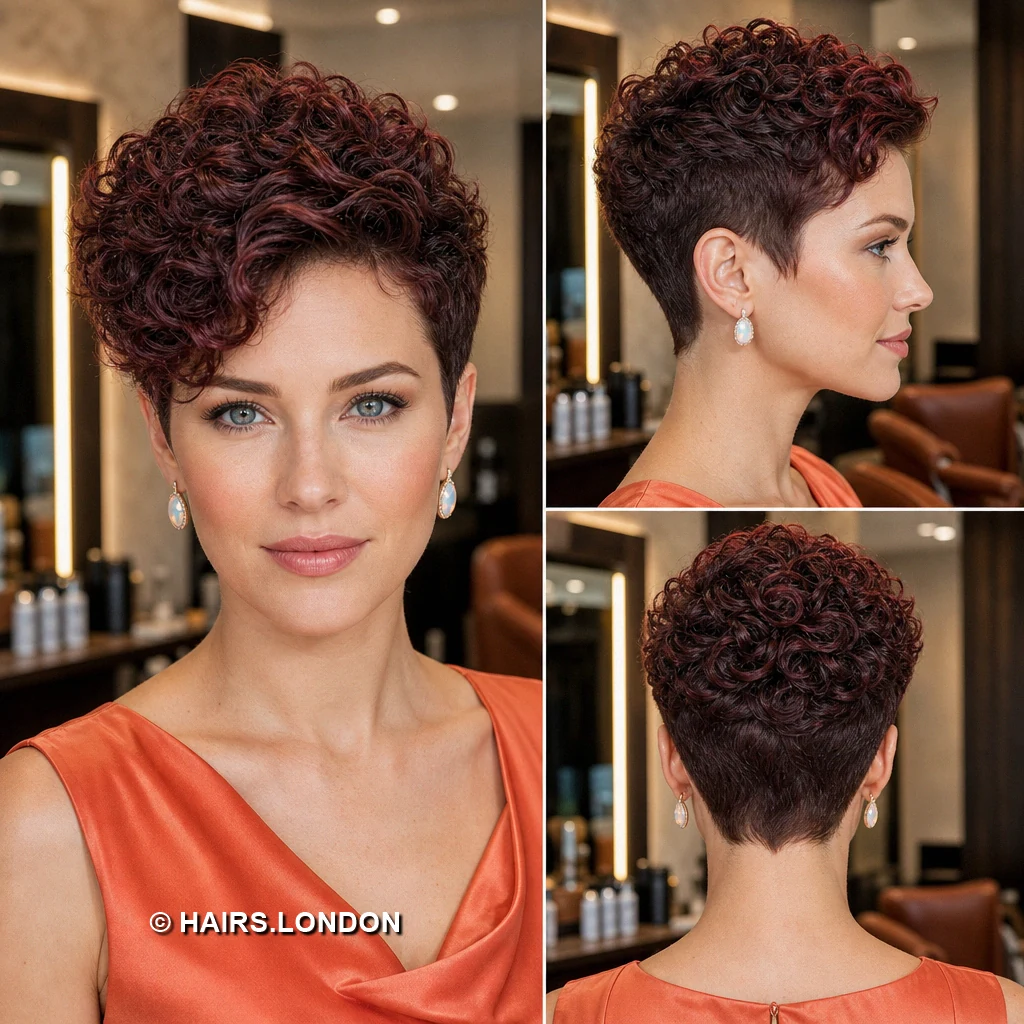
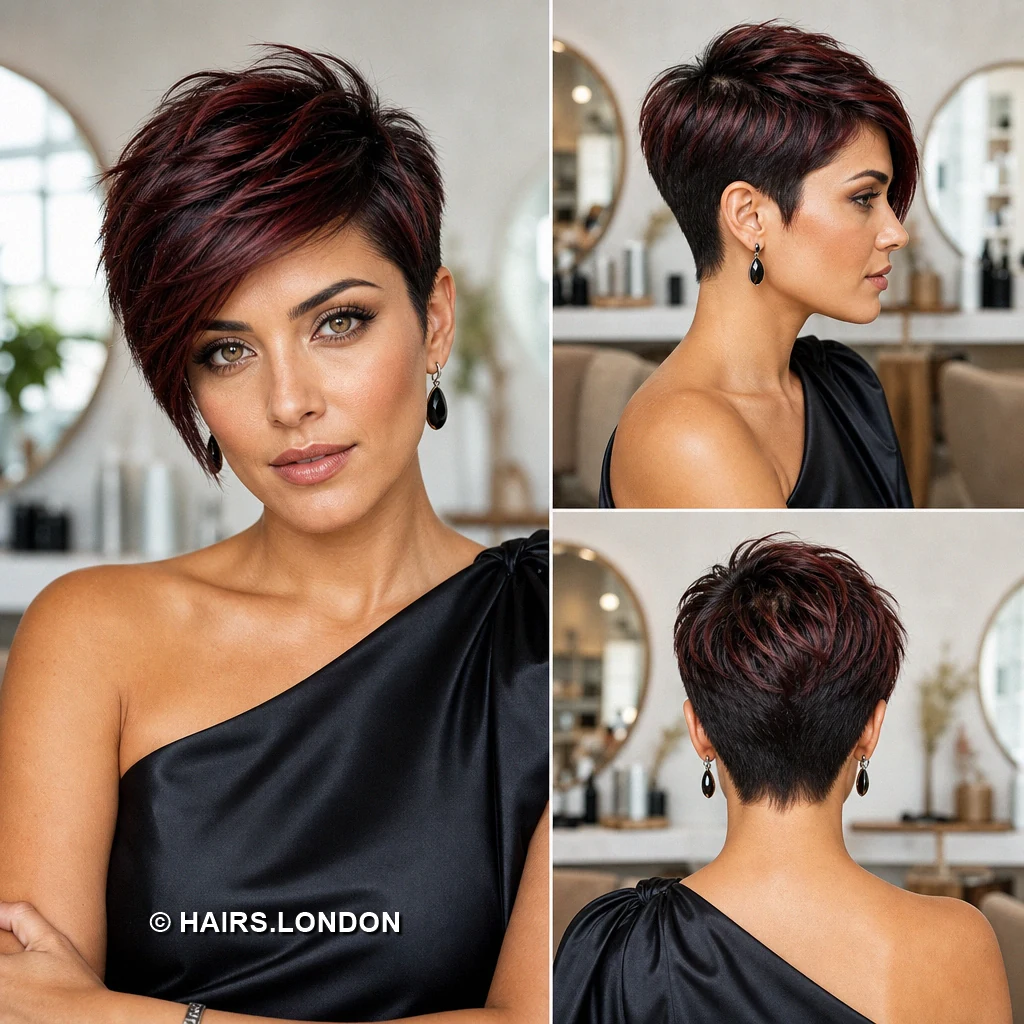
Mahogany red shines through this dramatic, long swept pixie cut. A deep side division sends substantial fringe across one eye. The opposite temple remains sleek, emphasizing the intentionally uneven lengths. Generous crown layers curve backward, building fullness above the taper. The back narrows to a slim, subtly pointed neckline finish. Ask your stylist to leave enough front length for movement. Lift roots with a brush while drying fringe across diagonally. Smooth the surface with light cream, avoiding the tapered sides. Check how the front falls naturally before committing to length. Maintain shine with color protecting care and periodic salon glosses.
6. Tousled Burgundy Pixie with Red Ribbons
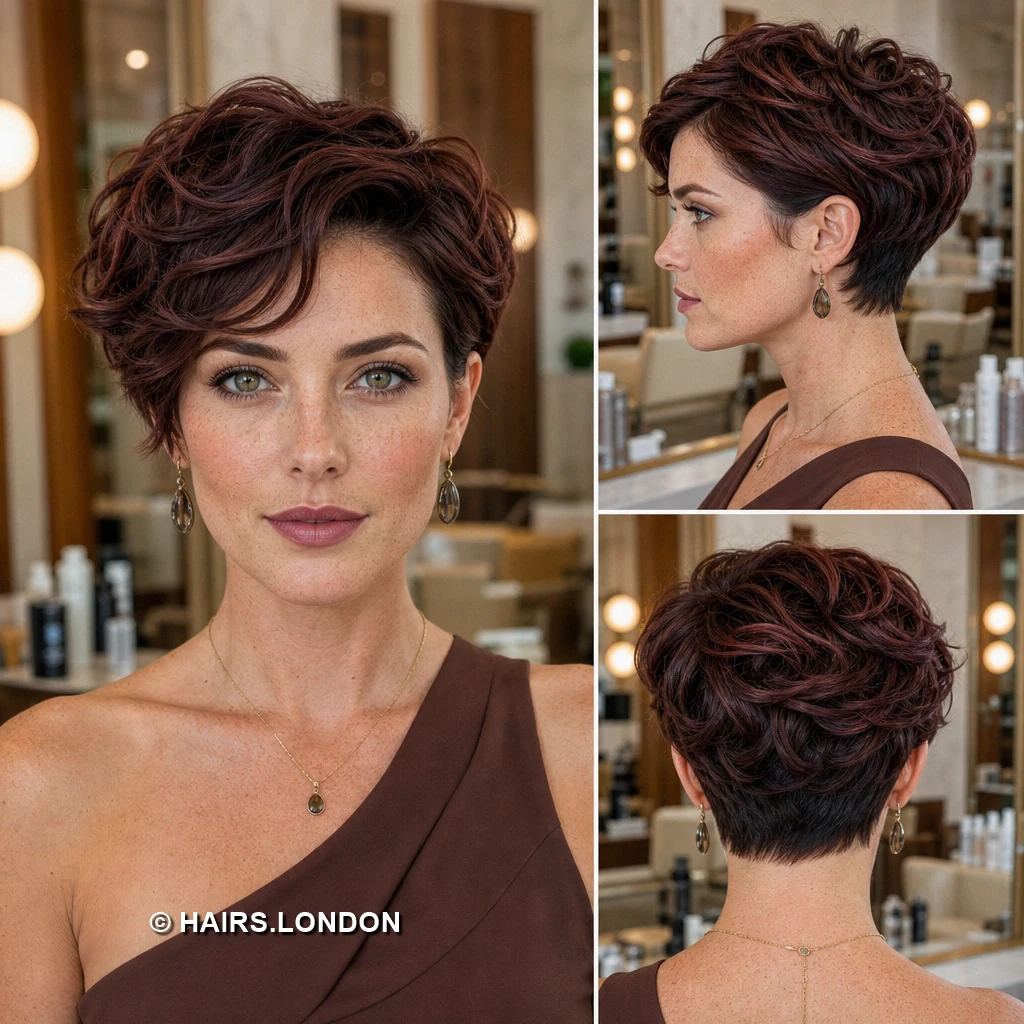
Burgundy highlights thread through dark layers in this tousled pixie. The upper sections lift loosely before sweeping across the forehead. Fine front strands interrupt the hairline without hiding either eye. Close sides and a short nape balance the fuller crown. Rear layers show loose swirls of red against darker roots. Request broken layers on top while preserving close ear coverage. Scrunch mousse into damp hair, then dry against natural growth. Finger style the ends for movement rather than combed precision. Trim around ears regularly to keep the silhouette visibly controlled. Ask about refreshing red ribbons without recoloring every darker section.
7. Dark Berry Pixie with a Spiky Crown
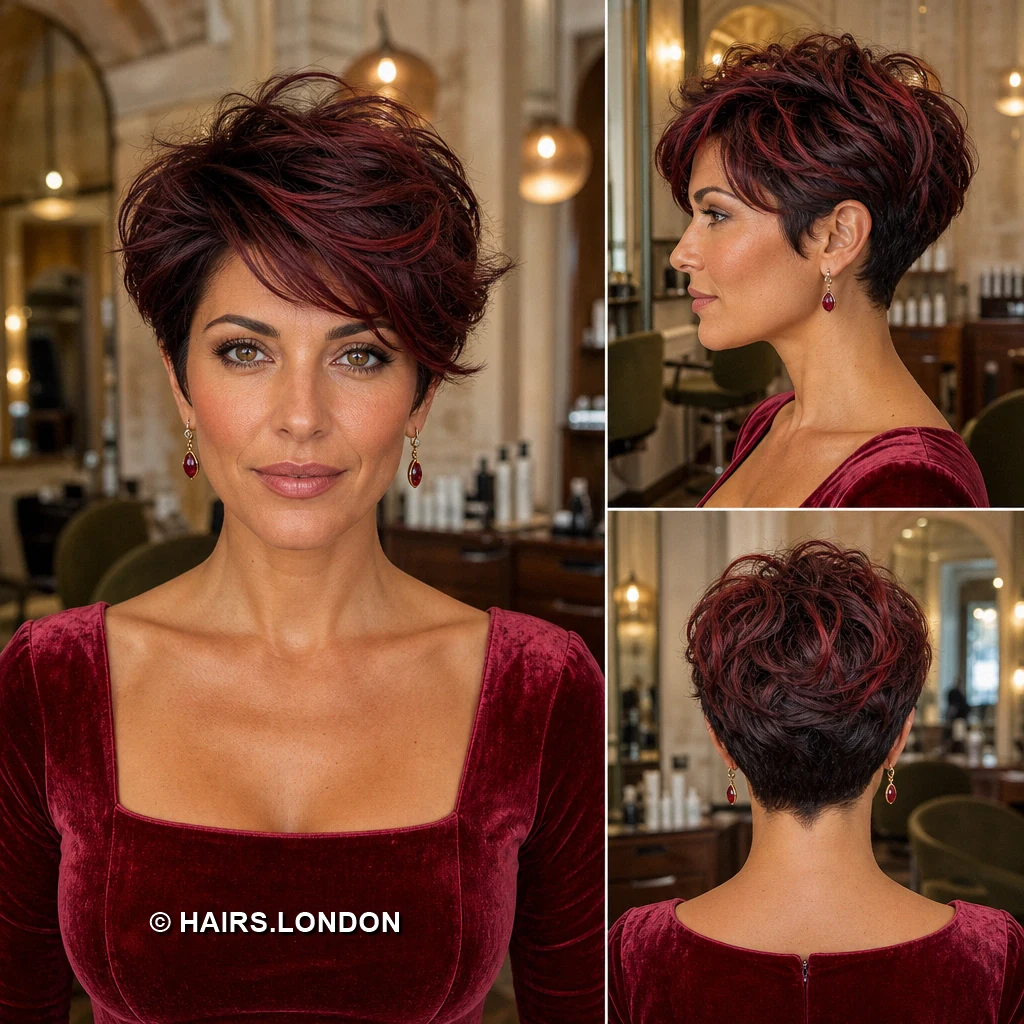
Dark berry color adds depth to this sharply lifted pixie. Long top sections rise into irregular spikes above the forehead. The short fringe blends upward rather than lying across brows. Closely cut sides expose the ears beneath the abundant crown. Back layers narrow firmly toward a neat, pointed nape finish. Ask for purposeful length on top and controlled temple graduation. Blow dry upward using fingers to establish its airy shape. Rub matte paste between palms, then pinch selected raised ends. Keep product off shorter sides to avoid flattening the contrast. Return for trims when the spiky crown starts falling forward.
8. Layered Burgundy Pixie with Feathered Bangs
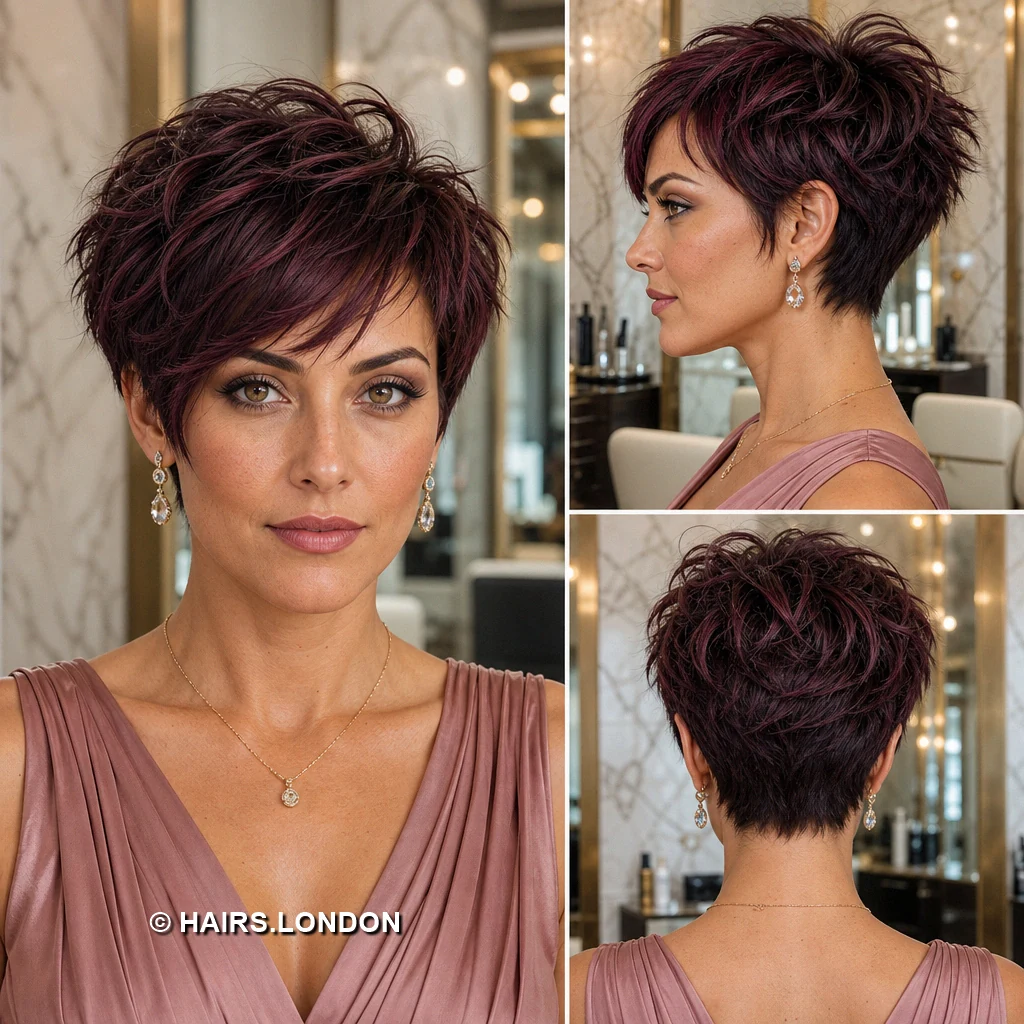
Red violet ribbons run through this softly layered burgundy pixie. A feathered diagonal fringe crosses the forehead with wispy ends. The crown has gentle lift while keeping a compact outline. Short temple sections reveal the ears beside fuller upper layers. At the back, overlapping pieces soften a close nape taper. Request delicate texturizing through the fringe, not harsh chunky thinning. Dry crown roots upward and guide the bangs across lightly. Apply a little styling cream to define loose surface strands. A clean ear outline preserves the contrast between short lengths. Use gentle washing habits to help retain the reddish tone.
9. Asymmetric Dark Cherry Pixie with a Long Fringe
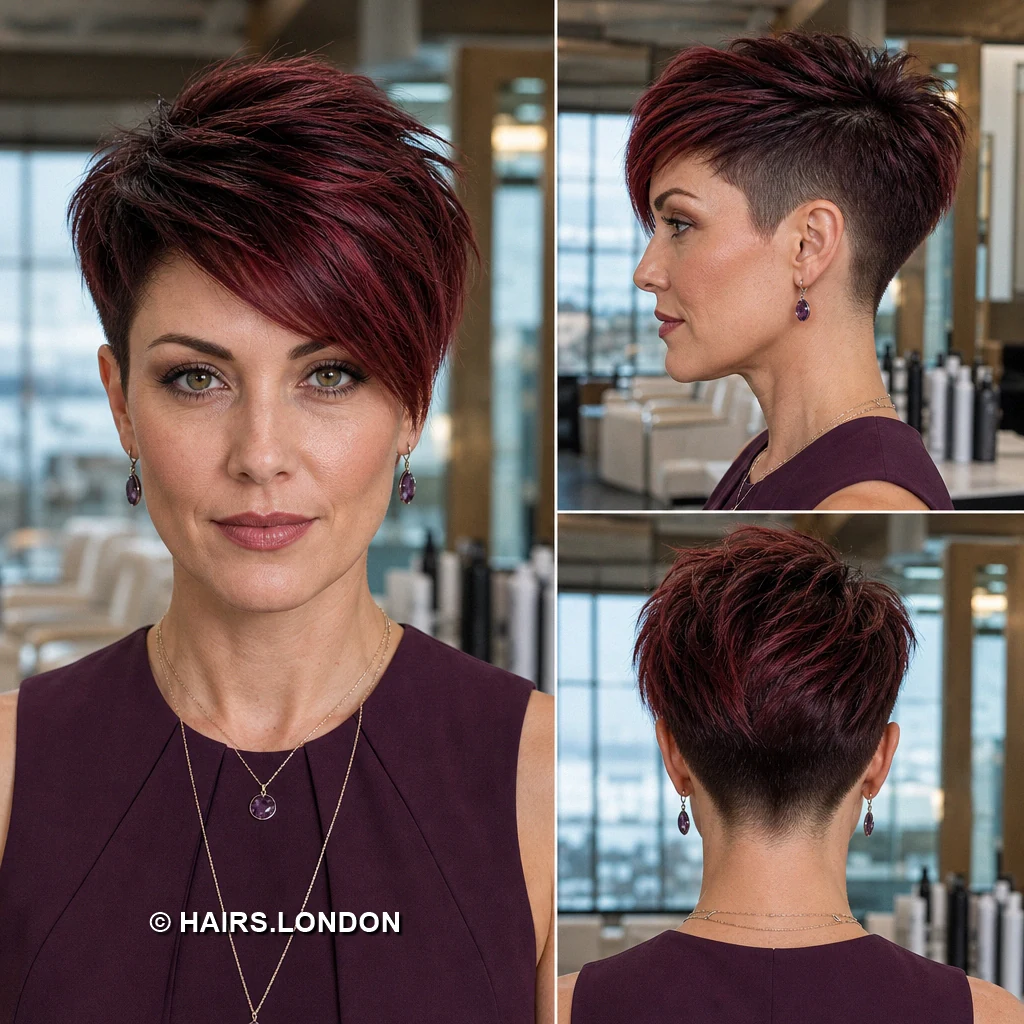
Dark cherry and crimson streaks enliven this asymmetric pixie shape. One sweeping fringe section drops lower beside the outer eye. Opposite layers stay shorter, leaving the face more visibly open. Raised crown pieces introduce height above smoothly clipped temple lengths. The nape tapers closely beneath a textured, rounded back section. Ask to preserve the longer fringe while refining weight underneath. Direct warm airflow across the part, lifting roots with fingers. Use flexible paste to separate the front without stiffening it. Check the side view when choosing your preferred fringe length. Regular neckline cleanup keeps the longer front looking intentionally balanced.
10. Sculpted Mulberry Pixie with a Curved Front
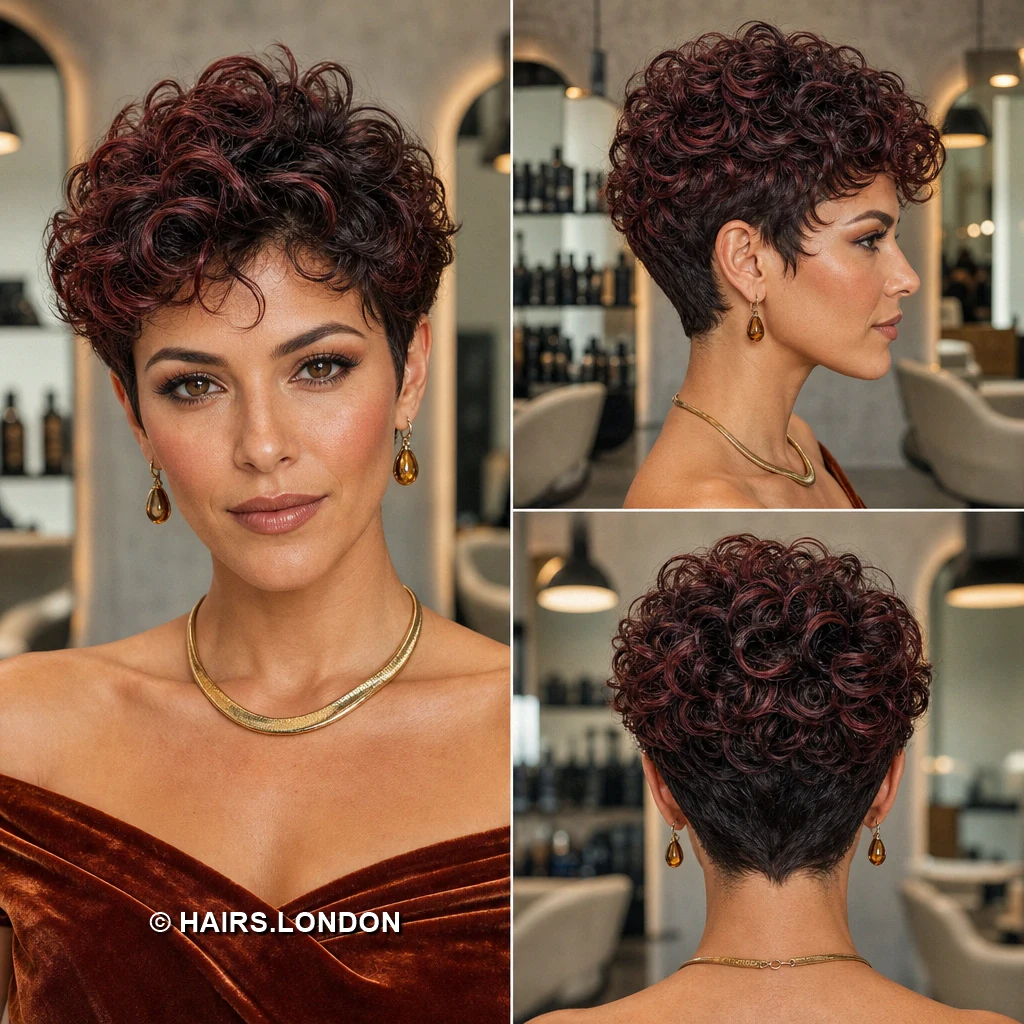
Mulberry burgundy adds dimension to this neatly sculpted short pixie. The gently curved fringe crosses partway over the front hairline. Top layers rise into a soft crest above flatter sides. Close shaping around ears continues into a slim nape taper. Back sections overlap in visible swirls of dark reddish color. Request modest crown length so the raised silhouette remains flexible. Lift roots while blow drying, then press fringe sideways gently. Add lightweight wax sparingly to emphasize the curving surface layers. Schedule trims before temple growth obscures the precise ear outline. Discuss a gloss when the red tones start looking subdued.