


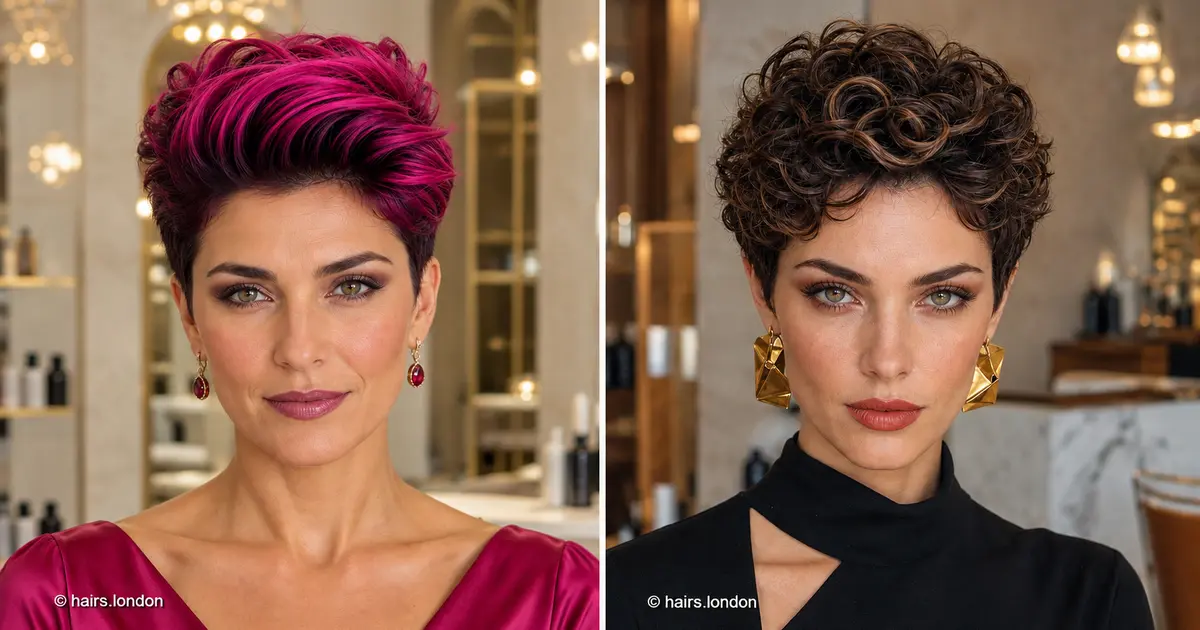
Layered pixie haircuts can hold fullness in very different ways. Some keep a rounded crown of curls, some leave a longer fringe to sweep across the face, and others lift the front into a textured quiff. The important detail is where the length remains. A short nape can make the upper shape look fuller without requiring height everywhere.
These 20 looks explore those choices in brunette, blonde, silver, copper, pink, and purple shades. Front, side, and back photographs help you compare the complete silhouette rather than choose only from the face framing. The descriptions explain which details to discuss with your stylist and how the pictured finish might fit into an everyday routine.
Pay attention to the difference between the haircut and its styling. A rounded curly crown needs enough length for the curl groups to form; a high quiff needs direction at the roots; a feathered fringe needs room to move. The best starting point is the shape that works with your texture and the amount of styling you want to do.
Where layered pixies keep their fullness
Compare the upper back with the nape first. A rounded crown above a tidy perimeter creates a different balance from a close crop with pointed ends. Next, notice the front: short bangs, a long diagonal fringe, and a brushed up quiff each change how the hairstyle frames the face. Finally, check how closely the sides sit around the ears.
The color names here describe the shades visible in the images, rather than confirmed dye formulas. Your starting color, previous treatments, and lighting influence the result. Discuss the tone and placement independently from the haircut so you can choose each detail clearly.
1. Fuchsia Pixie with a Full Swept Up Quiff
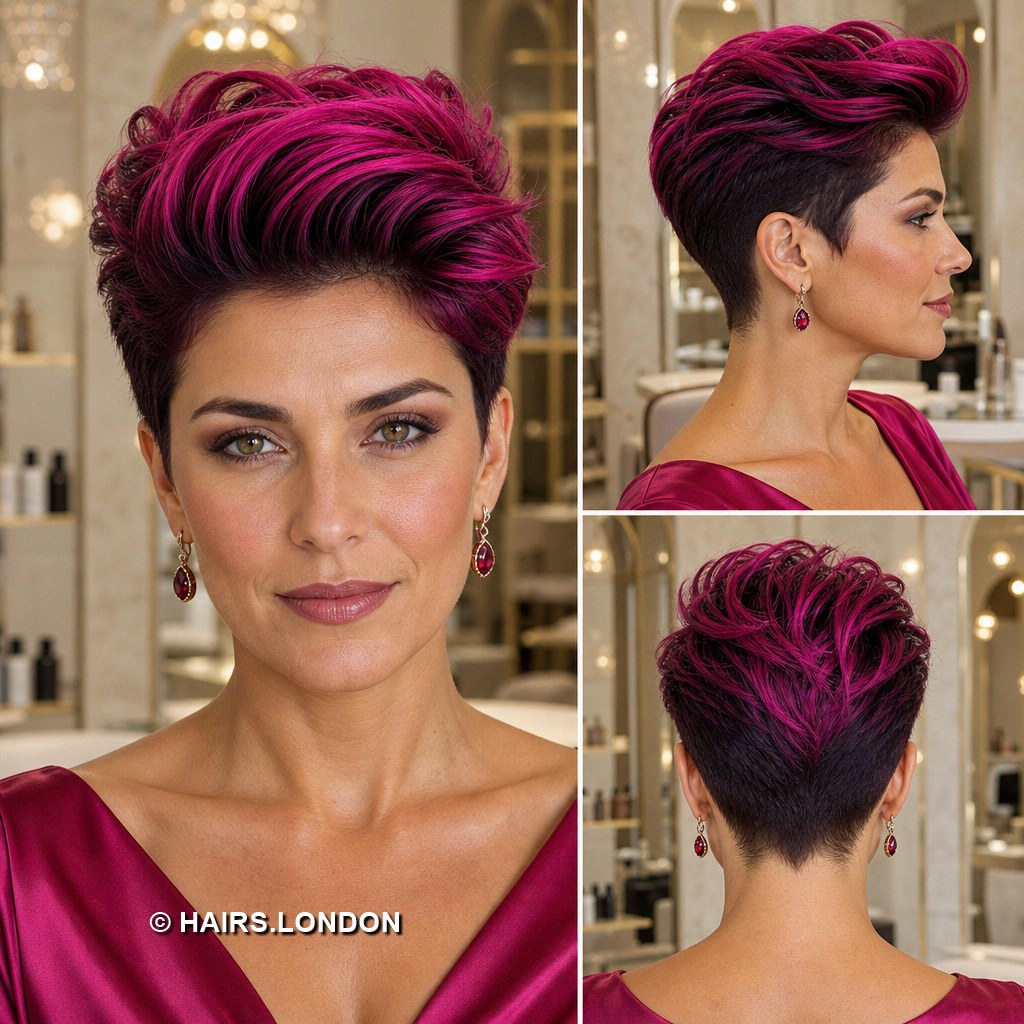
Fuchsia layers sweep upward and back, creating a full quiff above neatly shortened sides. Darker roots give the bright top depth, while the nape follows a compact outline. Ask your stylist to preserve enough front length for this rounded lift rather than cutting the crown uniformly short. During drying, direct the roots away from your forehead before guiding the ends backward. A light finishing product can support the shape without making it rigid. Discuss how much height your natural growth direction will allow. The vivid color needs its own consultation about preparation, fading, and the maintenance you want to manage.
2. Mahogany Curly Pixie with a Rounded Top
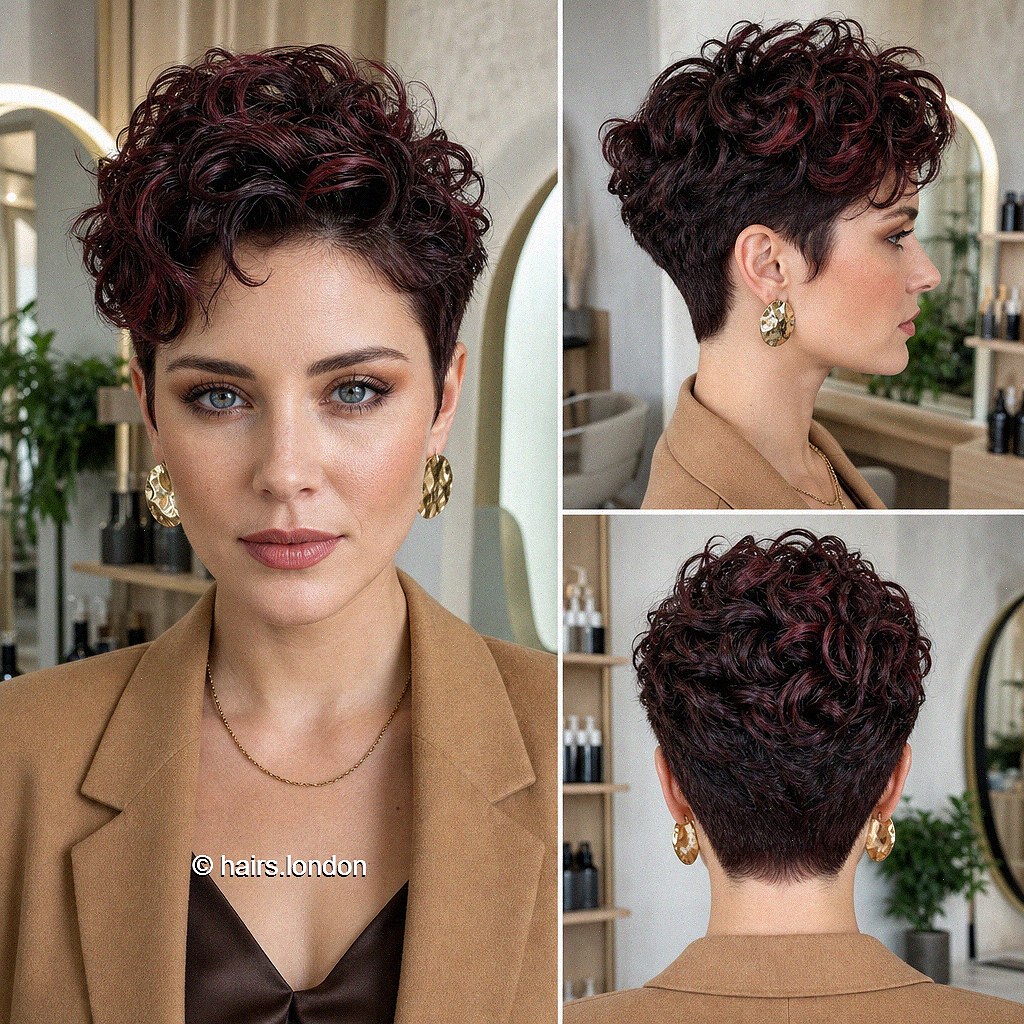
Mahogany curls form a rounded top above short sides, giving this pixie fullness without a long fringe. A few curls fall forward, softening the forehead and keeping the outline natural. Ask your stylist to consider curl shrinkage before agreeing on the finished length. Arrange damp hair with a modest amount of curl product, then let the groups settle as they dry. Fine curls may need less product near the roots. The back photograph shows where the fullness sits above the nape. Use that view to discuss whether you want a similarly rounded crown or a closer shape around the sides.
3. Flame Copper Undercut Pixie with a Choppy Fringe
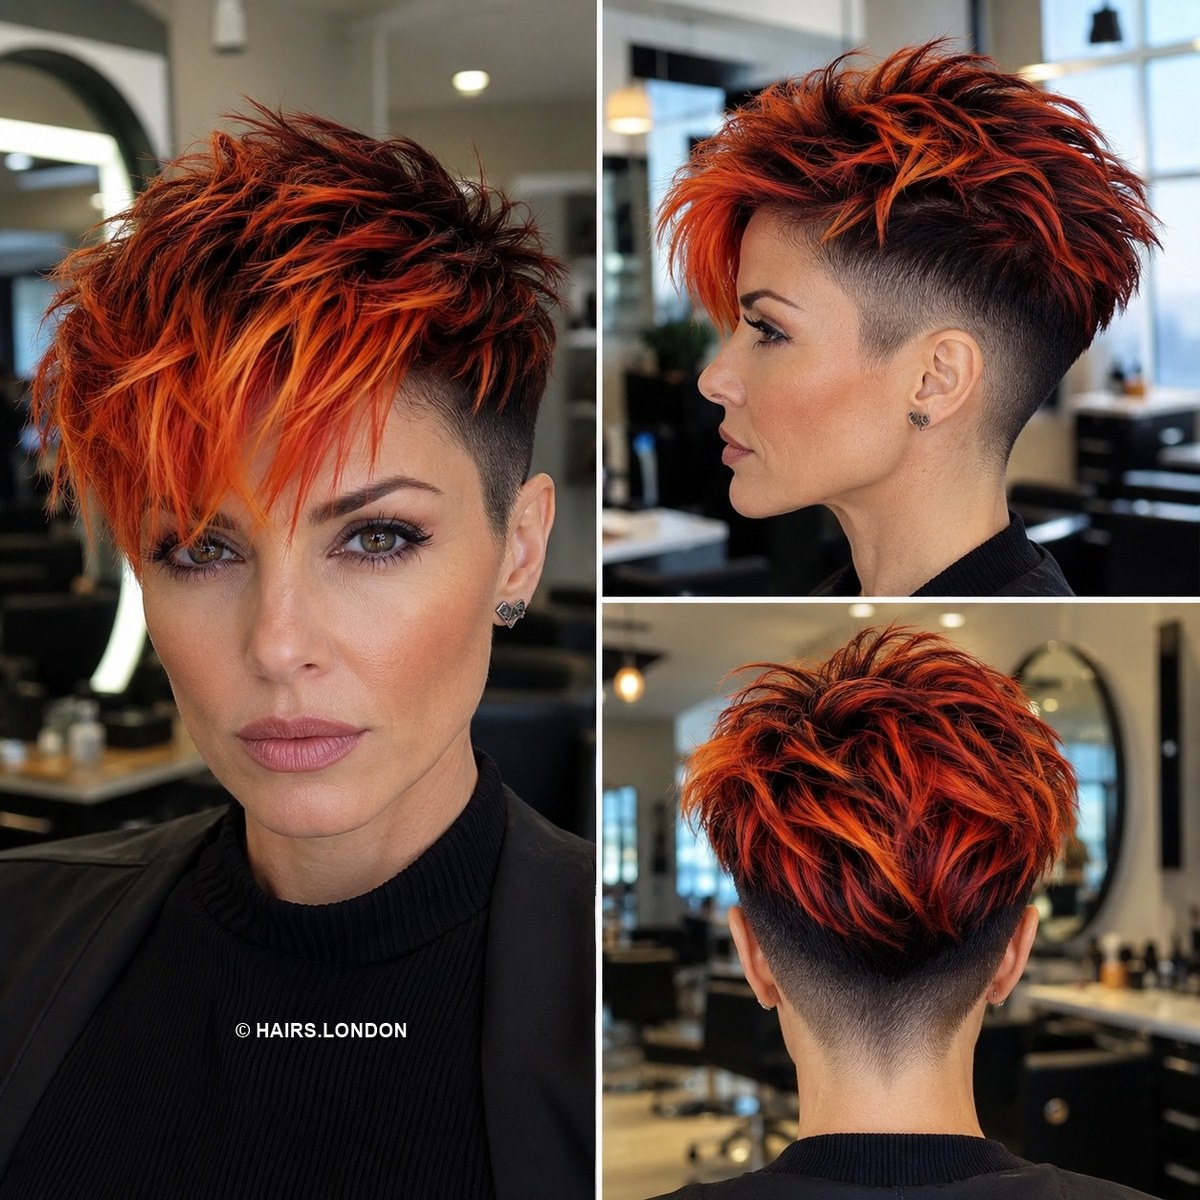
Flame copper pieces sweep across a dark base, emphasizing the choppy fringe and longer crown of this undercut pixie. The short side exposes the ear and makes the top look more pronounced. Ask your stylist how strongly you want those lengths contrasted when the hair falls naturally. Guide the fringe diagonally during drying, then use a little paste to separate selected ends. Keep enough density through the front so the copper pieces do not look sparse. Your colorist can place the brighter strands around your usual parting. Discuss fading and regrowth before choosing both the vivid tone and close perimeter.
4. Oat Blonde Pixie with a Brushed Back Front
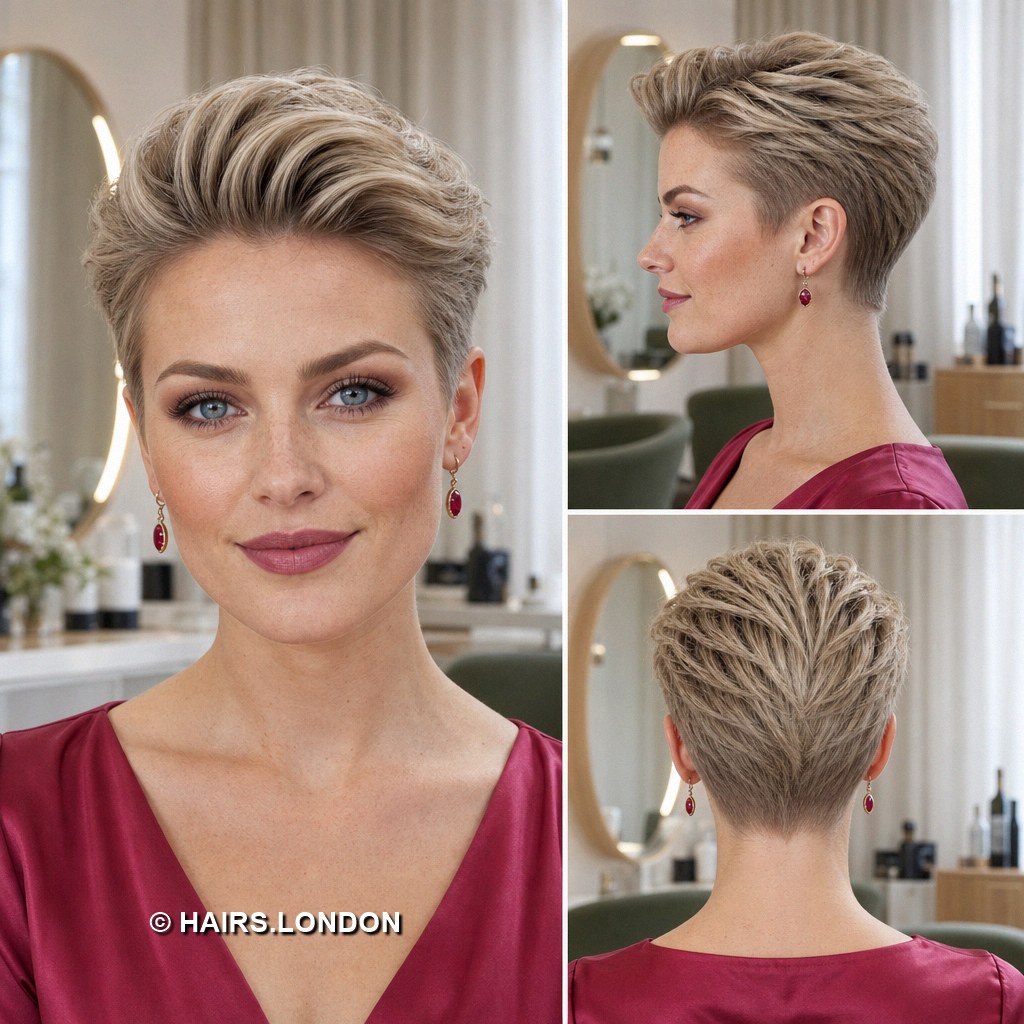
Oat blonde layers create a soft brushed back front above compact sides. The top has gentle lift, while the back follows the head without becoming bulky. This reference is useful if you want your forehead open but prefer a smoother finish to sharply pointed spikes. Ask your stylist to assess your hairline before committing to a backward direction. Lift the damp roots away from the face during drying, then guide the ends into place. A small amount of lightweight cream may help arrange the surface. The pale beige tone should be discussed with swatches, especially if you want minimal warmth.
5. Dark Chocolate Pixie with a Long Piecey Fringe
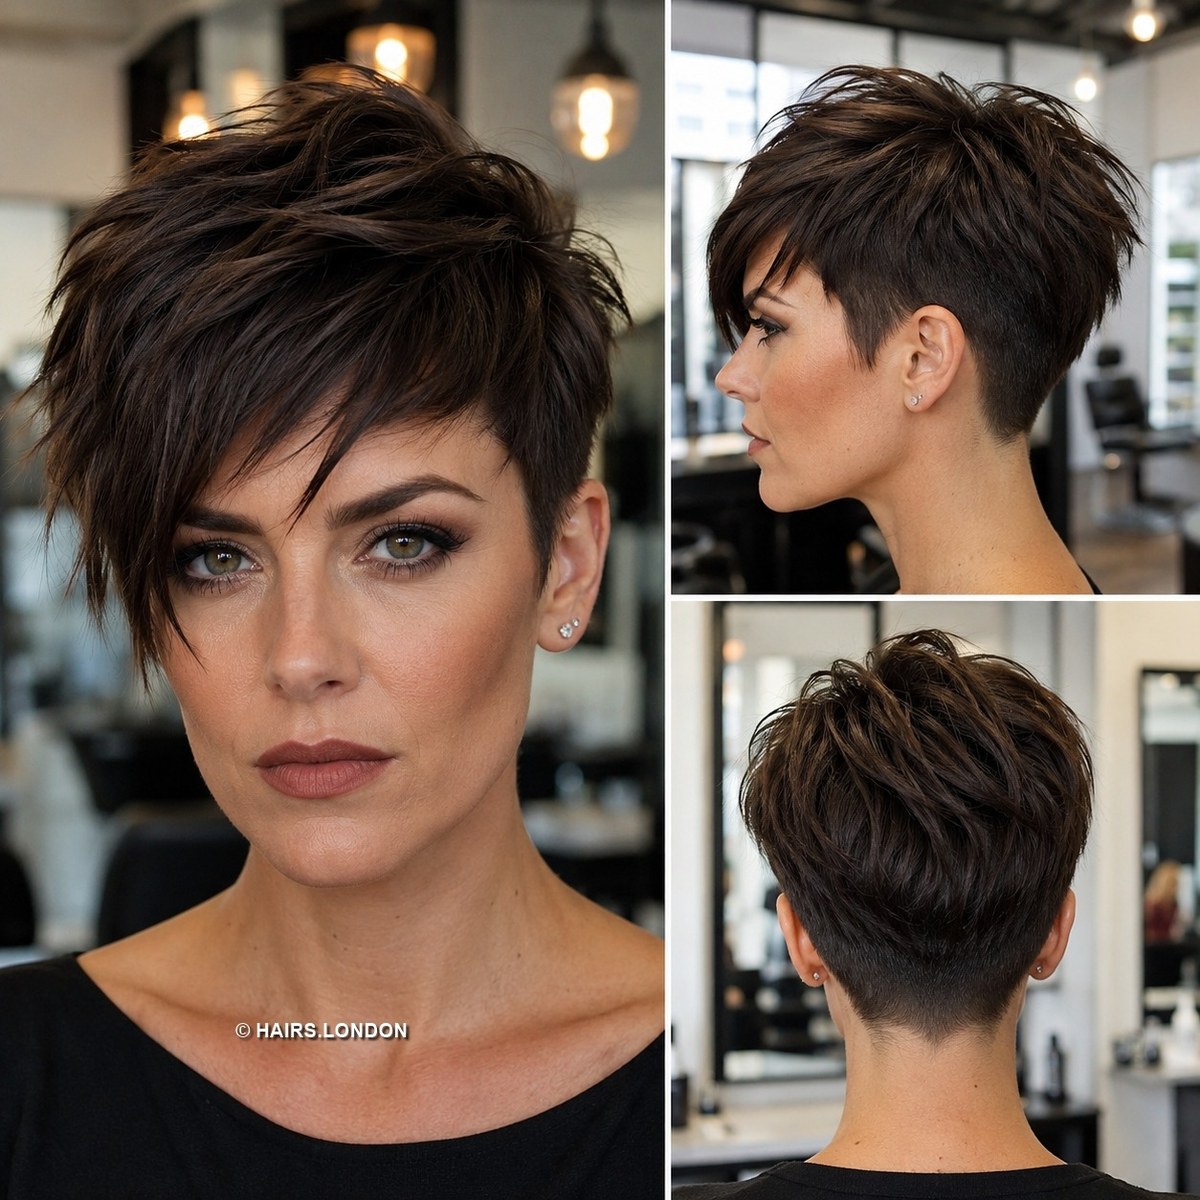
Dark chocolate layers fall into a long piecey fringe, giving this pixie a softer front above closely shaped sides. Subtle warmer strands reveal the movement without creating a strong color contrast. Ask your stylist where the fringe should finish when dry, and explain how much hair you enjoy near your eyes. Blow dry toward your preferred side, then separate a few ends with your fingers. Keep product light so the front remains flexible rather than greasy. The rounded back gives the upper layers support. Compare the side profile to decide how much coverage you want around the ear before cutting.
6. Coffee Brown Asymmetrical Pixie with a Close Side
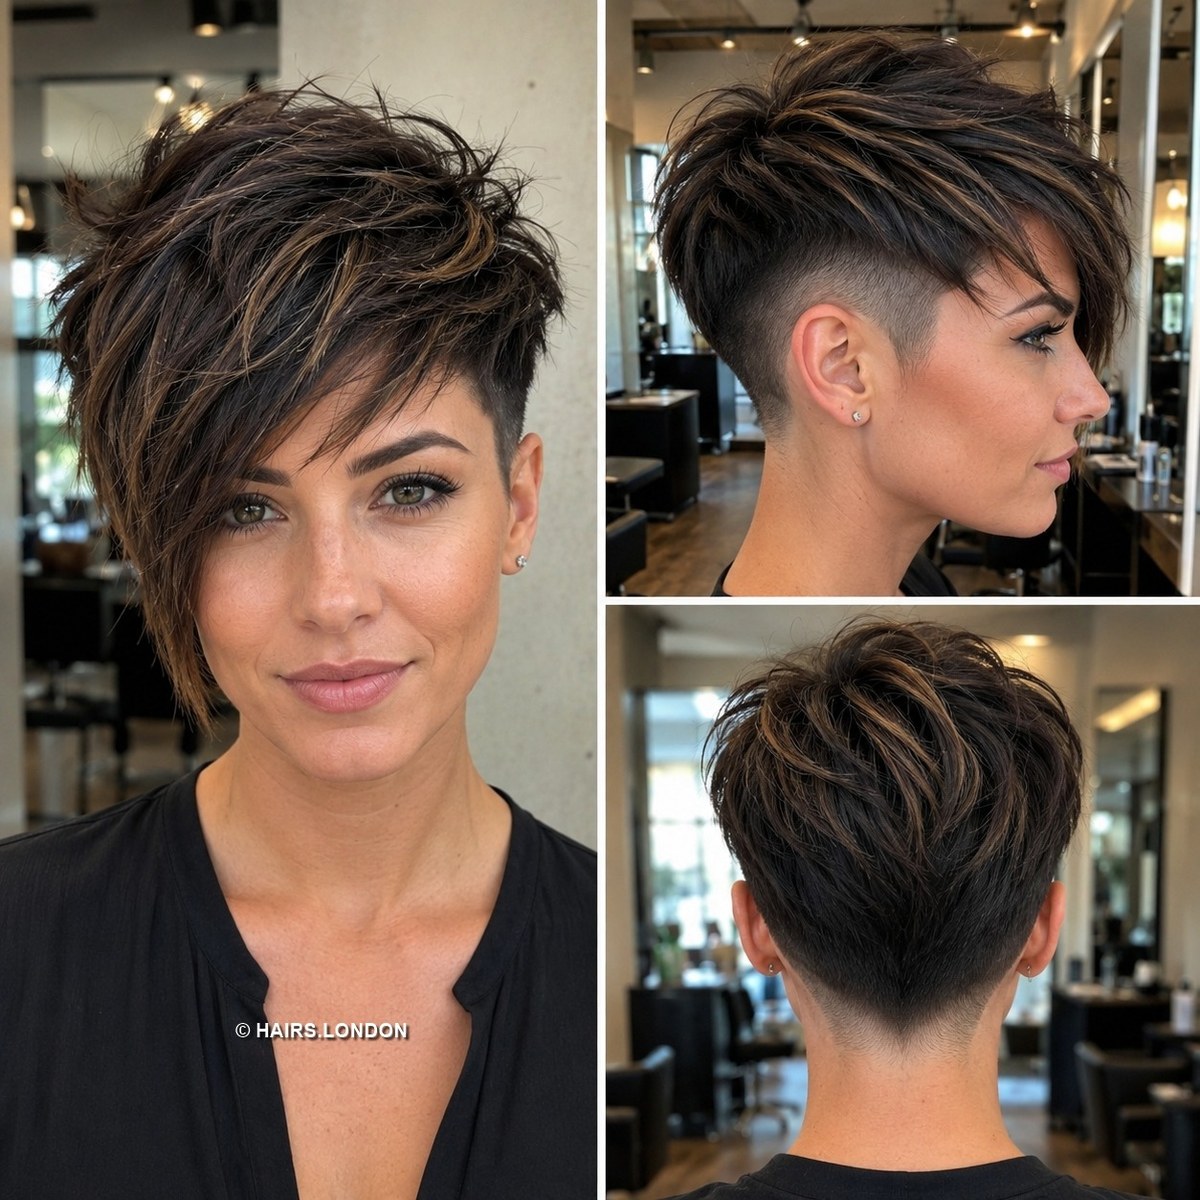
Coffee brown lengths sweep diagonally across the face, creating a longer fringe opposite a closely shortened side. The back stays compact, so the front becomes the main feature. Ask your stylist to agree on the degree of asymmetry before cutting, including how the haircut will look if you tuck the longer section behind your ear. Guide the fringe across during drying and use a small amount of paste on the ends. Avoid heavy root application, which can flatten the shape. Warm highlights follow the visible movement. Discuss your usual parting so the placement remains effective in the direction you wear.
7. Wheat Blonde Spiky Pixie with Soft Short Bangs
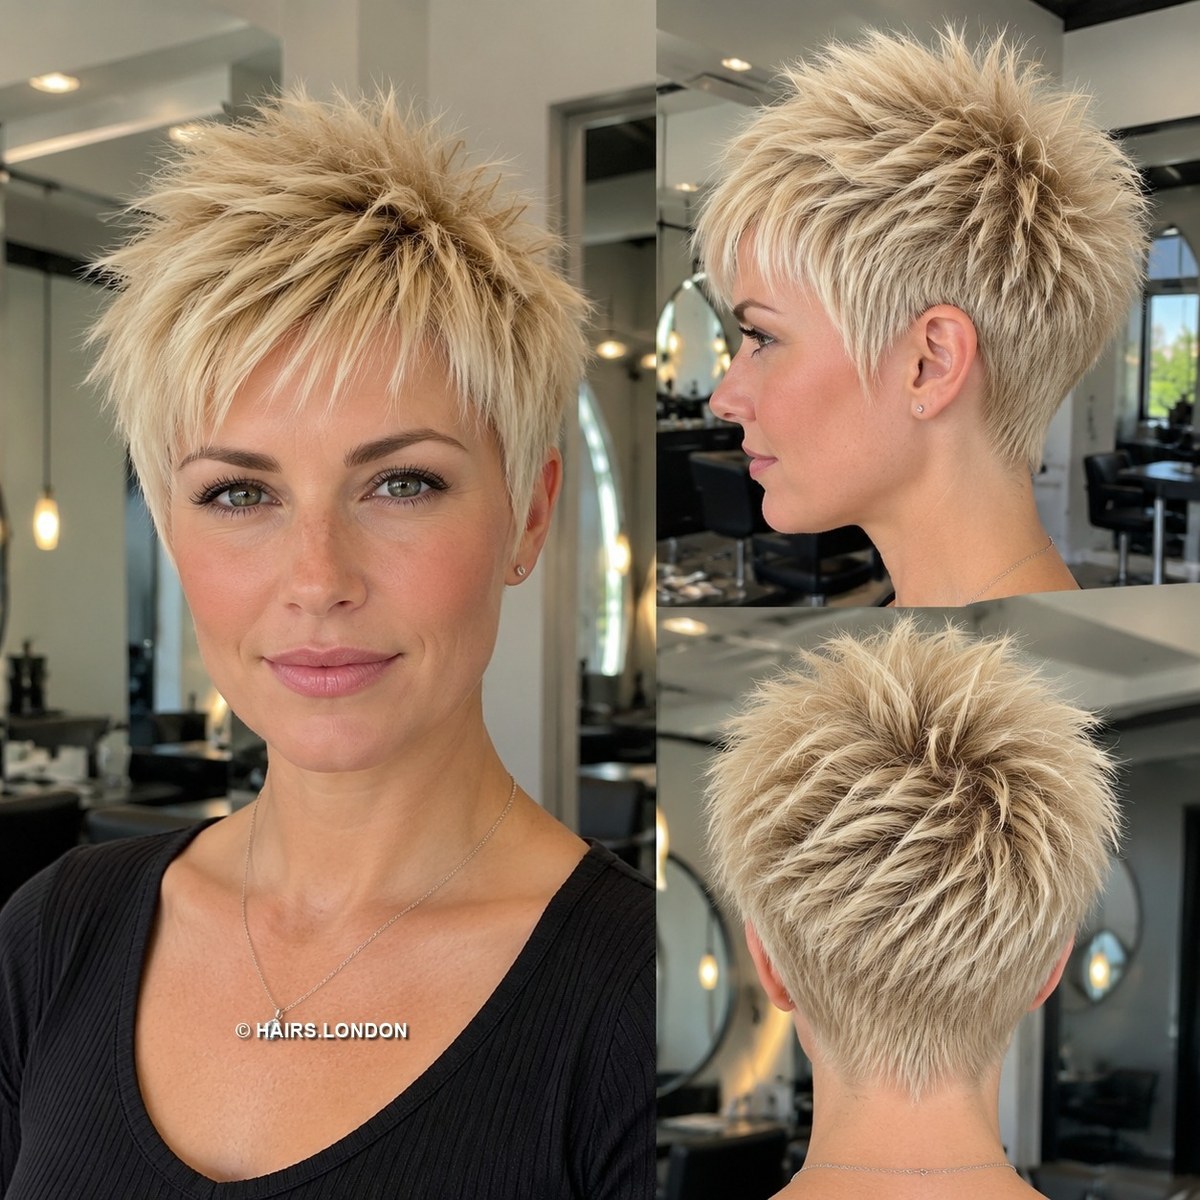
Wheat blonde layers give this spiky pixie a warmer finish, with short bangs softening the front and pale points rising through the crown. The sides are compact without making the upper shape look severe. Ask your stylist to preserve enough density on top, particularly if your strands are fine. Dry loosely with your fingers, then lift a few ends with a small amount of paste. A scattered arrangement can look softer than identical upright spikes. The back view shows a neat nape beneath the crown texture. Discuss how much of that pointed finish your hair will hold with minimal styling.
8. Ash Blonde Feathered Pixie with a Tapered Side
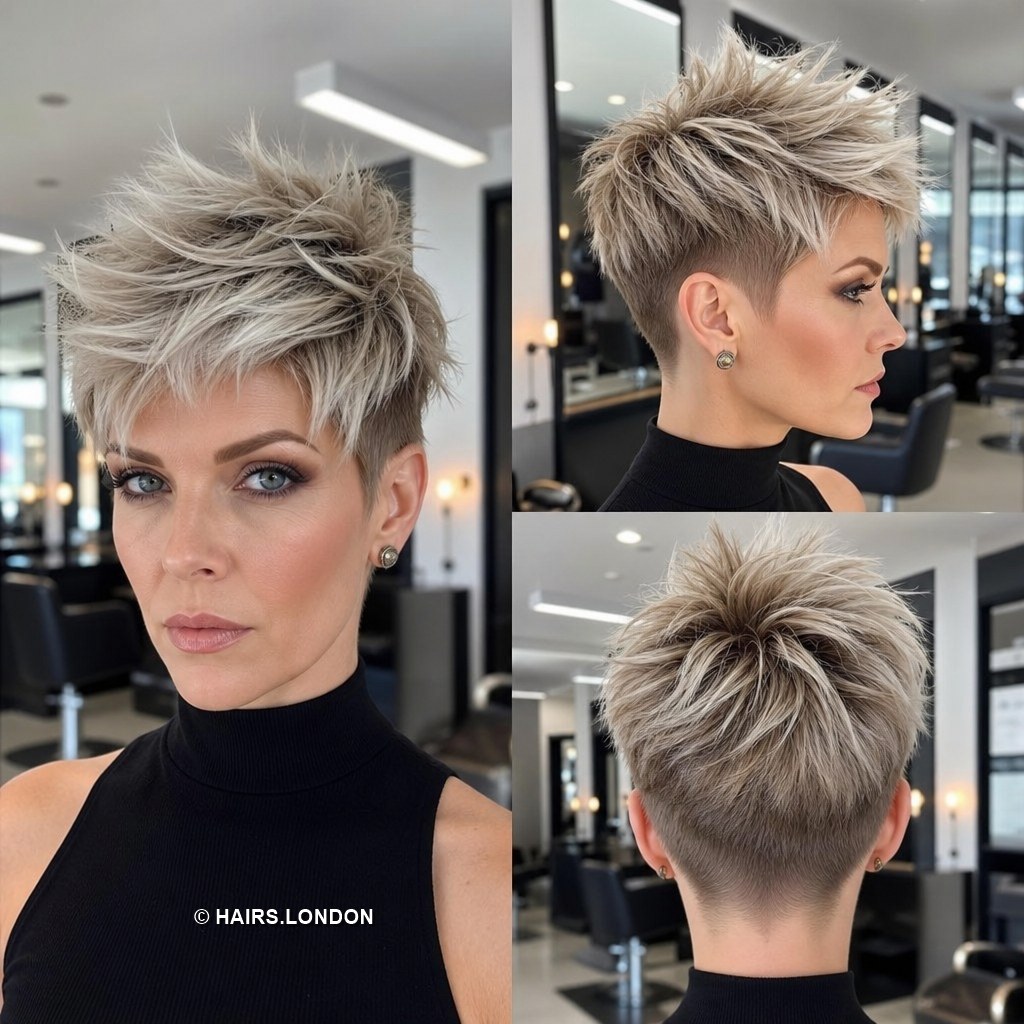
Ash blonde pieces sweep forward and sideways through this feathered pixie, with darker roots adding depth beneath the pale ends. The side profile shows a close taper that keeps attention on the longer crown. Ask your stylist to balance texture with fullness rather than thinning the entire top. Guide the fringe toward your usual parting during drying, then loosen the surface with your fingertips. Fine hair may need less product than dense hair to maintain movement. Bring the back photograph to show how rounded you want the upper outline. The cool color should be agreed separately from the haircut shape.
9. Muted Violet Bixie with a Rounded Crown and Fringe
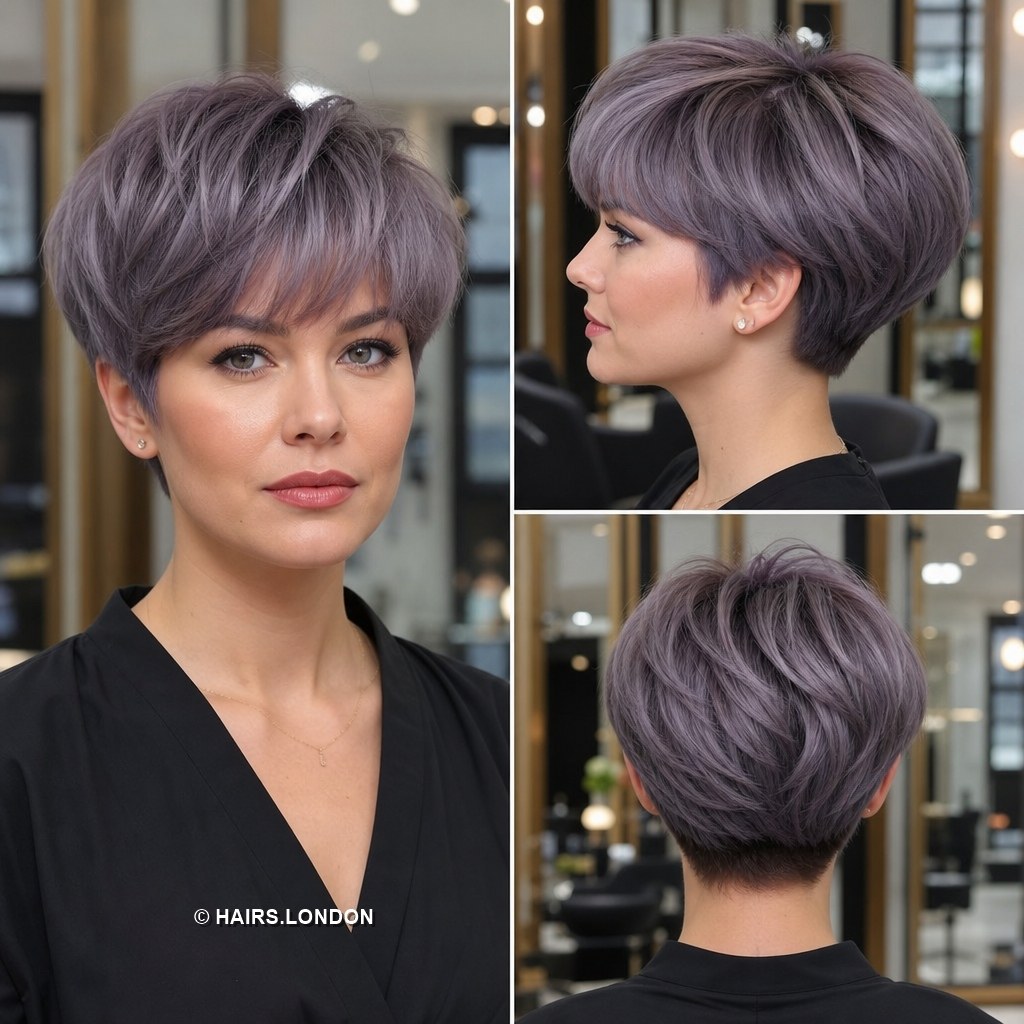
Muted violet layers create a rounded crown and fuller fringe, placing this look between a long pixie and a compact bob. The sides retain more coverage than the tightly cropped styles, while the nape remains shaped. Ask your stylist to discuss a bixie silhouette using the photographs, since salon names can vary. The front should sit comfortably when dry without requiring constant adjustment around your eyes. Guide the fringe sideways with a brush, then loosen the ends. This shape offers softness and visible fullness. Discuss whether your density supports the rounded outline before deciding how much internal layering to add.
10. Orchid Purple Spiky Pixie with a Lifted Front
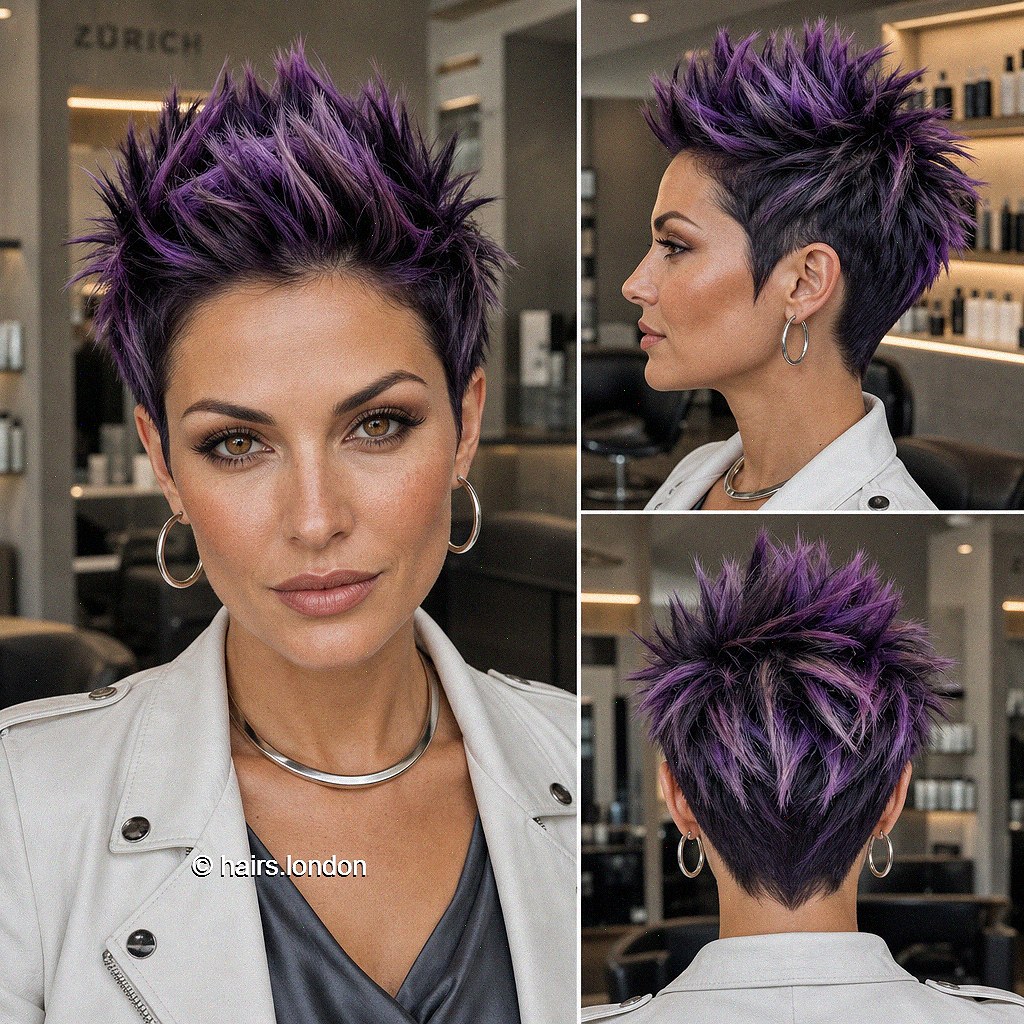
Orchid purple tips stand out above a dark base, giving this spiky pixie height through the front and crown. Short sides keep the overall profile narrow despite the lifted texture. Ask your stylist to leave enough upper length for flexible definition, particularly if you sometimes want a softer finish. Set the roots upward during drying, then pinch selected ends with paste. Avoid coating every section heavily, which can make the surface rigid. Color placement should follow the visible top rather than disappear beneath it. Discuss the preparation needed for the purple and how the contrast will change as hair grows.