


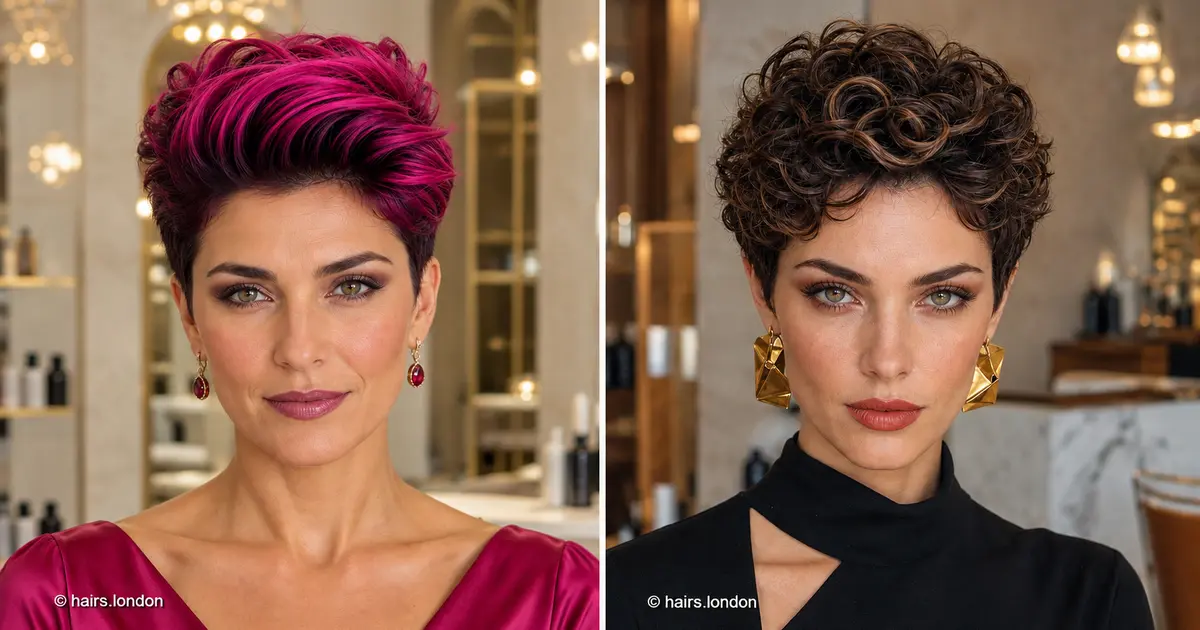
11. Cherry Red Curly Pixie with Defined Crown Curls
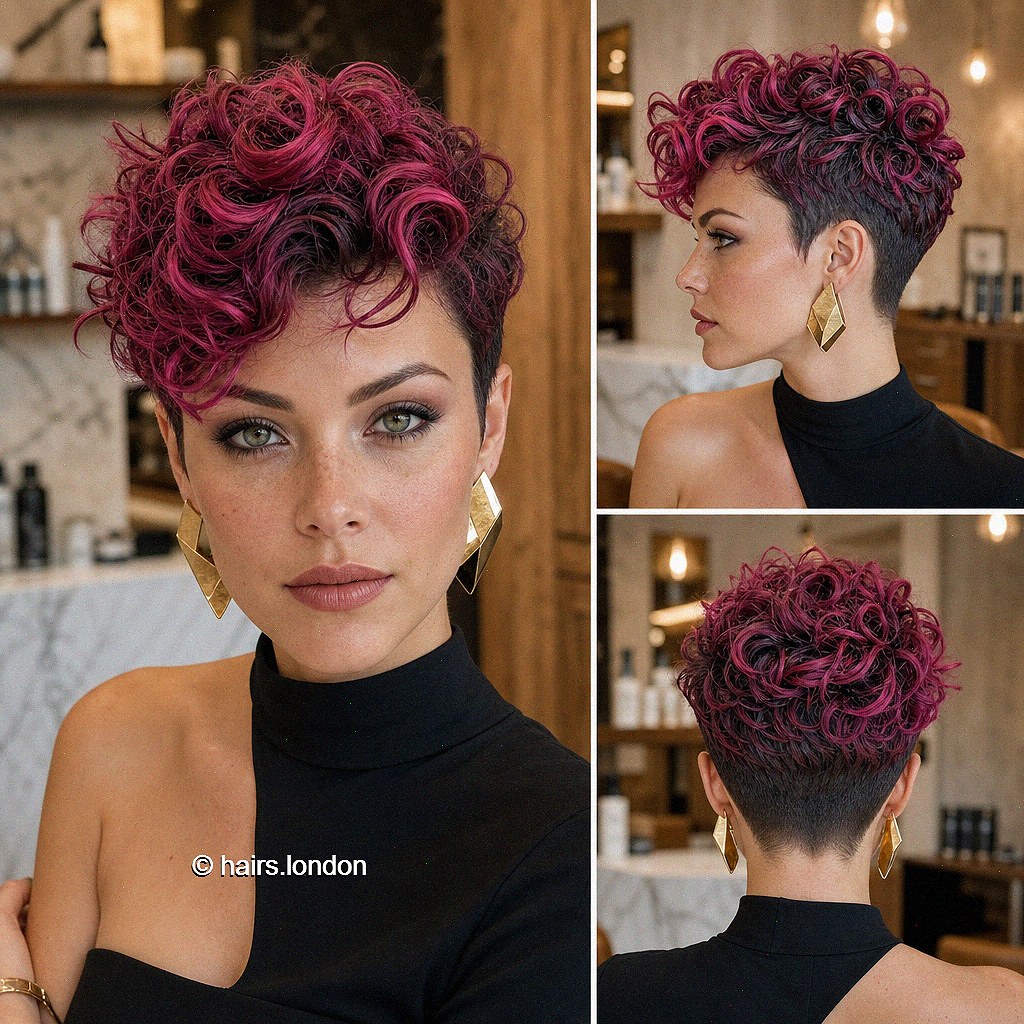
Cherry red curls add definition to this rounded pixie, with a few pieces falling toward the forehead above neatly shortened sides. Darker areas between the curls keep the vivid tone dimensional. Ask your stylist to plan the length around your own curl pattern and shrinkage. Distribute a little curl product through damp hair, then avoid repeatedly separating the groups while they dry. Once set, adjust only the pieces that need attention. The back view helps explain where you want fullness retained. Discuss the red tone independently from the cut, including how brightly you want it to read in everyday daylight.
12. Beige Blonde Swept Pixie with Dimensional Layers
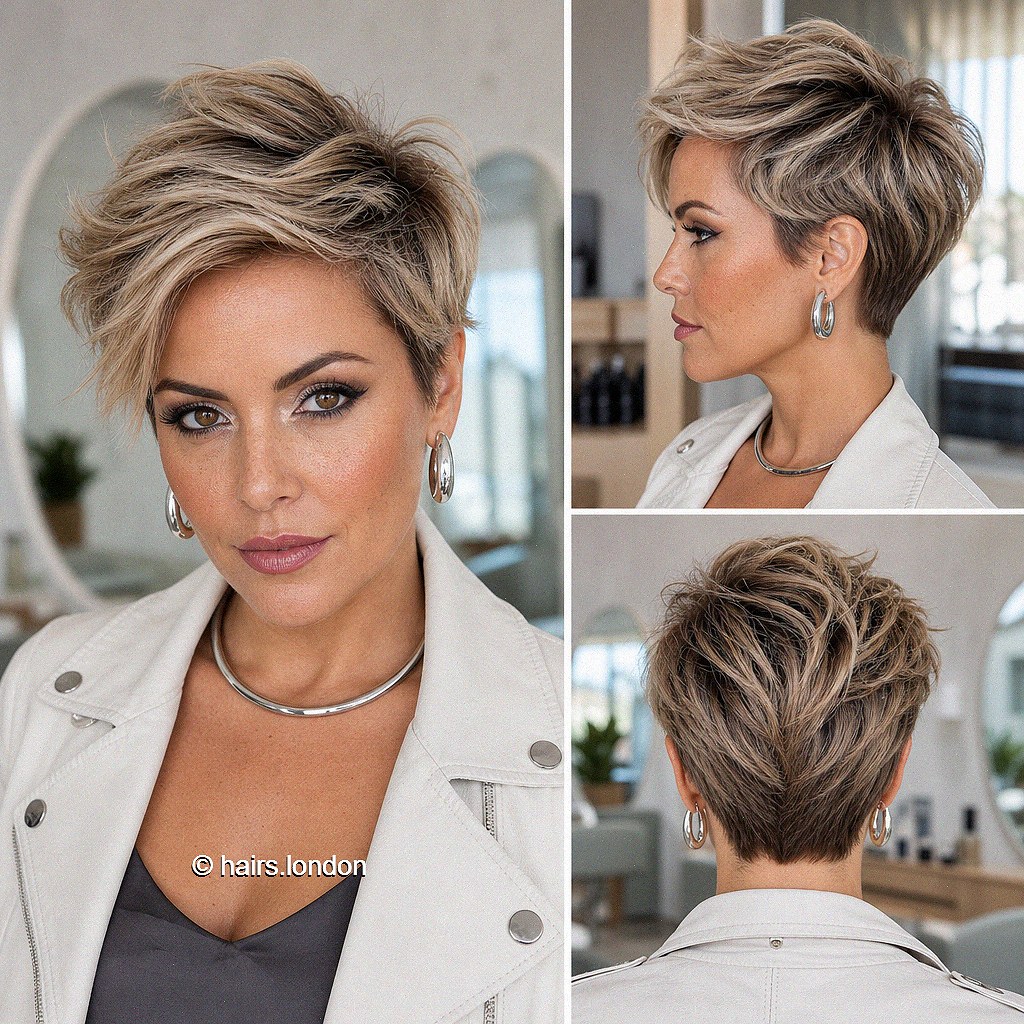
Beige blonde layers sweep across a darker base, giving this pixie soft dimension and a fuller front. The crown is rounded above a tidy nape, with enough texture to avoid a solid helmet shape. Ask your stylist to preserve density through the fringe while refining the ends. Guide the front sideways during drying, then arrange it loosely with your fingers. If a finishing cream makes the crown collapse, use less or discuss a lighter product texture. The side photograph is helpful for choosing your ear coverage. Highlight placement should follow your usual sweep so the pale pieces remain visible throughout.
13. Sand Blonde Textured Pixie with a Longer Front
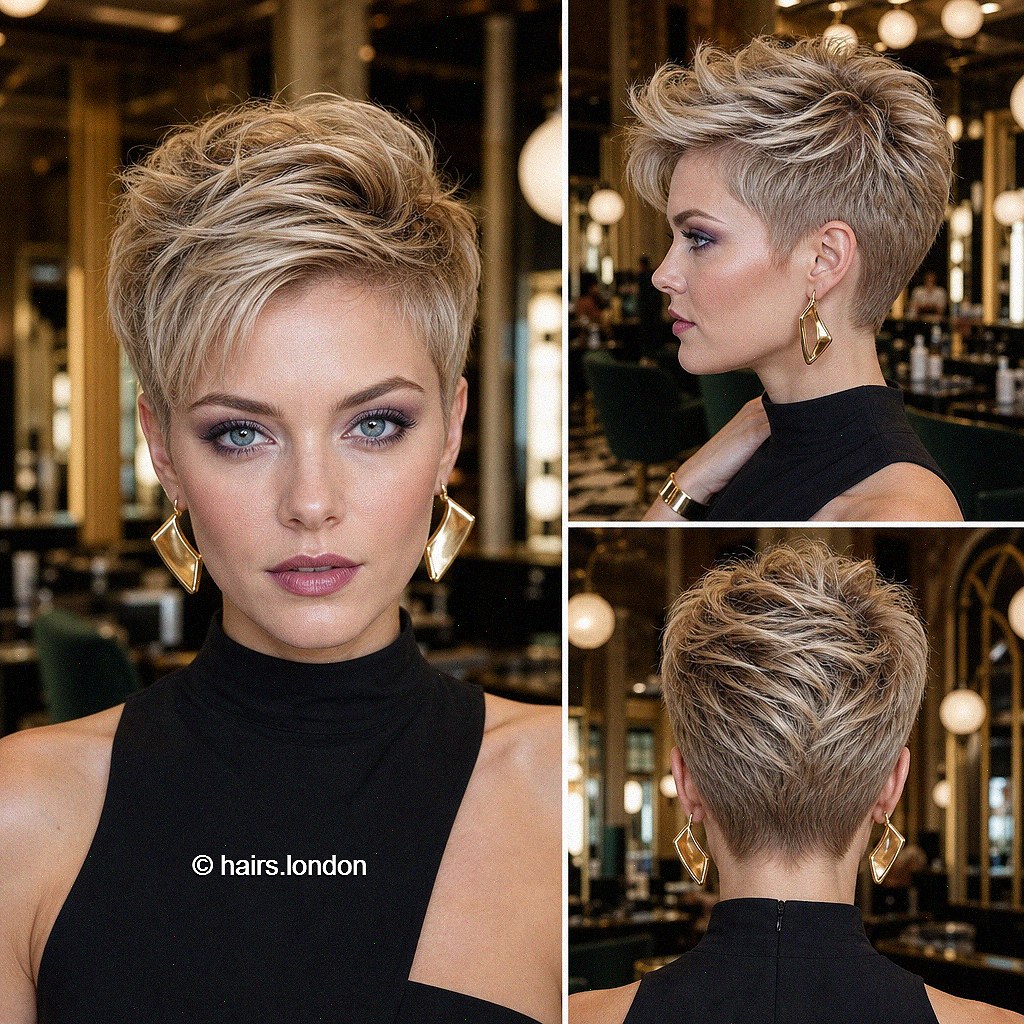
Sand blonde layers lift gently through this textured pixie, while the longer front provides a soft diagonal frame. The sides are shortened, and the back narrows below a rounded crown. Ask your stylist to connect the upper layers smoothly with the perimeter rather than remove weight everywhere. Blow dry in your preferred direction, lifting lightly at the roots before settling the fringe. A small amount of paste can pick out the ends without making them stiff. This reference suits a discussion about fullness with controlled texture. Compare the back view to decide how closely you want the nape shaped initially.
14. Burgundy Swept Pixie with a Long Curved Fringe
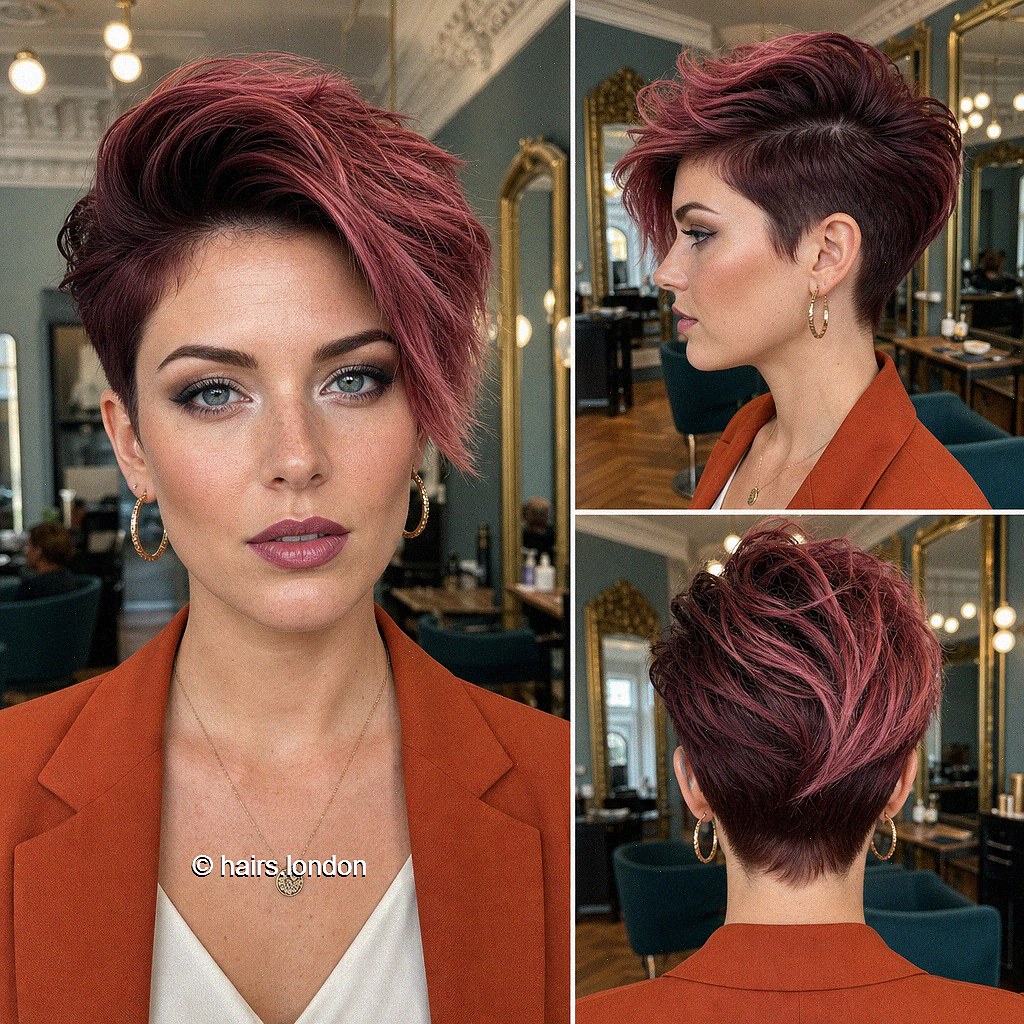
Burgundy lengths curve across the forehead, giving this pixie a longer, smoother front above closely shaped sides. The darker base supports the rich red tone, while a rounded back balances the sweeping fringe. Ask your stylist where the longest section should finish when dry and how you want the shorter side blended. Direct the front diagonally during drying, then loosen the ends so the curve retains movement. Keep finishing product mainly on the areas that need smoothing. This shape can be adapted with a shorter fringe if you dislike eye coverage. Discuss color depth using salon swatches before the appointment.
15. Slate Gray Layered Pixie with a Soft Side Fringe
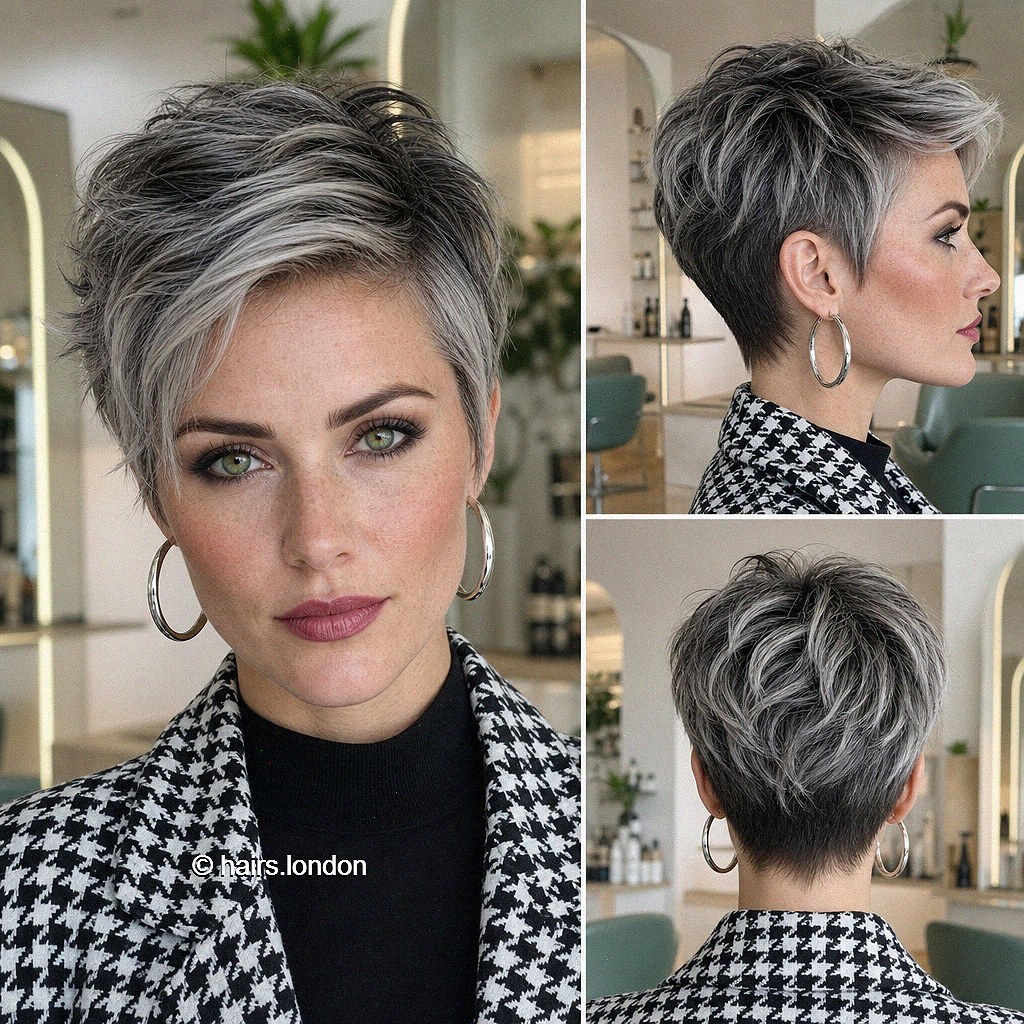
Slate gray layers sweep into a soft side fringe, with lighter pieces outlining the movement above a darker nape. The rounded crown and controlled sides make the shape feel fuller than a close crop. Ask your stylist to balance the top with your density, keeping enough substance through the front. Guide the fringe sideways during drying, then separate selected ends lightly. Naturally gray hair may supply similar dimension, although its pattern and texture will differ. Discuss whether any tonal adjustment would help rather than assume coloring is necessary. Bring the side view to agree on the coverage around your ears.
16. Pearl Silver Curly Pixie with a Soft Taper
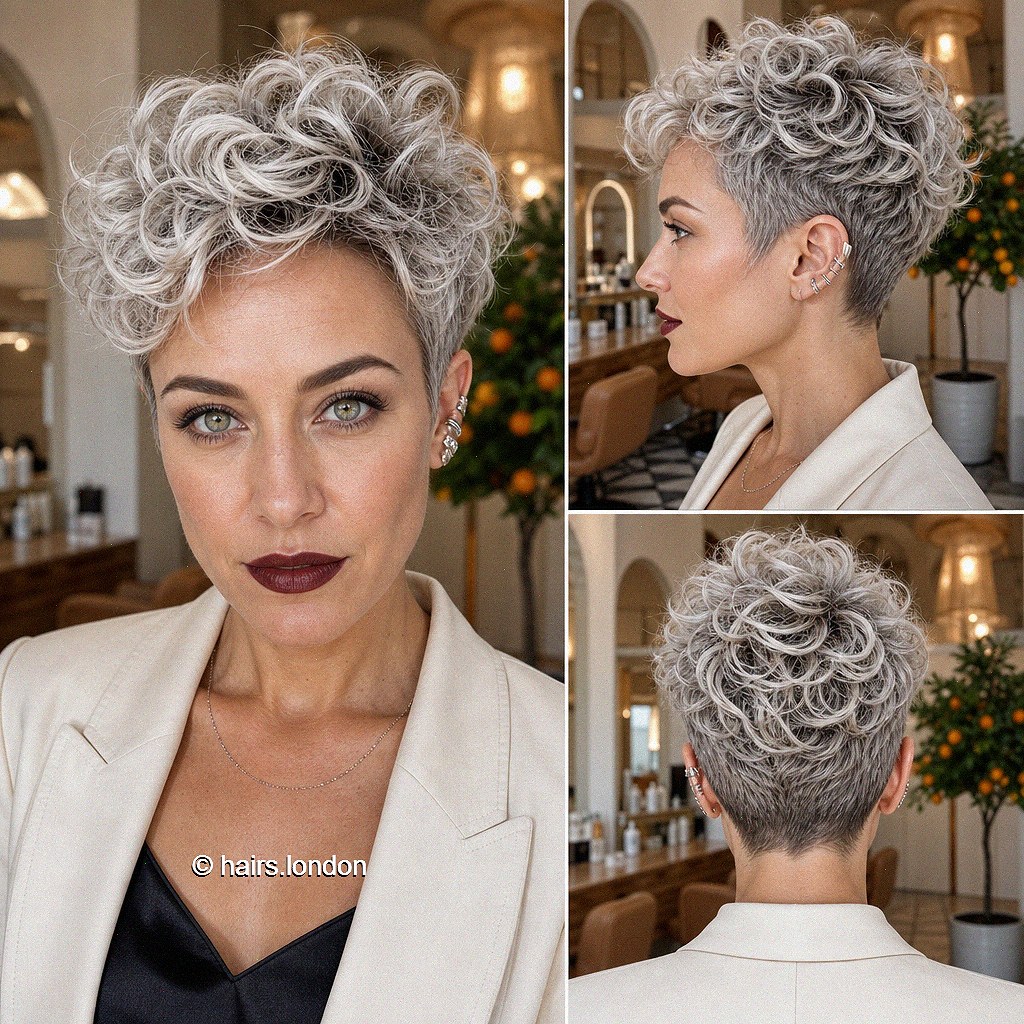
Pearl silver curls form a full crown above softly tapered sides, giving this pixie movement without a long sweeping fringe. A few curls fall forward to frame the forehead. Ask your stylist to decide the length with shrinkage in mind and explain how you normally dry your hair. Arrange damp curls with a modest amount of product, then let them settle without repeated touching. The back view shows a rounded upper shape above a neat nape. If your curls are fine, preserve enough density to maintain that outline. Discuss silver tone separately, especially if your starting color is substantially darker.
17. Amber Copper Pixie with a Tall Textured Quiff
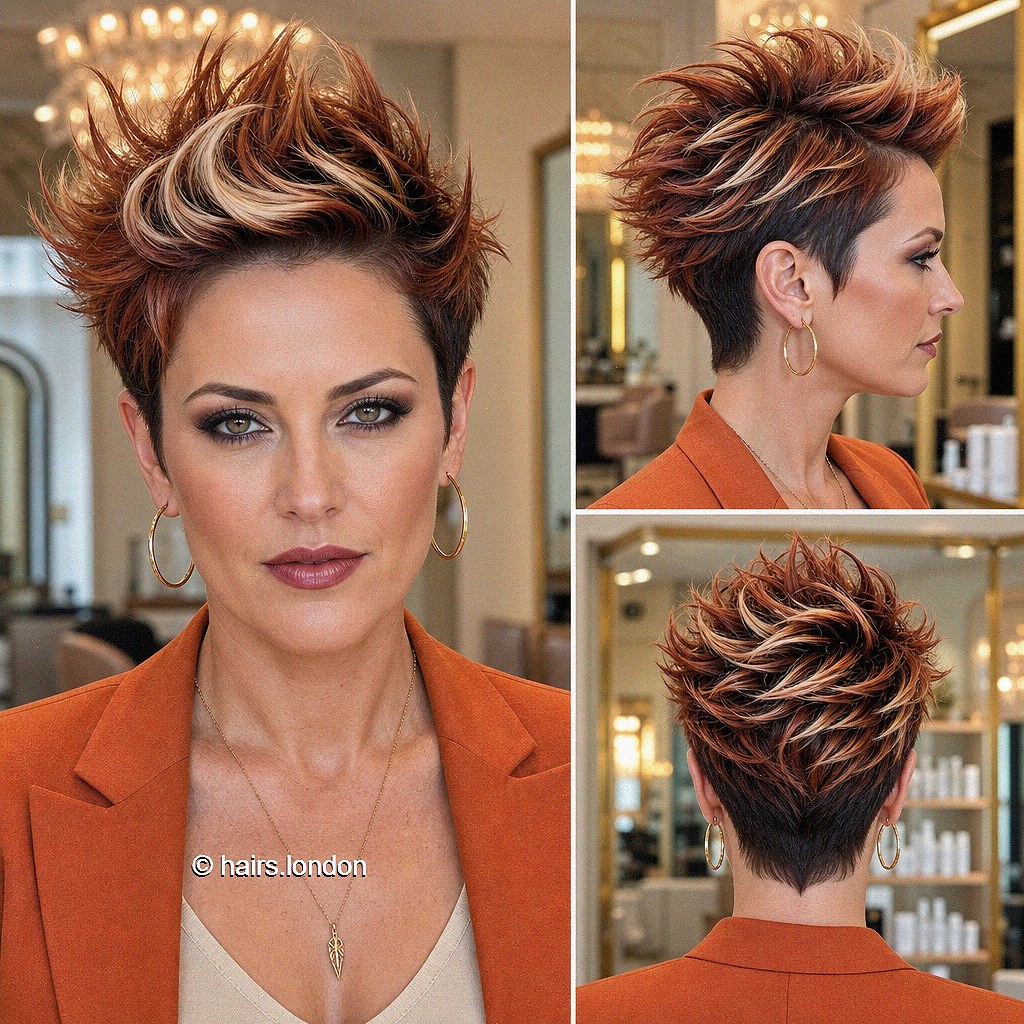
Amber copper highlights follow the tall quiff in this pixie, creating warm contrast above darker roots and short sides. The top has defined pieces rather than one completely smooth surface. Ask your stylist how much front length your hair needs to support this height. Lift the damp roots away from the forehead during drying, then guide the ends backward. A small amount of paste can define selected sections. If you prefer less daily styling, discuss a lower version of the same shape. Color placement should follow the lifted layers so the warm pieces remain visible when the front is arranged.
18. Cocoa Brown Curly Pixie with a Rounded Fringe
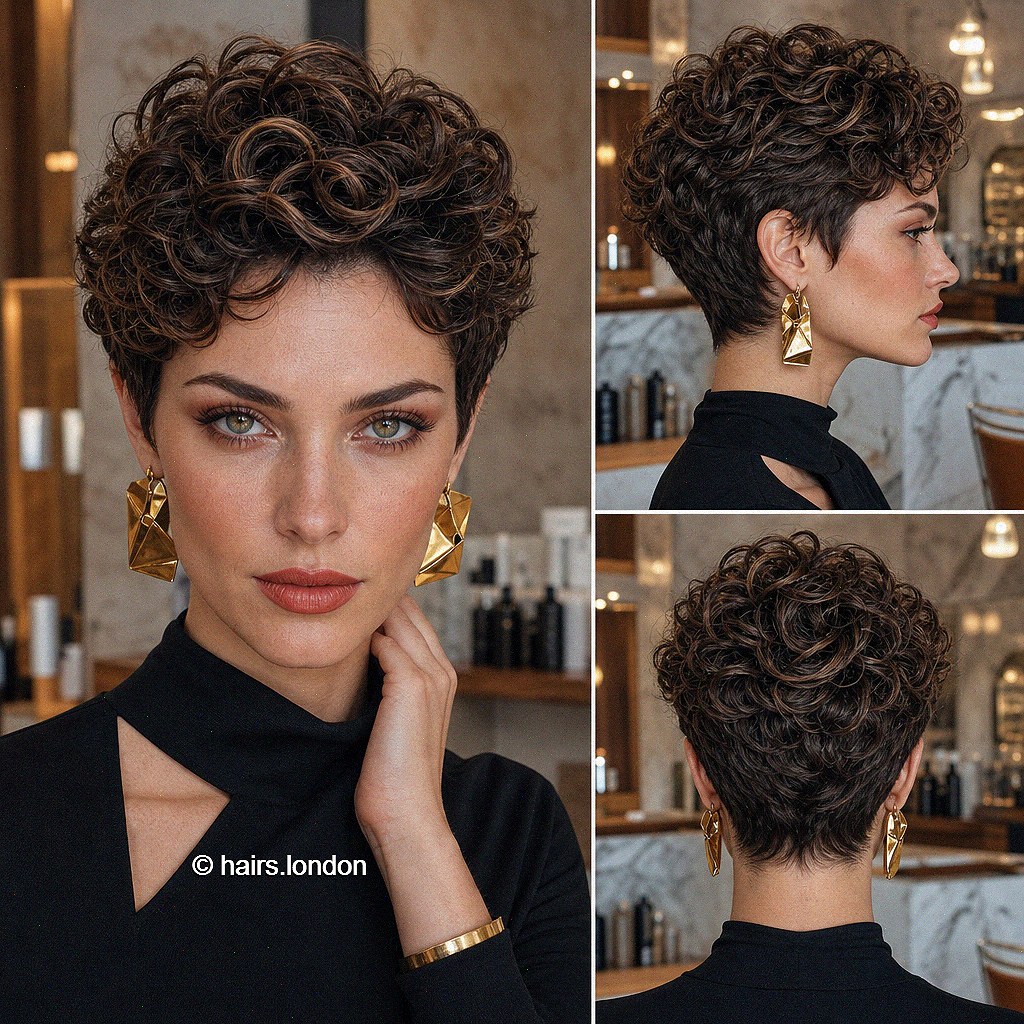
Cocoa brown curls give this pixie a rounded crown, with soft pieces resting across the upper forehead. Warm highlights trace the curl groups without overwhelming the dark base. Ask your stylist to consider your texture when shaping the front, since curl shrinkage affects both length and coverage. Arrange damp hair gently with a little curl product and allow the groups to settle. Avoid raking through the finished surface if you want definition. The back photograph is useful for discussing fullness above the nape. Decide how close you want the sides before settling on the overall balance of the curly shape.
19. Walnut Brown Spiky Pixie with a Short Open Fringe
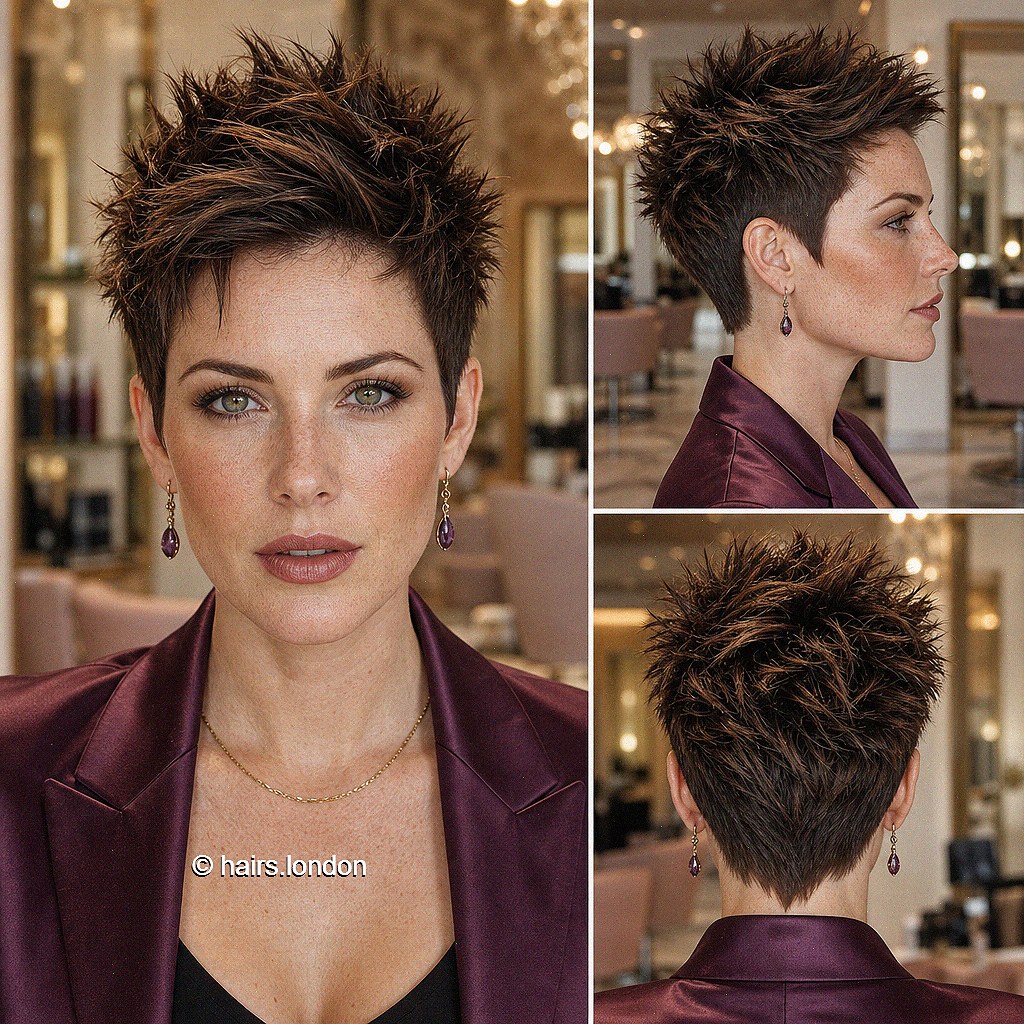
Walnut brown pieces rise through this short spiky pixie, creating an open front and a compact outline around the ears. Subtle lighter ends make the textured crown easier to see. Ask your stylist to preserve enough support through the top rather than thin every section heavily. On dry hair, warm a little paste between your palms and lift selected ends. Check the shape before adding more product. If your hair naturally falls forward, discuss the styling needed to achieve this upright direction. The back view shows how the crown texture sits above a neat nape, which helps clarify your preferences.
20. Rose Quartz Pixie with a Lifted Wavy Crown
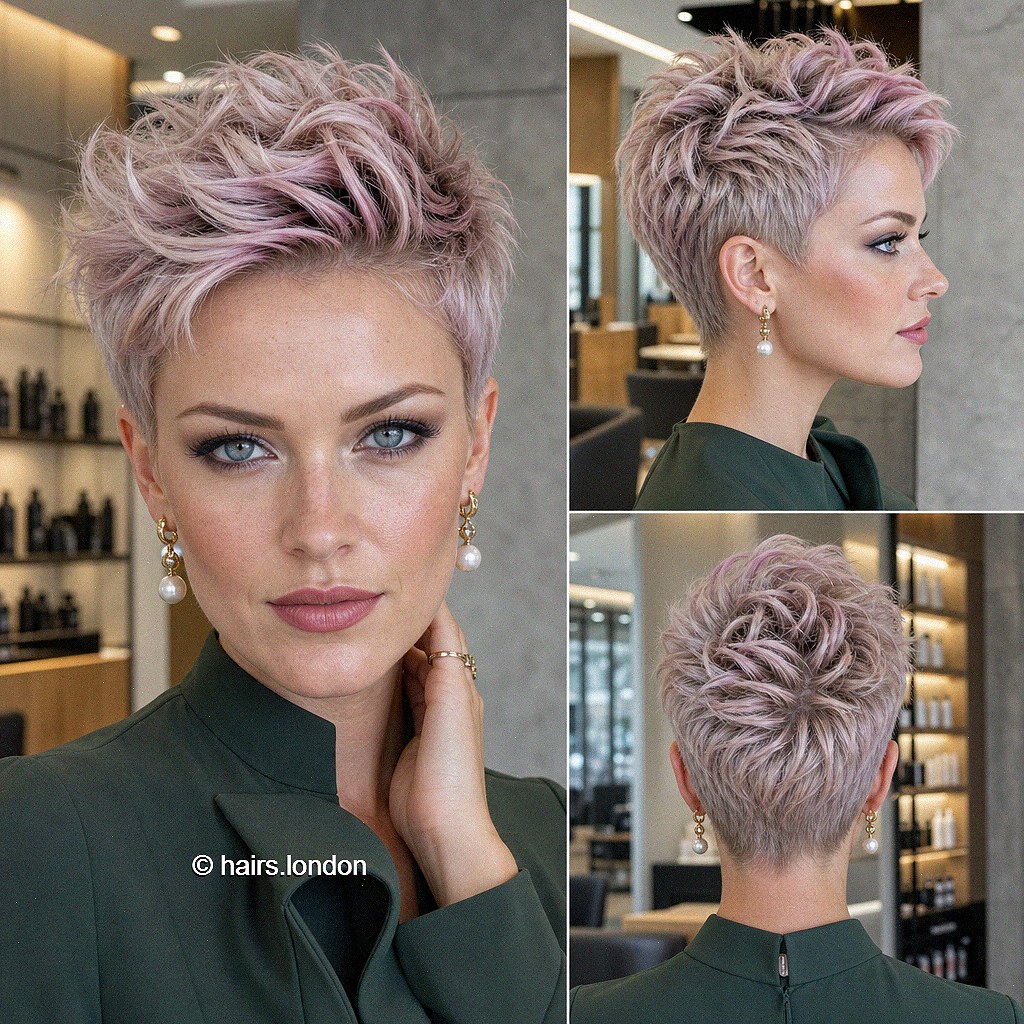
Rose quartz tones give this pixie a muted pink finish, while loose waves create lift through the crown. The sides stay compact, allowing the upper texture to carry the shape. Ask your stylist to leave enough length for your natural movement to show rather than expect wave from a uniformly short crop. Guide the front away from your face during drying, then arrange the surface gently. A little lightweight cream can soften the ends. Discuss the pale tone with swatches, distinguishing a pink reflection from cooler lavender or silver. The back view helps agree on fullness above the shaped nape.
Choose crown fullness according to your hair
Fine hair needs support as well as movement
Too many short or heavily thinned layers can make fine hair look sparse at the ends. Ask where your pixie needs to retain density before deciding how much texture to add. The beige swept style and slate layered pixie show softer upper shapes to discuss. A fuller fringe may give you a different balance from widely separated spikes, even when both cuts are short around the nape.
Thick hair needs the right areas controlled
If your hair expands around the ears or upper back, removing selected weight may be more useful than shortening the whole crown. Explain where the bulk bothers you and whether you want the sides clipped or shaped with scissors. The flame undercut and coffee asymmetrical pixie show stronger contrasts between lengths; the rounded layered looks offer a softer perimeter. Ask your stylist which approach suits your growth pattern.
Curls need a dry length that makes sense
The mahogany, cherry, pearl silver, and cocoa curly pixies each keep enough upper length for visible curl groups. Your own pattern determines how much room those curls need. Discuss shrinkage and show how you usually arrange your hair after washing. If you air dry most days, the silhouette should be planned around that result rather than depend on stretching the curls into a different shape.
A longer top does not always need a high quiff
The fuchsia and amber quiffs use their upper length for lift, but longer crown layers can also be directed sideways or loosely backward. Ask your stylist to demonstrate a lower, softer finish. Having a second styling option makes the haircut easier to wear on days when you do not want a carefully sculpted front.
How to decide on your fringe and side coverage
A long fringe offers a strong diagonal line, but it should finish where you find it comfortable. The dark chocolate, coffee, and burgundy looks keep more length at the front than the short wheat blonde crop. If hair near your eyes bothers you, say so before cutting. A shorter sweep can keep the same direction without relying on product to hold an awkward length away.
Side coverage deserves its own decision. A close taper exposes the ear and emphasizes the top; longer temple pieces soften the profile. Wear your glasses during the consultation if you use them regularly, and check how the hair meets the frames. Your stylist can then adjust the fringe and temple lengths together.
Color can help the layers read more clearly
Lighter pieces across a darker crown outline the movement in the beige, ash blonde, and walnut pixies. Copper tips make the amber quiff more defined, while cherry tones help individual curl groups stand out. Placement should follow the areas you actually expose in your usual parting and styling direction. A few carefully placed pieces may achieve the effect you want without an all over color change.
For fuchsia, orchid, and pale rose quartz tones, ask what your starting shade allows and how much preparation the result needs. Discuss the brightness, likely fading, and your comfort with regrowth. The color and cut may need attention at different times, so agree on both routines before committing to the complete pictured look.
Three styling approaches for layered pixie haircuts
For a quiff establish lift at the roots
Begin with the front damp enough to redirect. Lift the roots away from your forehead during drying, then guide the longer ends backward. Finish with only enough product to support the shape. Adding paste to a front that has already dried flat may make the surface heavier without giving the roots the direction you want.
For a swept fringe keep the ends flexible
Guide the front diagonally toward your preferred side, leaving some lift at its base. Once dry, loosen the ends with your fingertips so the fringe moves rather than sits as one solid section. If you keep needing to push it away from your eyes, ask about the length and shape before trying stronger hold.
For curls let the groups settle
Arrange damp hair with a modest amount of curl product, then avoid repeated touching as it dries. Once the curls are set, adjust only the pieces that need attention. Fine curls can be weighed down quickly, so start with less product. Ask your stylist to show how to refresh the front without pulling apart the whole crown.
Keeping the haircut balanced as it grows
Watch which part of your pixie changes first. A short side may lose its tidy outline before the top needs reshaping, while a longer fringe can become difficult to place even when the back still looks good. Ask whether a small perimeter cleanup would help between fuller appointments. Your growth rate, density, and preferred precision should guide the timing.
If you want to move toward a longer pixie or bixie, tell your stylist which sections you want to keep growing. The nape can be tidied selectively while the front and sides gain length. A rounded crown may need small adjustments to avoid collecting too much bulk as the shorter perimeter catches up.
What makes a useful salon reference
- Show the front, side, and back of the same hairstyle so the silhouette is clear
- Point out where you want fullness and where you prefer a close outline
- Agree on the fringe length when fully dry, including any natural wave or shrinkage
- Explain your usual drying method and the styling time you want to spend
- Mention cowlicks, glasses, and a parting you prefer to keep
- Discuss the color goal separately, using swatches to compare tone and brightness
Frequently asked questions about layered pixie haircuts
What do layers change in a pixie haircut
Layers determine how length and weight are distributed through the short shape. They can create movement, support a rounded crown, or allow separated ends. The effect depends on where they are placed and how your hair behaves, rather than simply on adding more layers everywhere.
Which looks in this collection keep the fullest crown
Compare the mahogany, pearl silver, and cocoa curly pixies, along with the muted violet bixie. They retain rounded upper shapes above shorter napes. The right amount of fullness for your own hair depends on density, curl pattern, and how closely you want the sides cut.
Is a bixie the same as a pixie
A bixie generally combines the compact perimeter of a pixie with some of the length and fullness associated with a bob. The muted violet look here is a useful reference. Because salon terminology varies, photographs and an agreed outline are more reliable than the name alone.
Can fine hair hold a layered pixie
It can, but the cut should preserve enough density in the areas that need substance. Ask your stylist to assess whether a fuller front and fewer short upper layers would help. Excessive thinning can work against the shape if the ends already look delicate.
Do the curly looks require a perm
The photographs do not establish how the texture was created. If you have natural curls, discuss adapting the shape to your pattern. If your hair is straight, ask what styling or salon process would be required and whether you want the extra upkeep. Do not assume the cut alone will create curls.
Can I wear a quiff without making it very high
Yes, depending on the lengths and your growth direction. Ask your stylist to show a lower backward sweep or a soft diagonal arrangement using the same upper layers. A second finish gives you flexibility when you do not want the height shown in the reference.
Should I choose a close taper or an undercut
Choose according to how strongly you want the short sides contrasted with the top. A taper shortens gradually toward the perimeter; an undercut creates a more pronounced difference in length. Explain whether you want that shorter section visible when your hair falls naturally.
Will the lighter shades look the same on naturally gray hair
Your gray distribution and texture may create different depth from the photographs. The slate and pearl silver images can guide a conversation about shape and tone, but coloring is not automatically necessary. Ask whether your natural pattern already supplies the dimension you like.
How can I stop my longer fringe separating awkwardly
Check the drying direction, product amount, and length first. A heavy coating can make delicate ends collect into strands. Guide the damp roots toward your preferred side and use less finishing product. If the fringe still falls uncomfortably, ask your stylist to reassess its shape.
What should I discuss before choosing fuchsia or orchid purple
Agree on the intensity you want, your starting shade, previous coloring, and any lightening needed. Ask how the tone may fade and how you would maintain it. The visible shade is a reference, not a formula that predicts the same result on every head of hair.
How often does a layered pixie need cutting
There is no single schedule for every version. The ears, nape, crown, and fringe may need attention at different stages. Ask your stylist which detail will lose balance first and whether selective tidying is appropriate between full reshaping appointments.
How do I explain that I want softness rather than spikes
Point to the surface and fringe you like, and explain where you want movement without upright points. The beige swept, slate layered, and muted violet looks offer useful references. Ask your stylist to demonstrate a flexible finish rather than choose only from the haircut name.
Find the crown shape you want to wear
A layered pixie works best when its fullness sits where you want it. Choose between a rounded curly crown, a lifted front, or a softer sweeping fringe, then decide how closely the perimeter should follow your head. These 20 looks provide plenty of color and texture inspiration, but the final proportions should fit your own hair and the routine you want to maintain.